Mudroom Before & After Reveal: Small Modern Entryway
Our small mudroom is finally complete, and the before-and-after is incredible. With custom cabinetry, a bench seat, and smart storage, this once-forgotten space is now one of the most functional spots in our home.
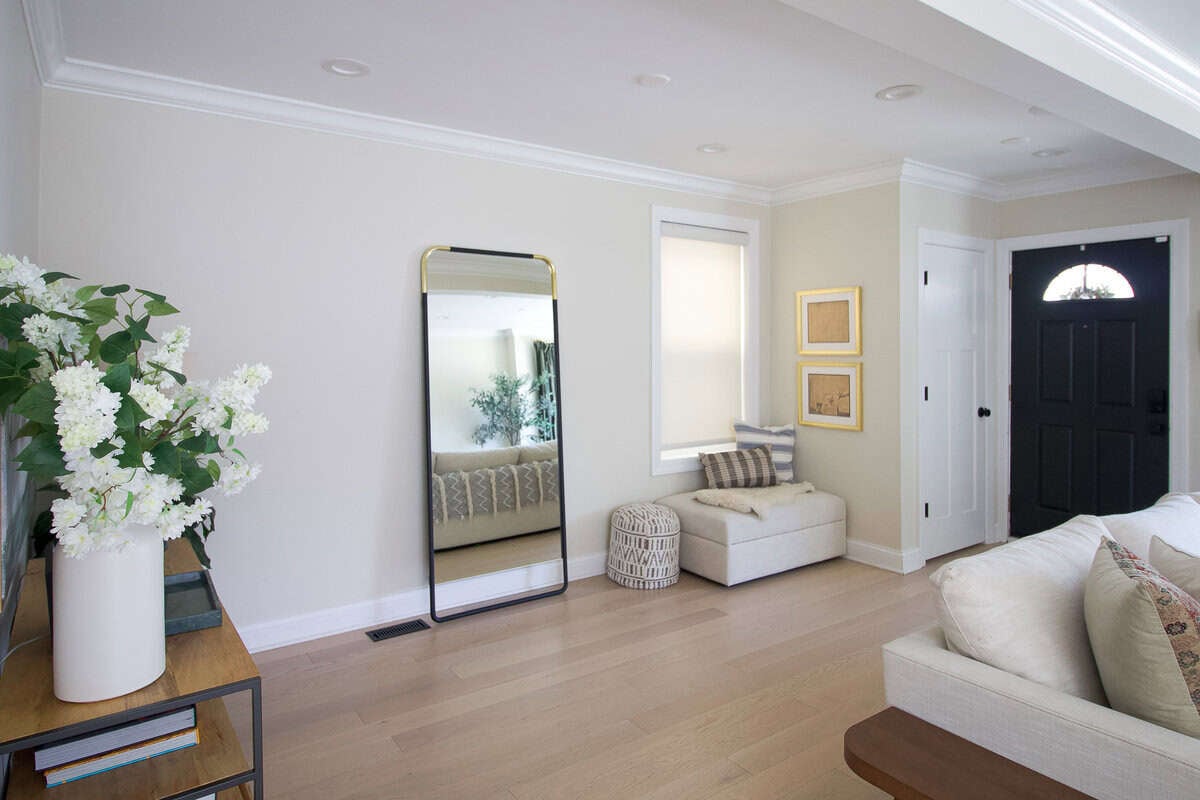
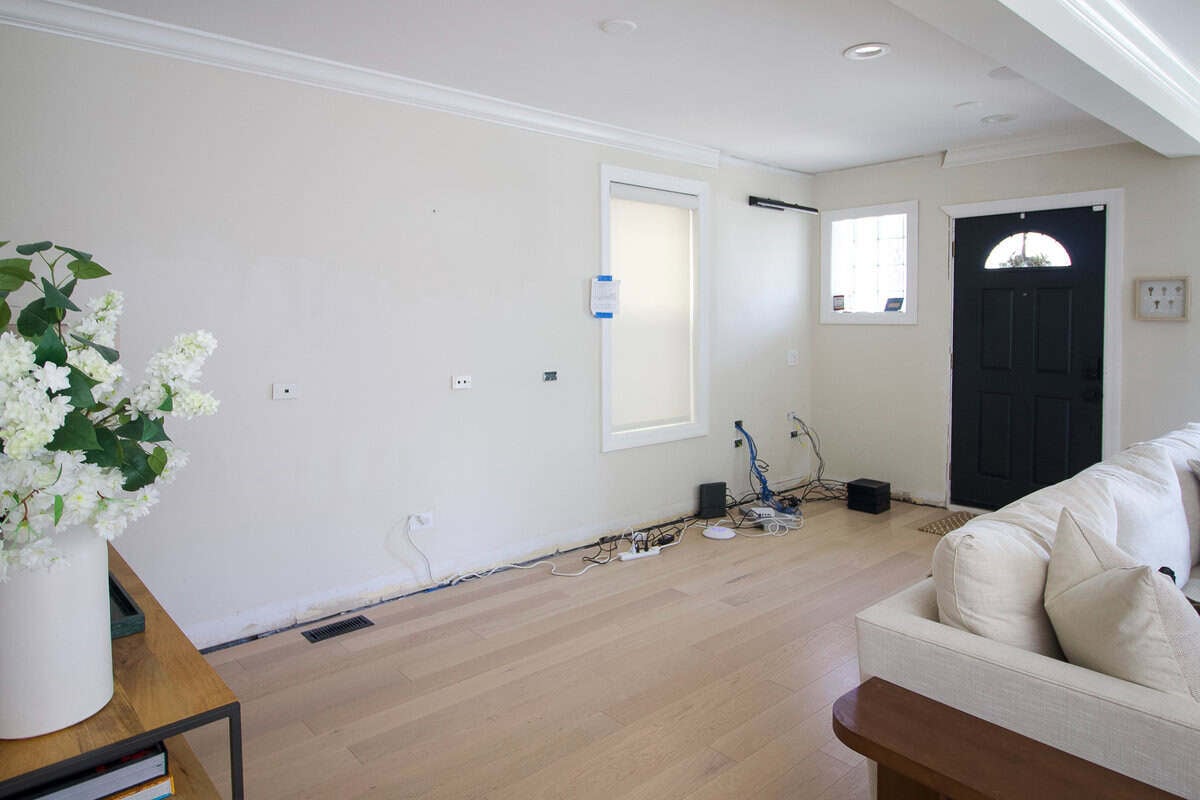
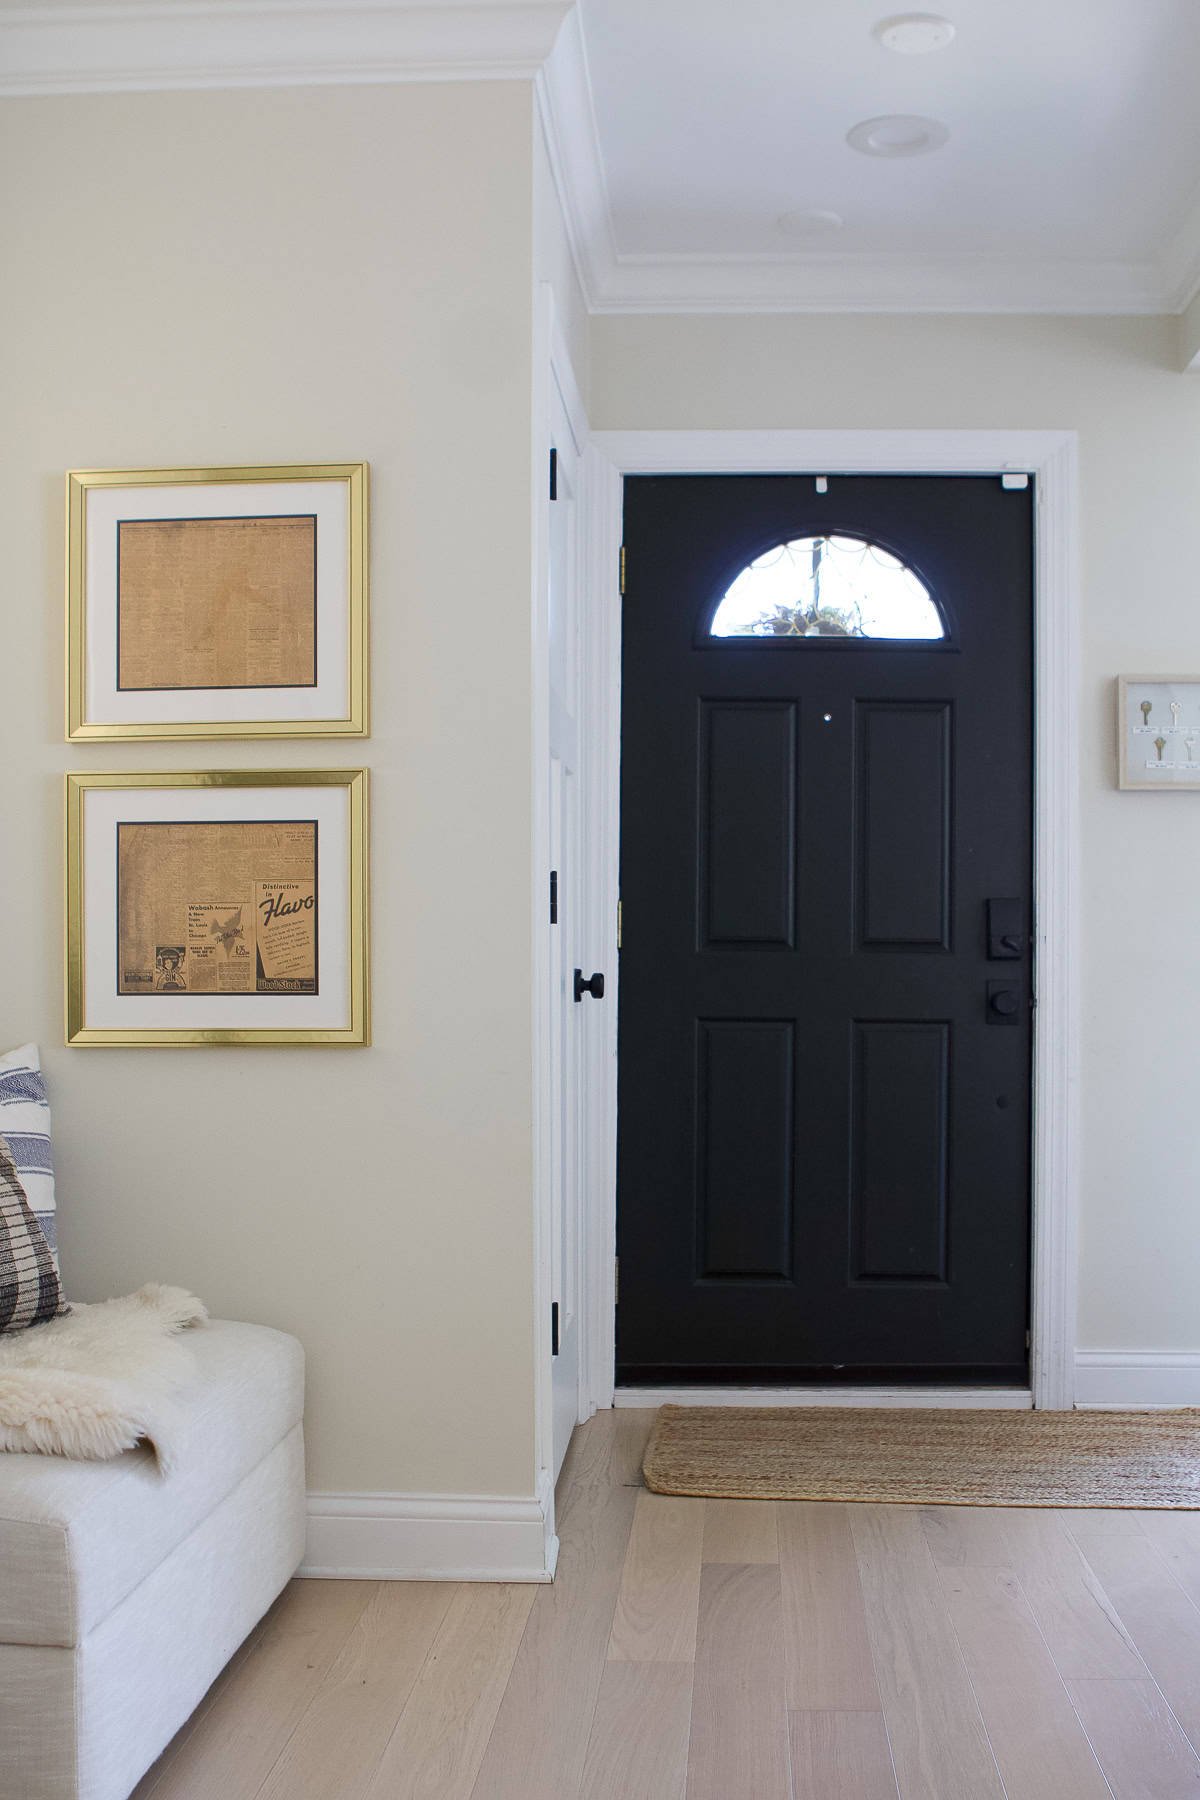
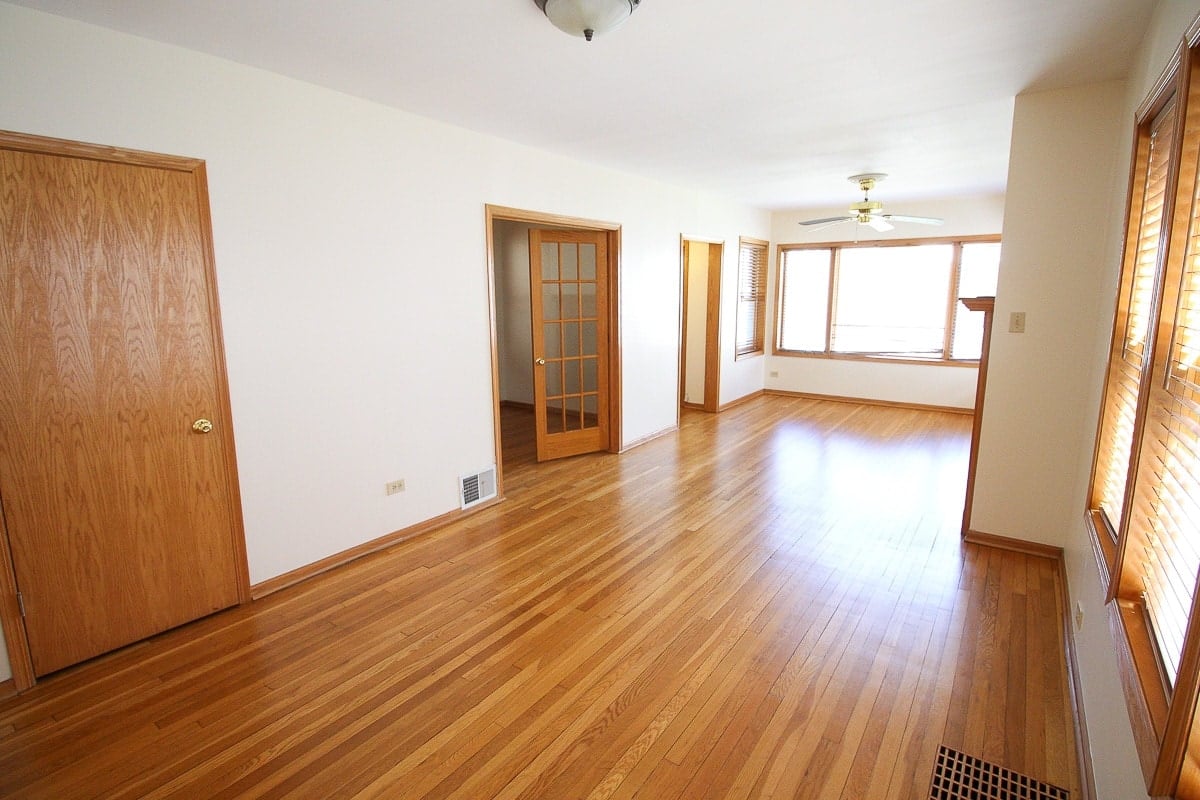
When I look back at the before photos of this small space, I can’t believe how underutilized it was. That front closet became a catchall for everything—bags, shoes, coats, and even our internet equipment—and it still never really worked. The closet door constantly collided with the front door, which was a total nightmare every time people came in or out.
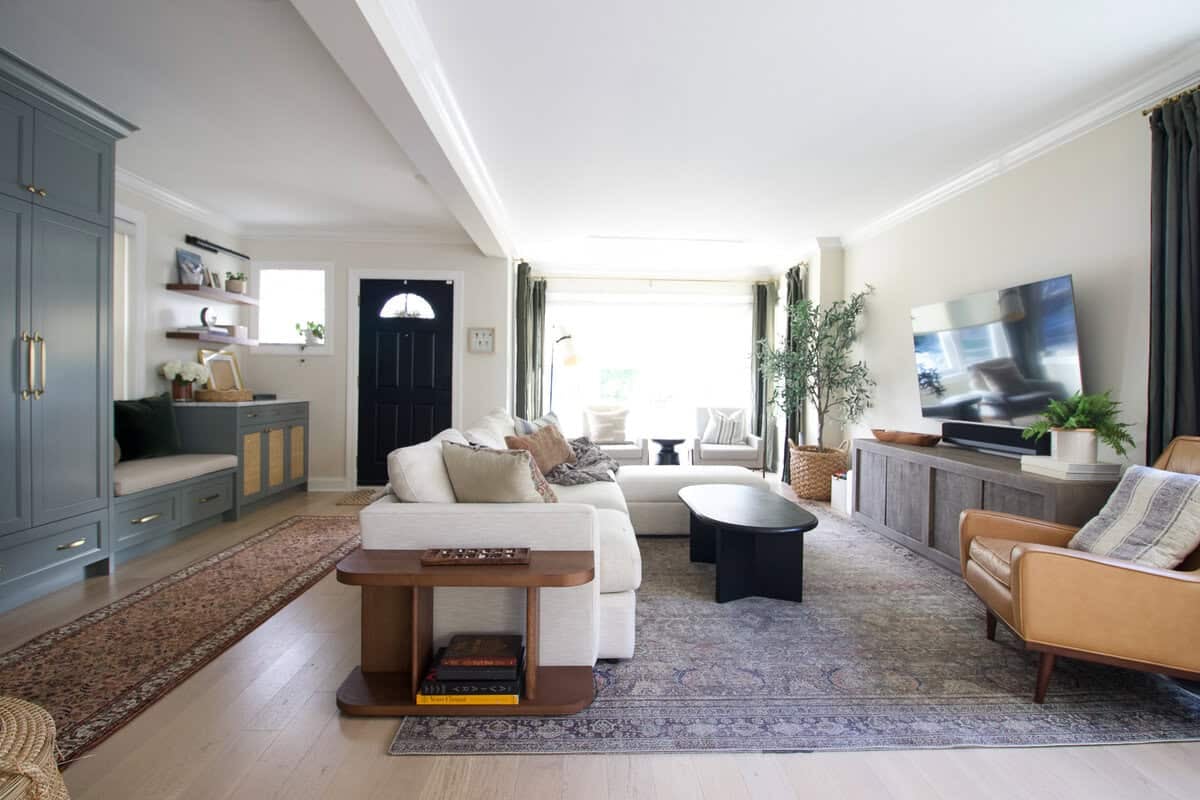
Once I landed on the idea of custom built-ins in the family room, everything came together so quickly. I sketched the plan in late August, and now here we are in November with a fully finished mudroom! I’m honestly still pinching myself that it came together so fast. This transformation has completely changed how our family uses this little corner of our home, and I couldn’t be more excited to finally share the reveal with you.
Catch Up on the Mudroom Project
If you’re just joining in, this reveal is actually the fourth post in our mudroom series. Here’s everything that came before:
- The Mudroom Design Plan – how we mapped out the layout and worked with a custom carpenter to bring it to life.
- Mudroom Makeover Progress – the messy but necessary demo phase (including taking out a closet, patching floors, and adding new electrical).
- Custom Mudroom Built-Ins – the installation process, cabinet details, and cost breakdown.
Now it’s time for the fun part—the final reveal!
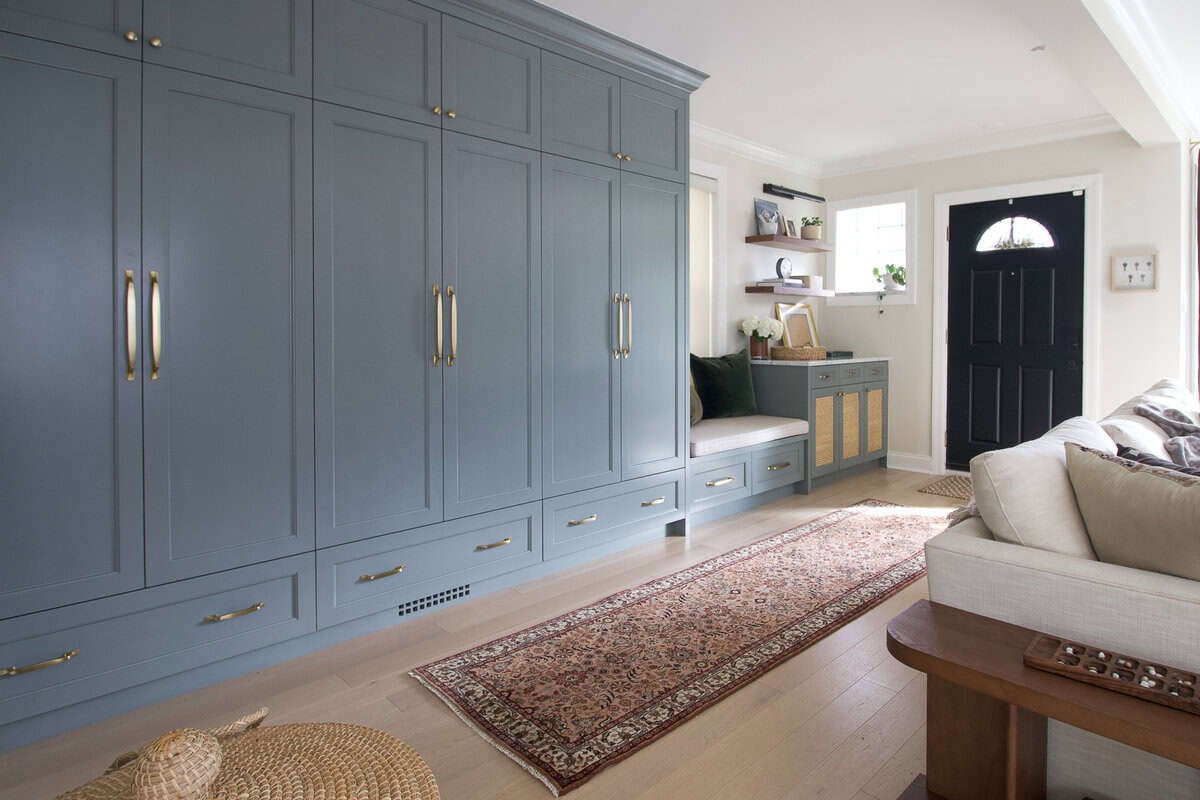
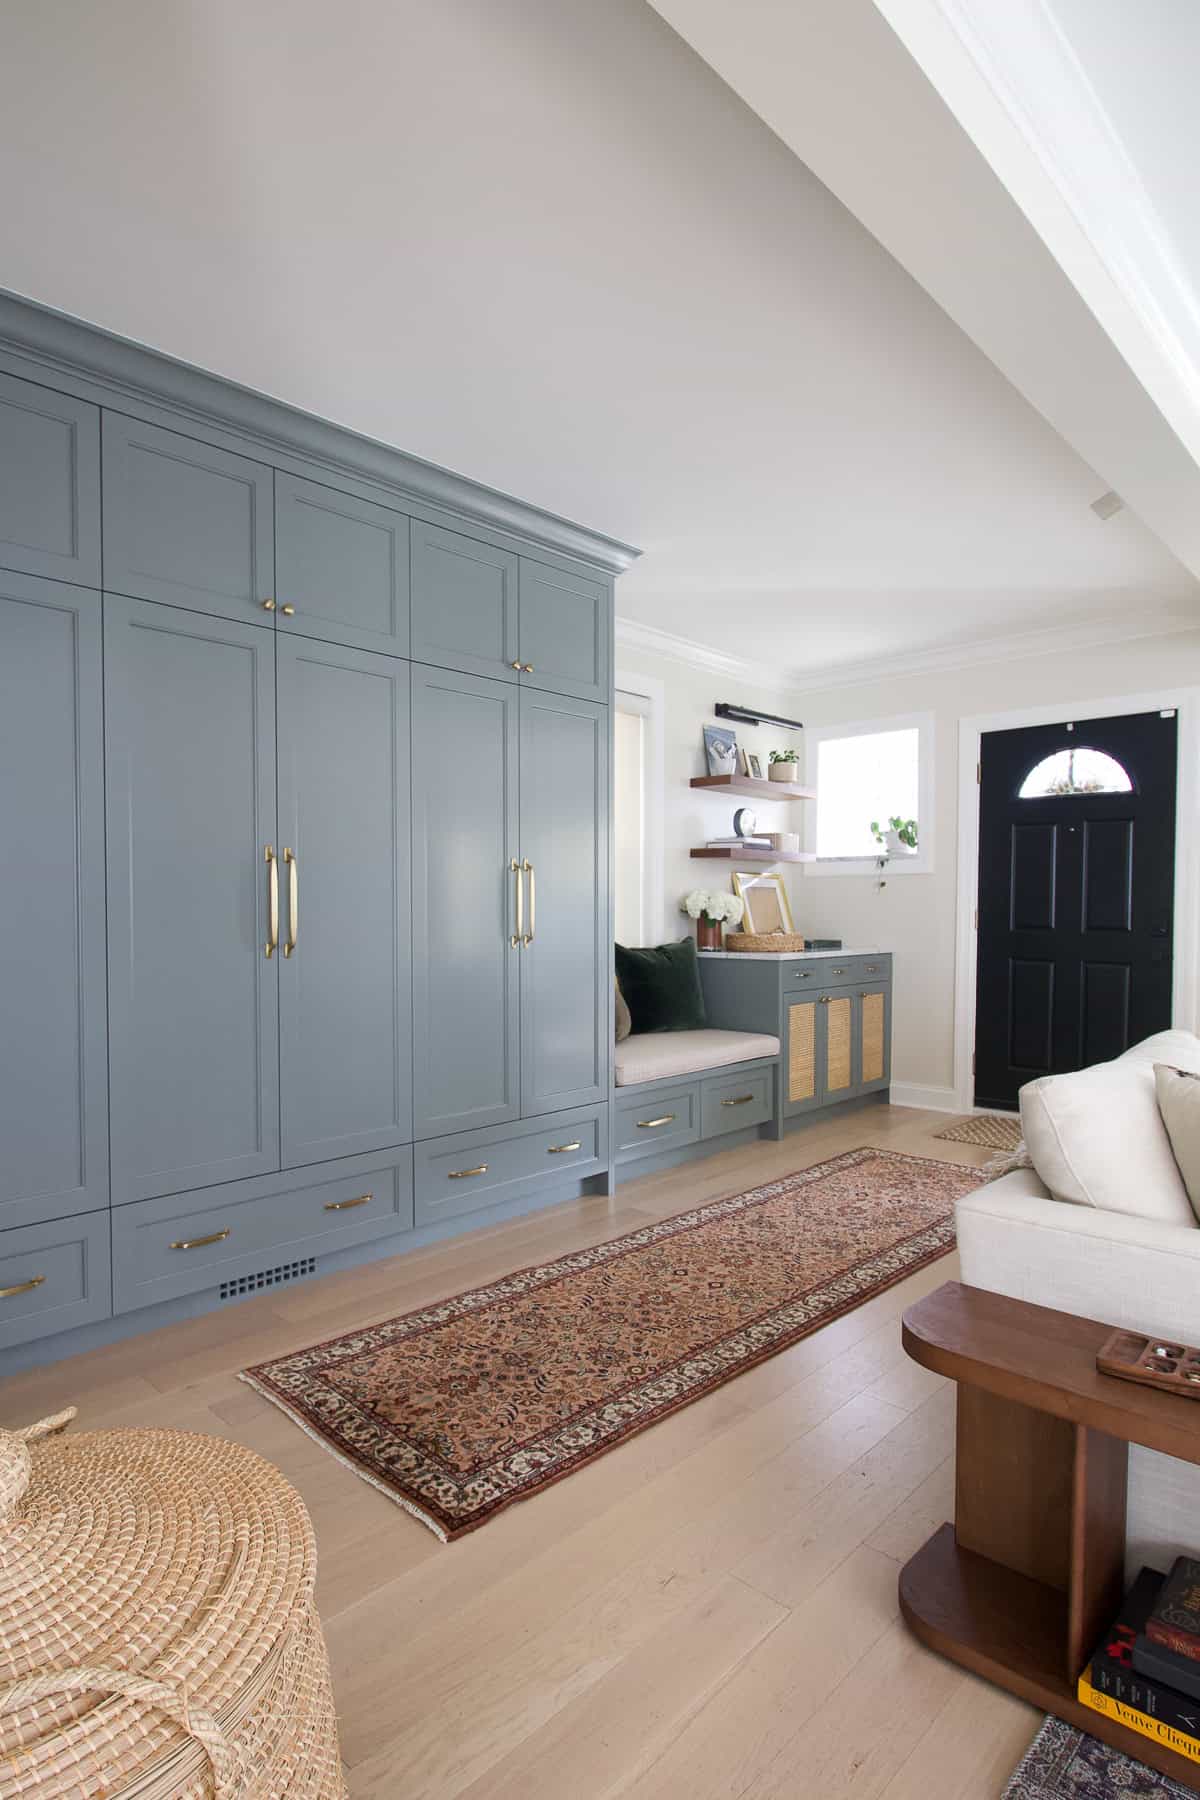
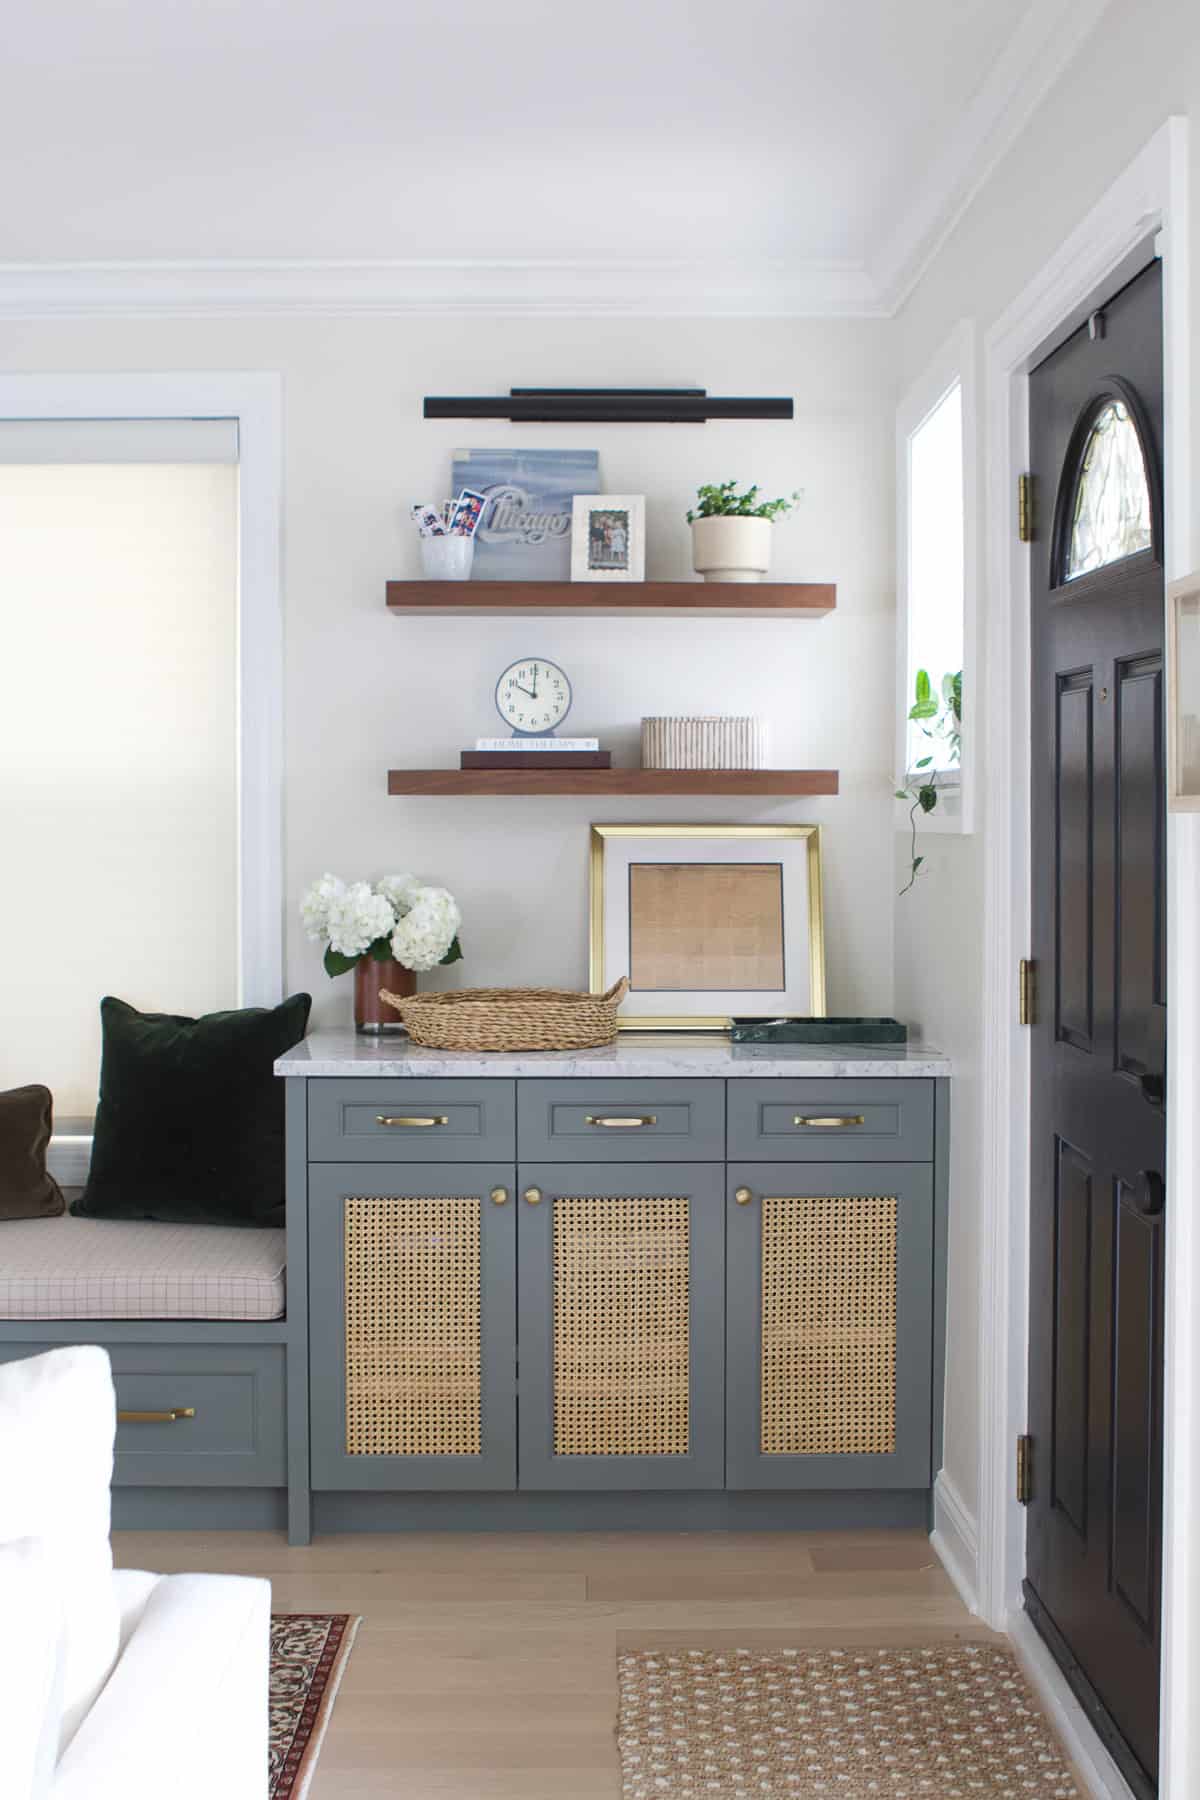
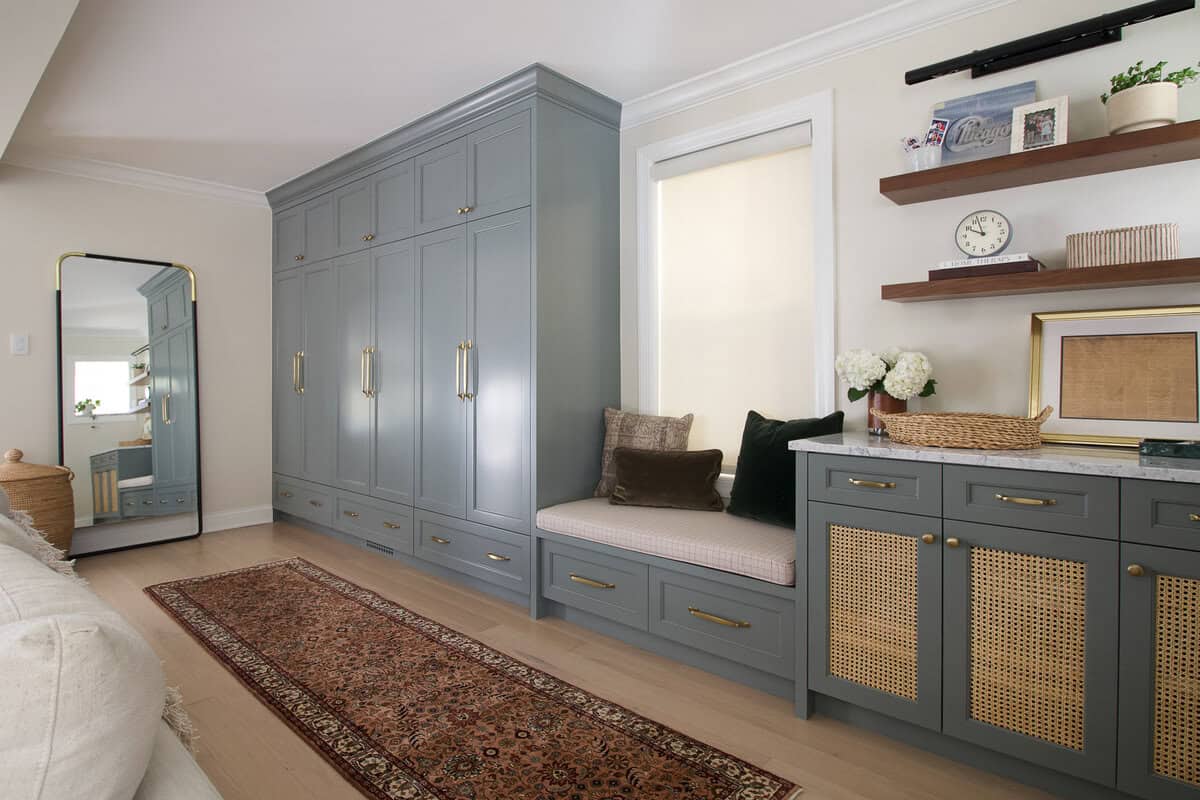
The Right Side: Marble Drop Zone & Cane Cabinets
On the far right side of the wall, we carved out one of my favorite spots in the entire mudroom. This little drop zone has both beauty and function, and it’s already making our everyday routines so much smoother.
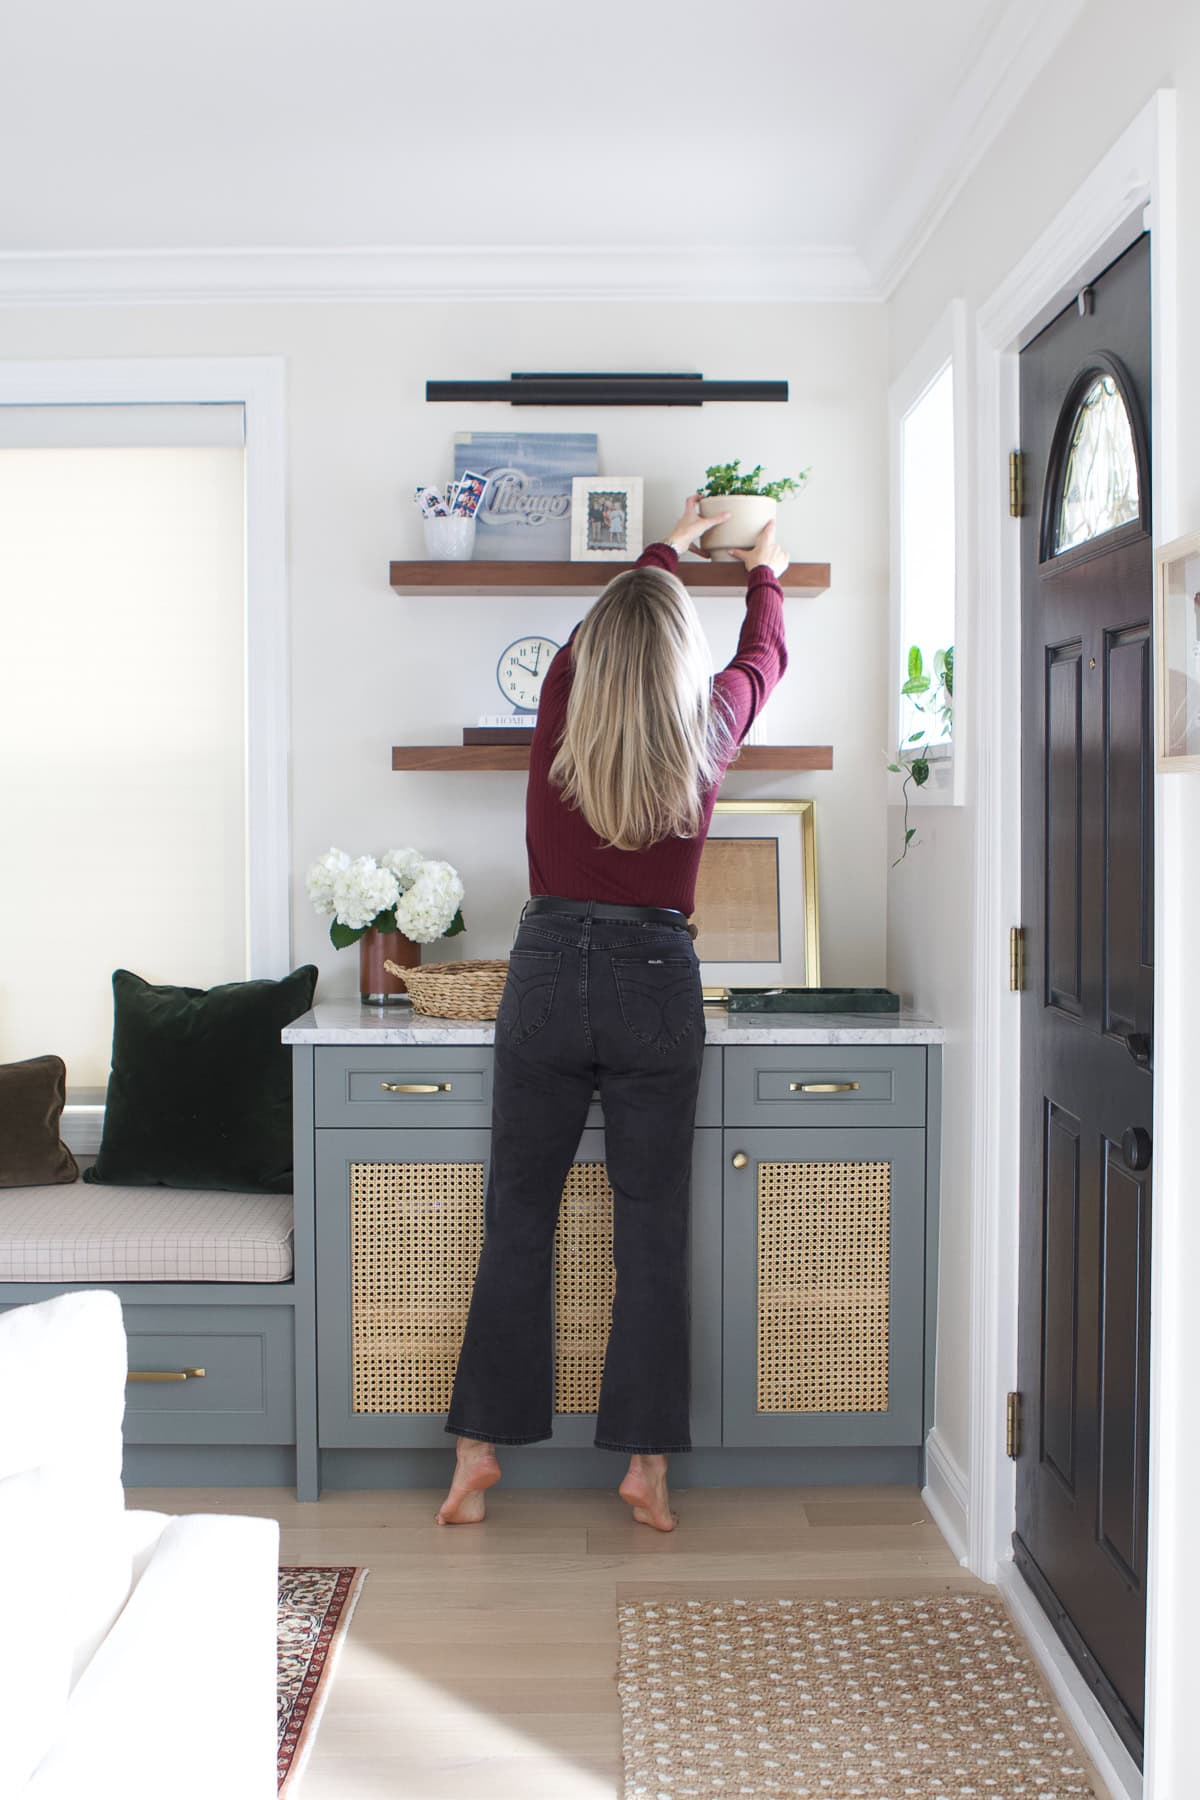
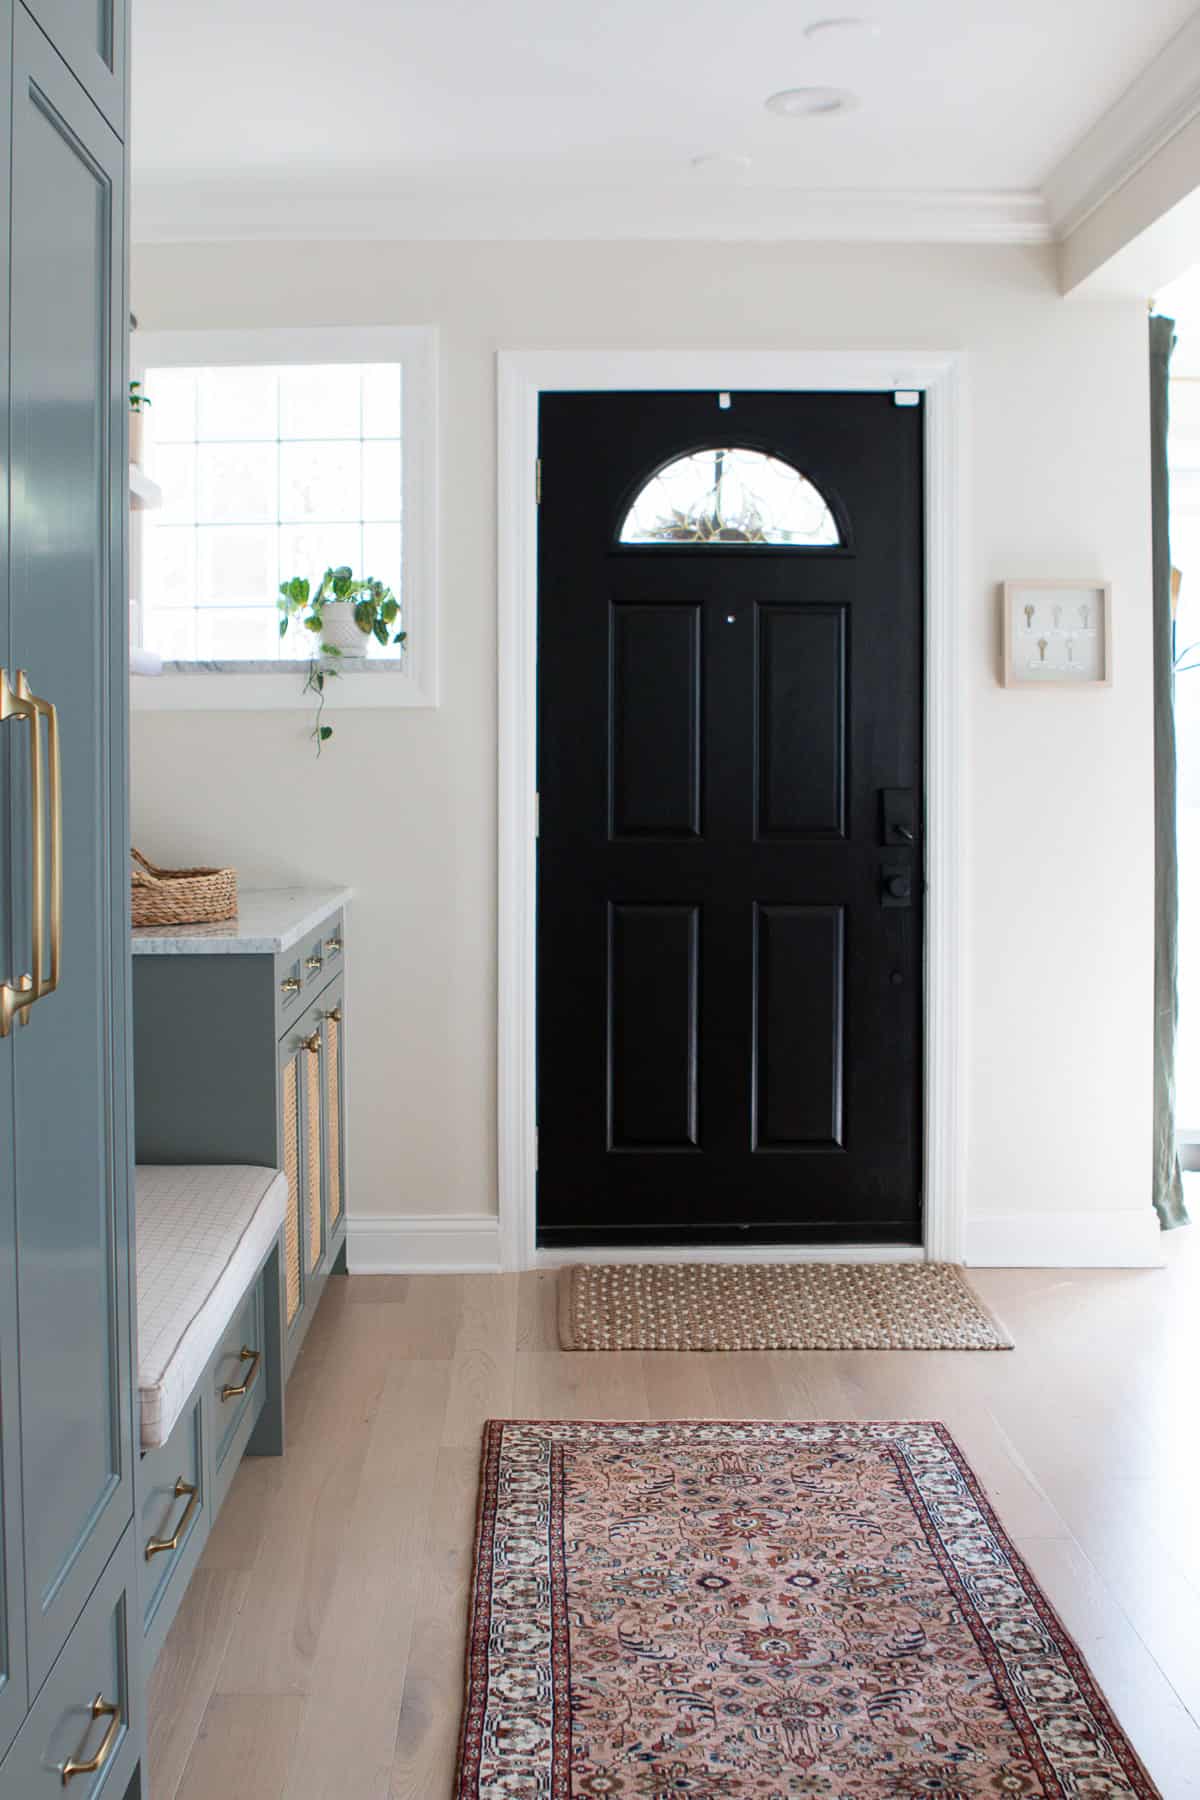
You’ll also notice that we now have a window streaming in natural light! That window was originally inside the front closet, and it’s nice that it’s now visible in the room.
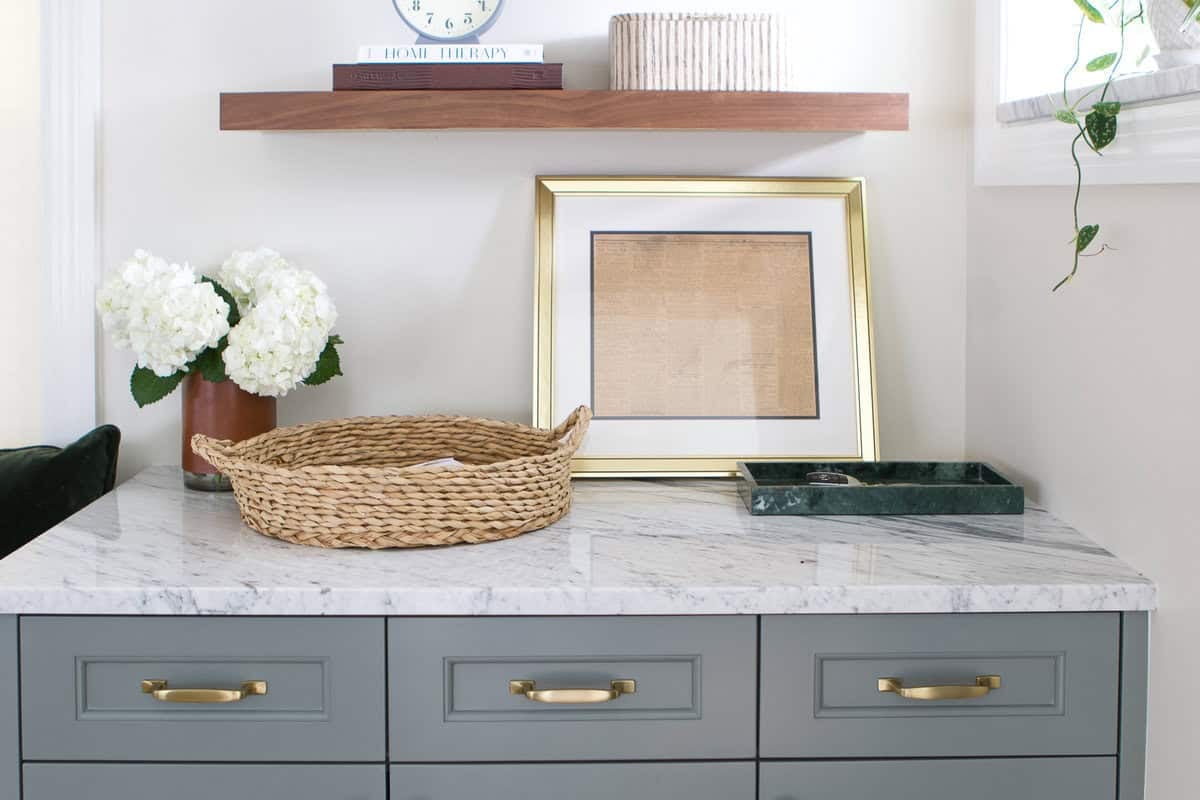
Marble Countertop
I knew from the start that I wanted marble here. Since this isn’t a wet area (no sink or water splashes to worry about), it felt like the perfect place to bring in a durable but beautiful stone. A friend of mine is a countertop fabricator, and he set aside a remnant just for us. Reach out if you want his information.
With marble, you usually need to buy an entire slab. He cut the main piece for our mudroom, and then used the extras to make a few smaller items—like a marble windowsill, two cutting board-style trays, and even a little piece that Finn now uses on his desk in the basement. Nothing went to waste, and now I get to enjoy marble in more than one room of our home!
Hidden Tech Storage
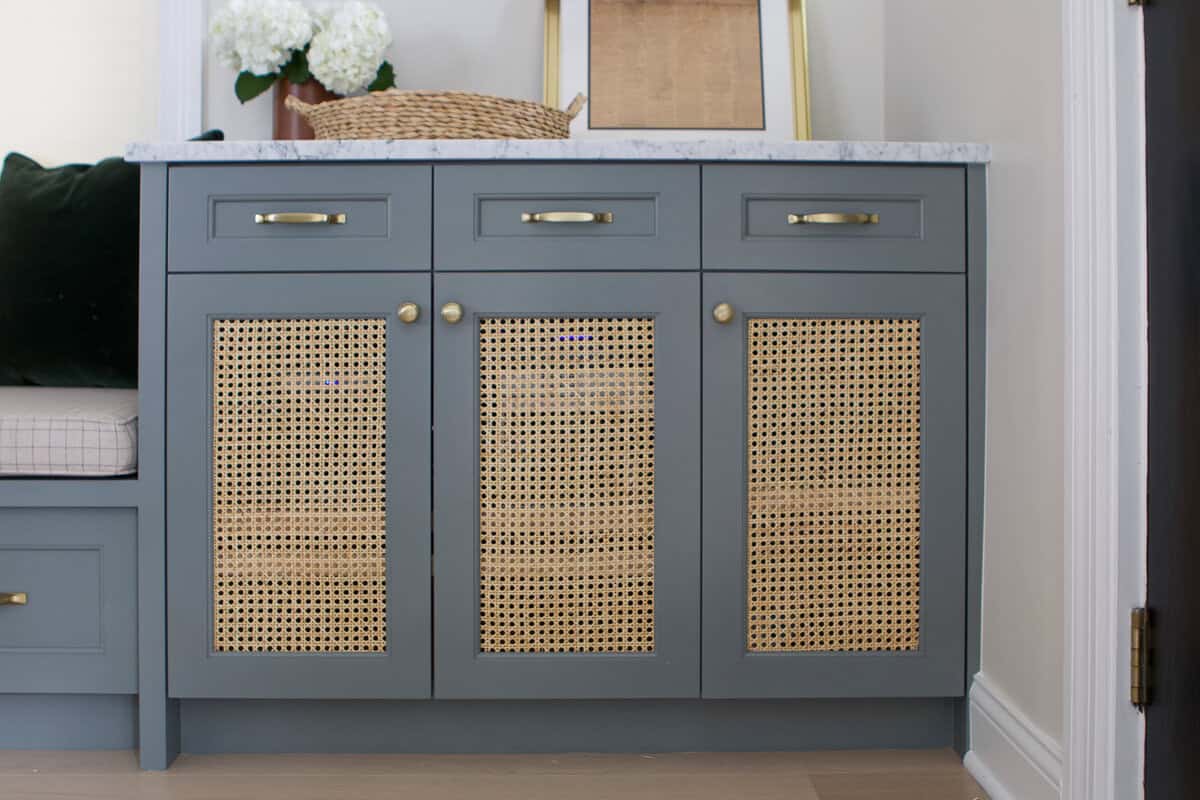
Beneath the marble, the cabinets are vented cane-front doors, which allow airflow while hiding all of our internet equipment, routers, and Sonos speakers. Before, these cords and boxes were piled into our old coat closet, and now they’re neatly tucked away but still easy to access. It’s such a huge improvement visually, and the cane adds warmth and texture to balance the painted cabinetry.
Open Shelves & Styling
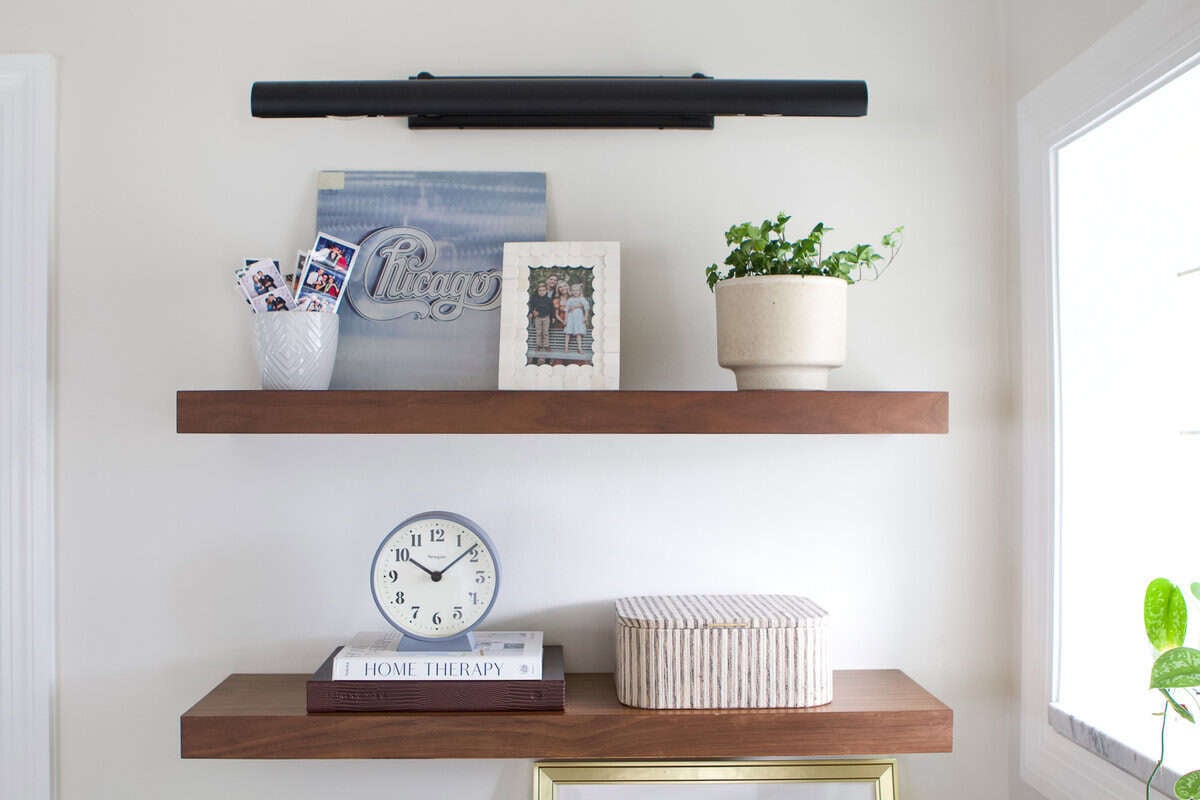
Above the countertop, we added floating wood shelves that are lit by a black picture light. (If you missed it, I have a full post on how to choose picture lights and my favorites here.)
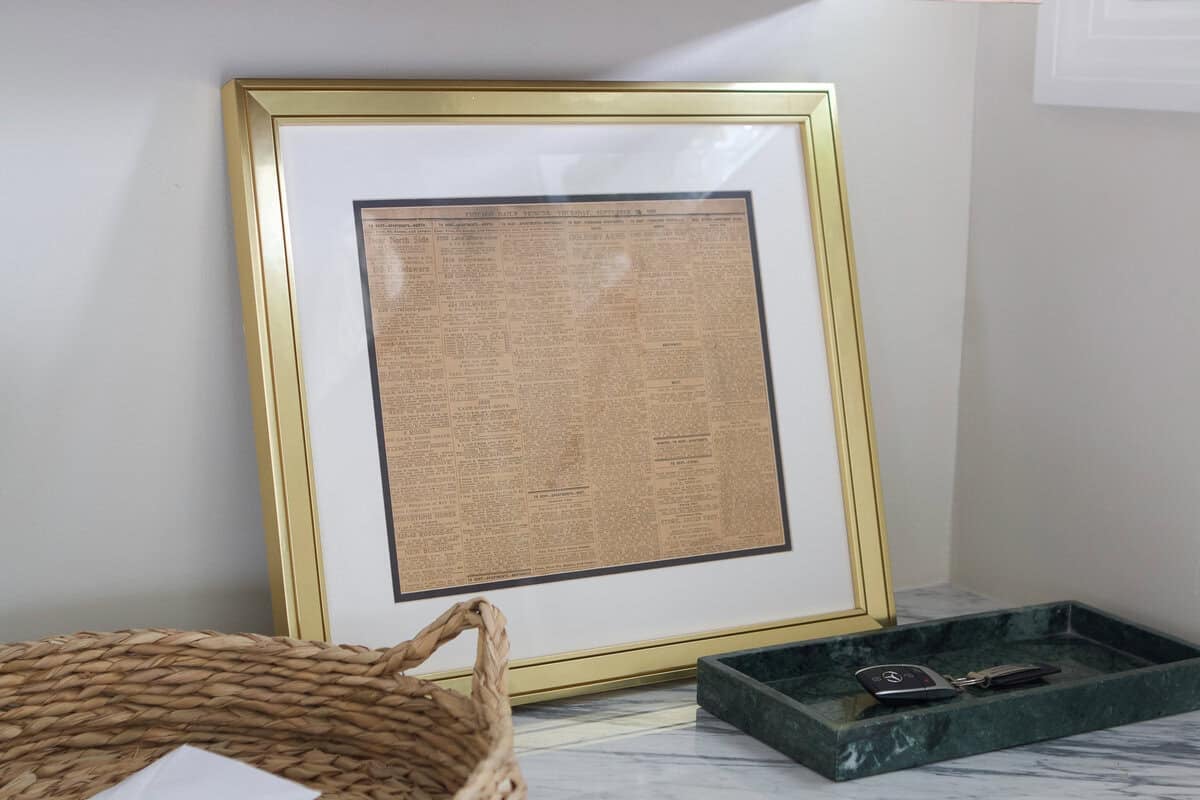
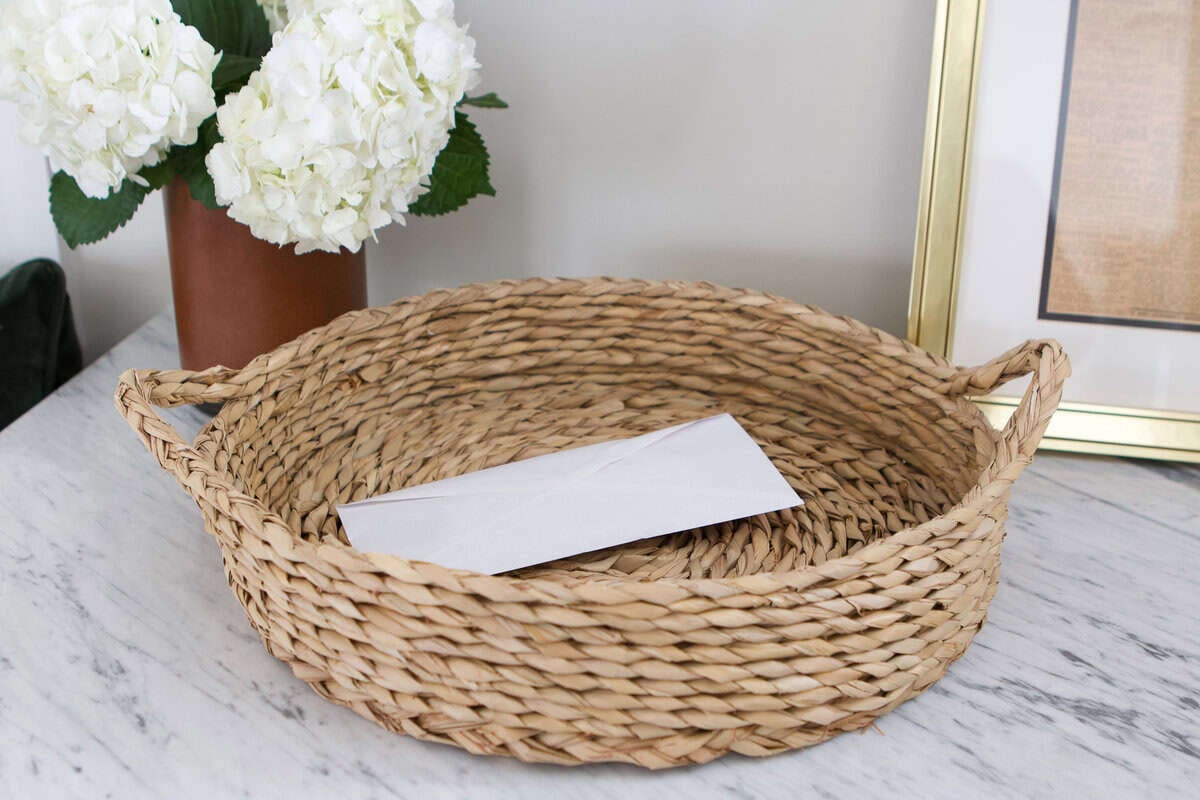
These shelves are the perfect spot for decorative accents, mail, and keys. Right now, I have a plant sitting on the marble windowsill, a framed family photo, and even a framed newspaper clipping that we discovered tucked into the walls during demo. I love showcasing a piece of our home’s history right when you walk in the door.
This entire right-hand section is proof that even a small amount of space can become a hardworking, stylish zone with the right cabinetry and finishes.
The Bench & Drawers
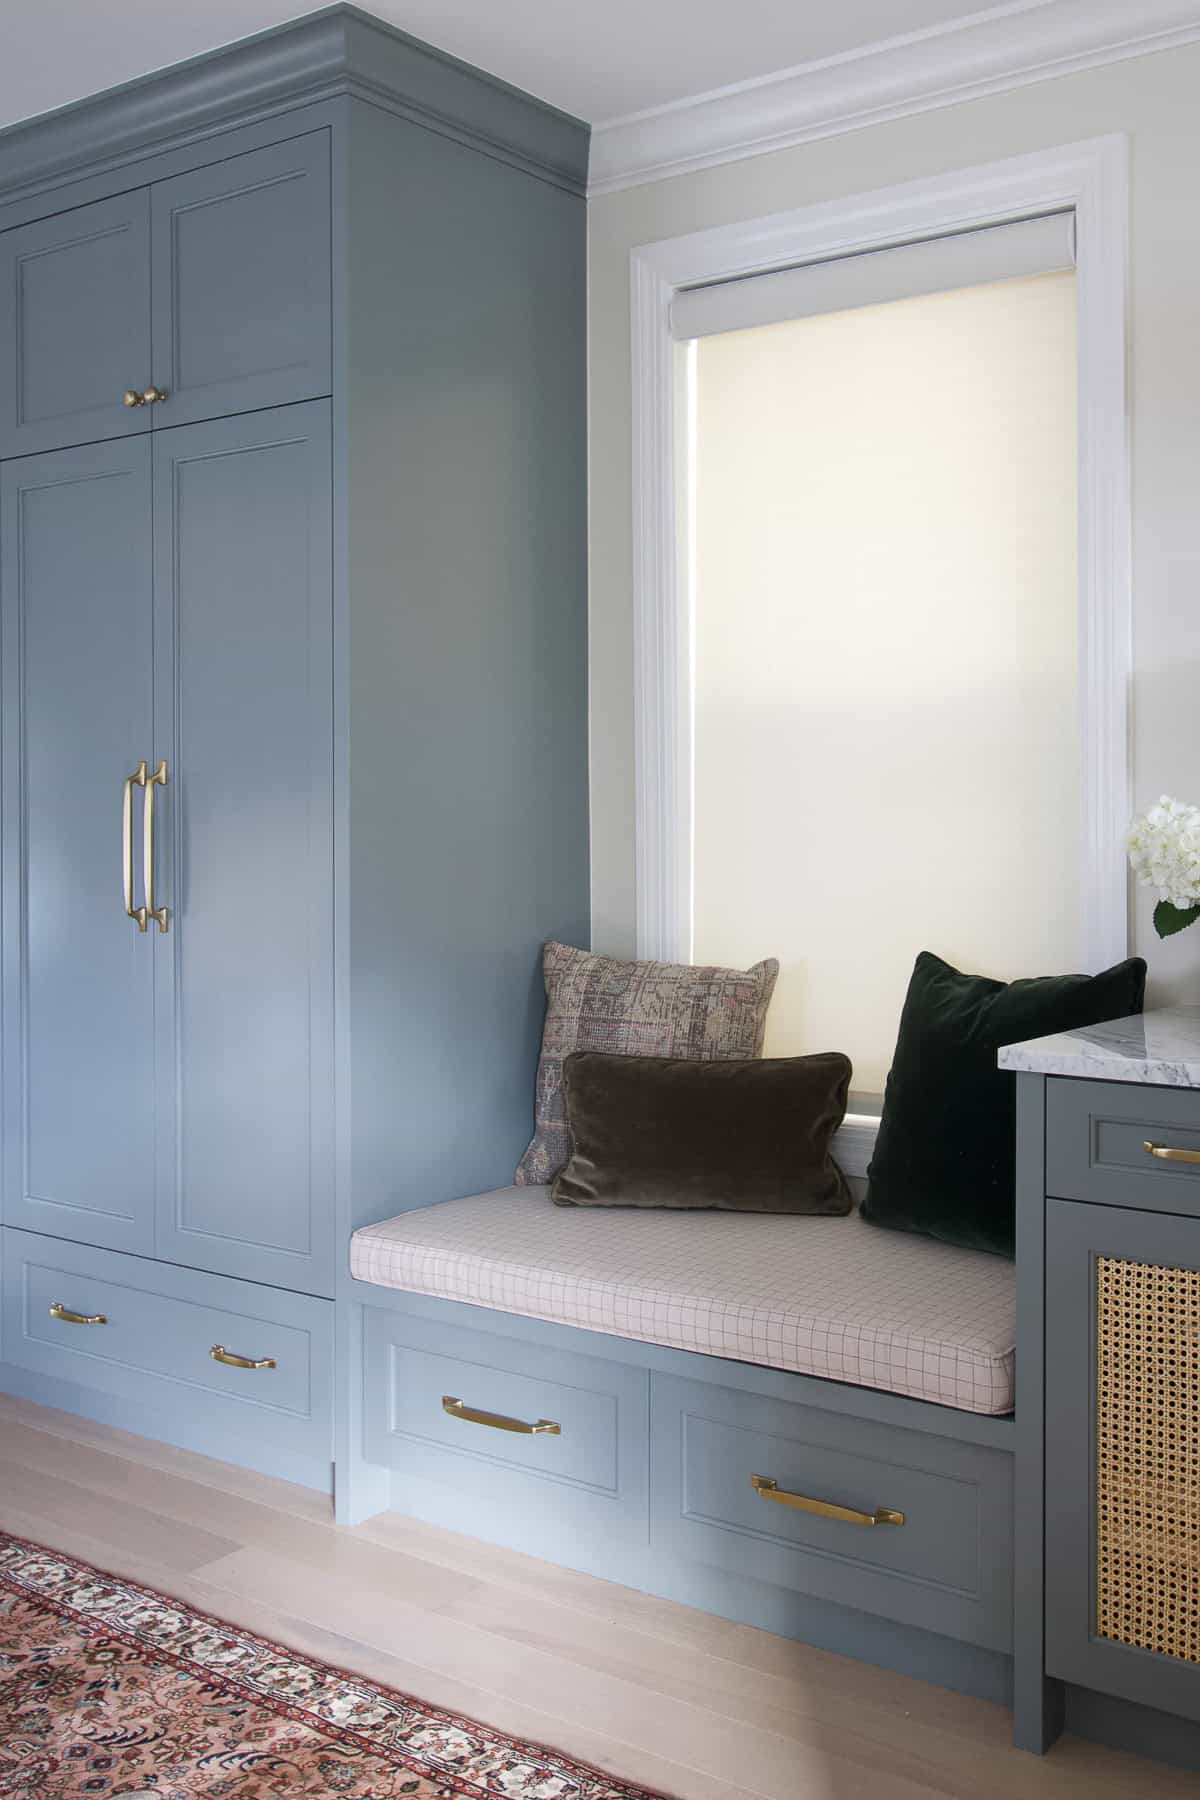
The window was always staying, so designing a built-in bench beneath it just made sense. Now we have a practical spot to sit down and take shoes on and off, and guests can do the same when they come in the door.
Deep Storage Drawers
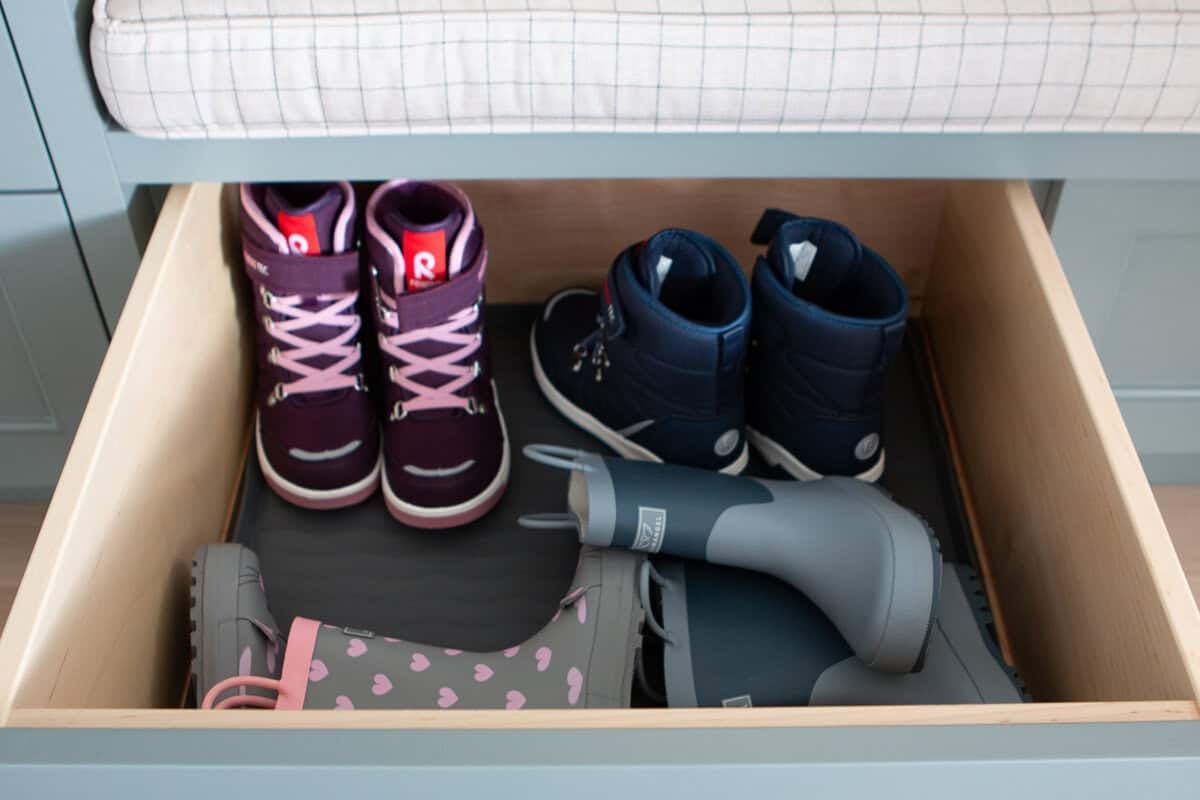
Below the bench, two large drawers hold our bulkier shoes and boots. I lined the bottoms to protect the wood, so even if things get wet or muddy, clean-up is simple. These drawers have already become one of the hardest-working parts of the mudroom.
Custom Cushion
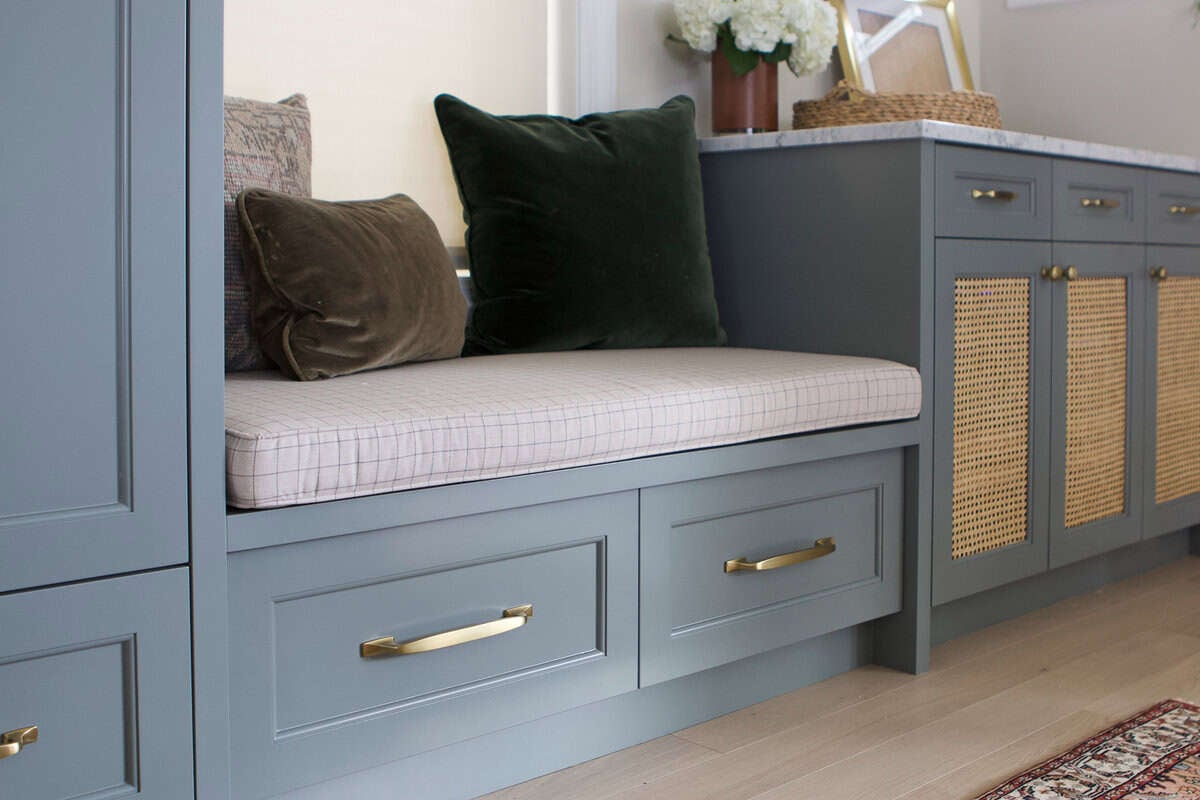
To finish it off, I had a custom cushion made from PatioLane. I’ve used their cushions throughout our home—on the kitchen breakfast nook bench and the basement reading nook—and I love how simple their process is. You just plug in your measurements online, choose a fabric, and they ship a perfectly tailored cushion.
For this space, I went with a subtle check pattern that adds a touch of interest and softness against the cabinetry. (If you’re considering a cushion for your own home, I even have a 10% off code good through the end of the year! Use code DIYPB10)
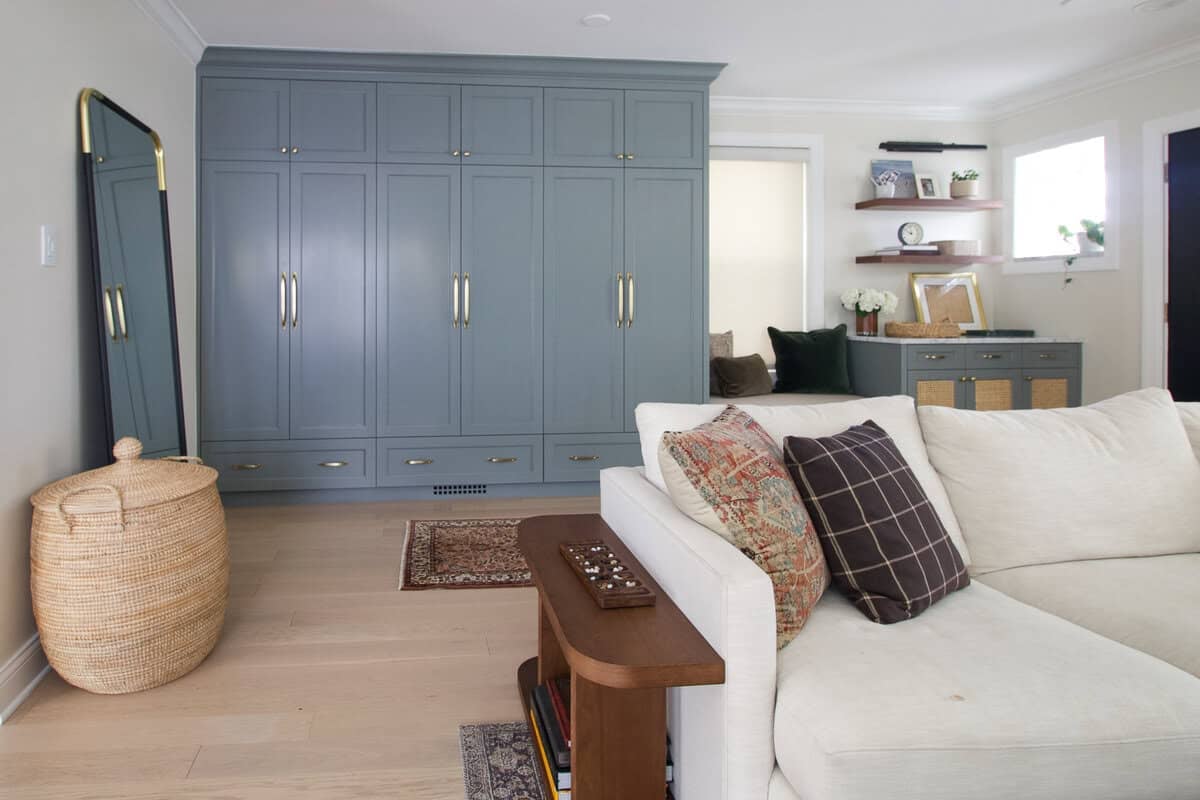
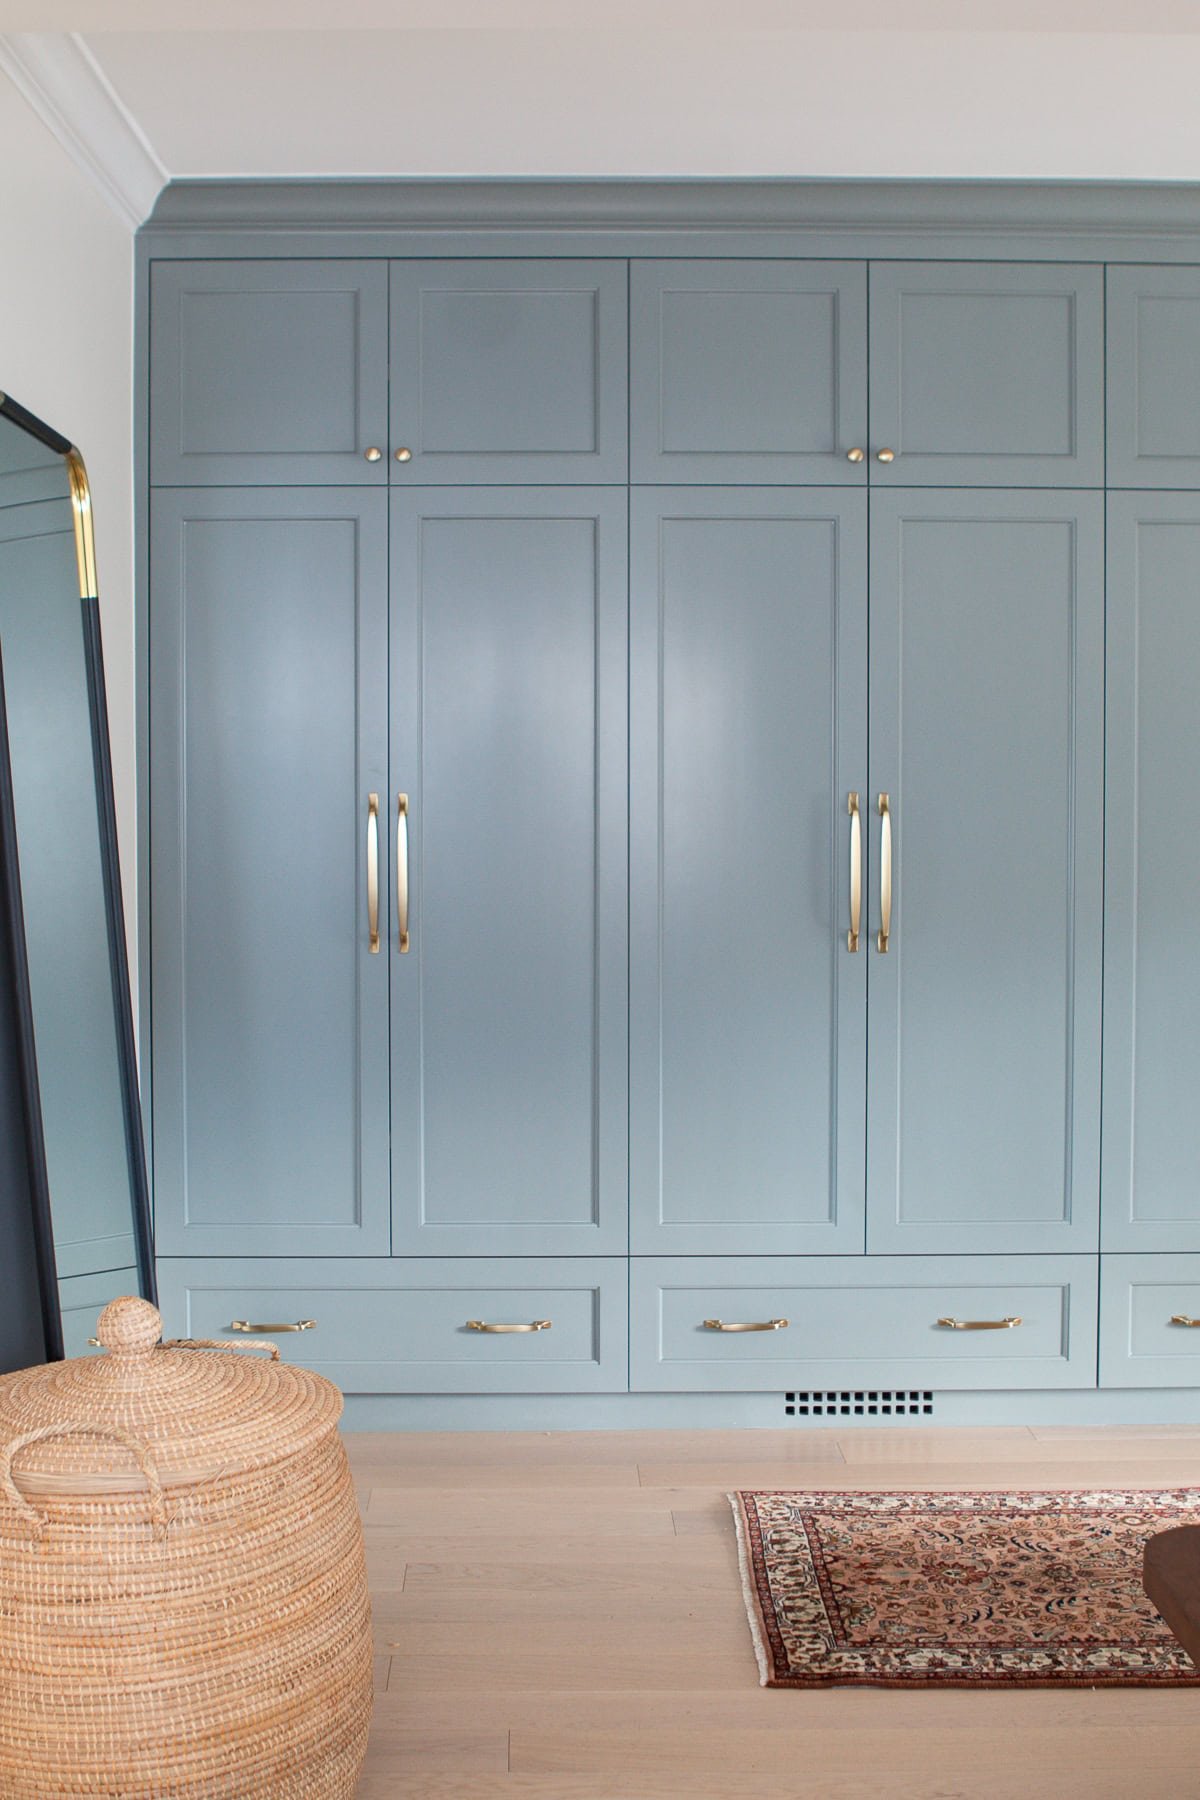
The Lockers & Tall Cabinets
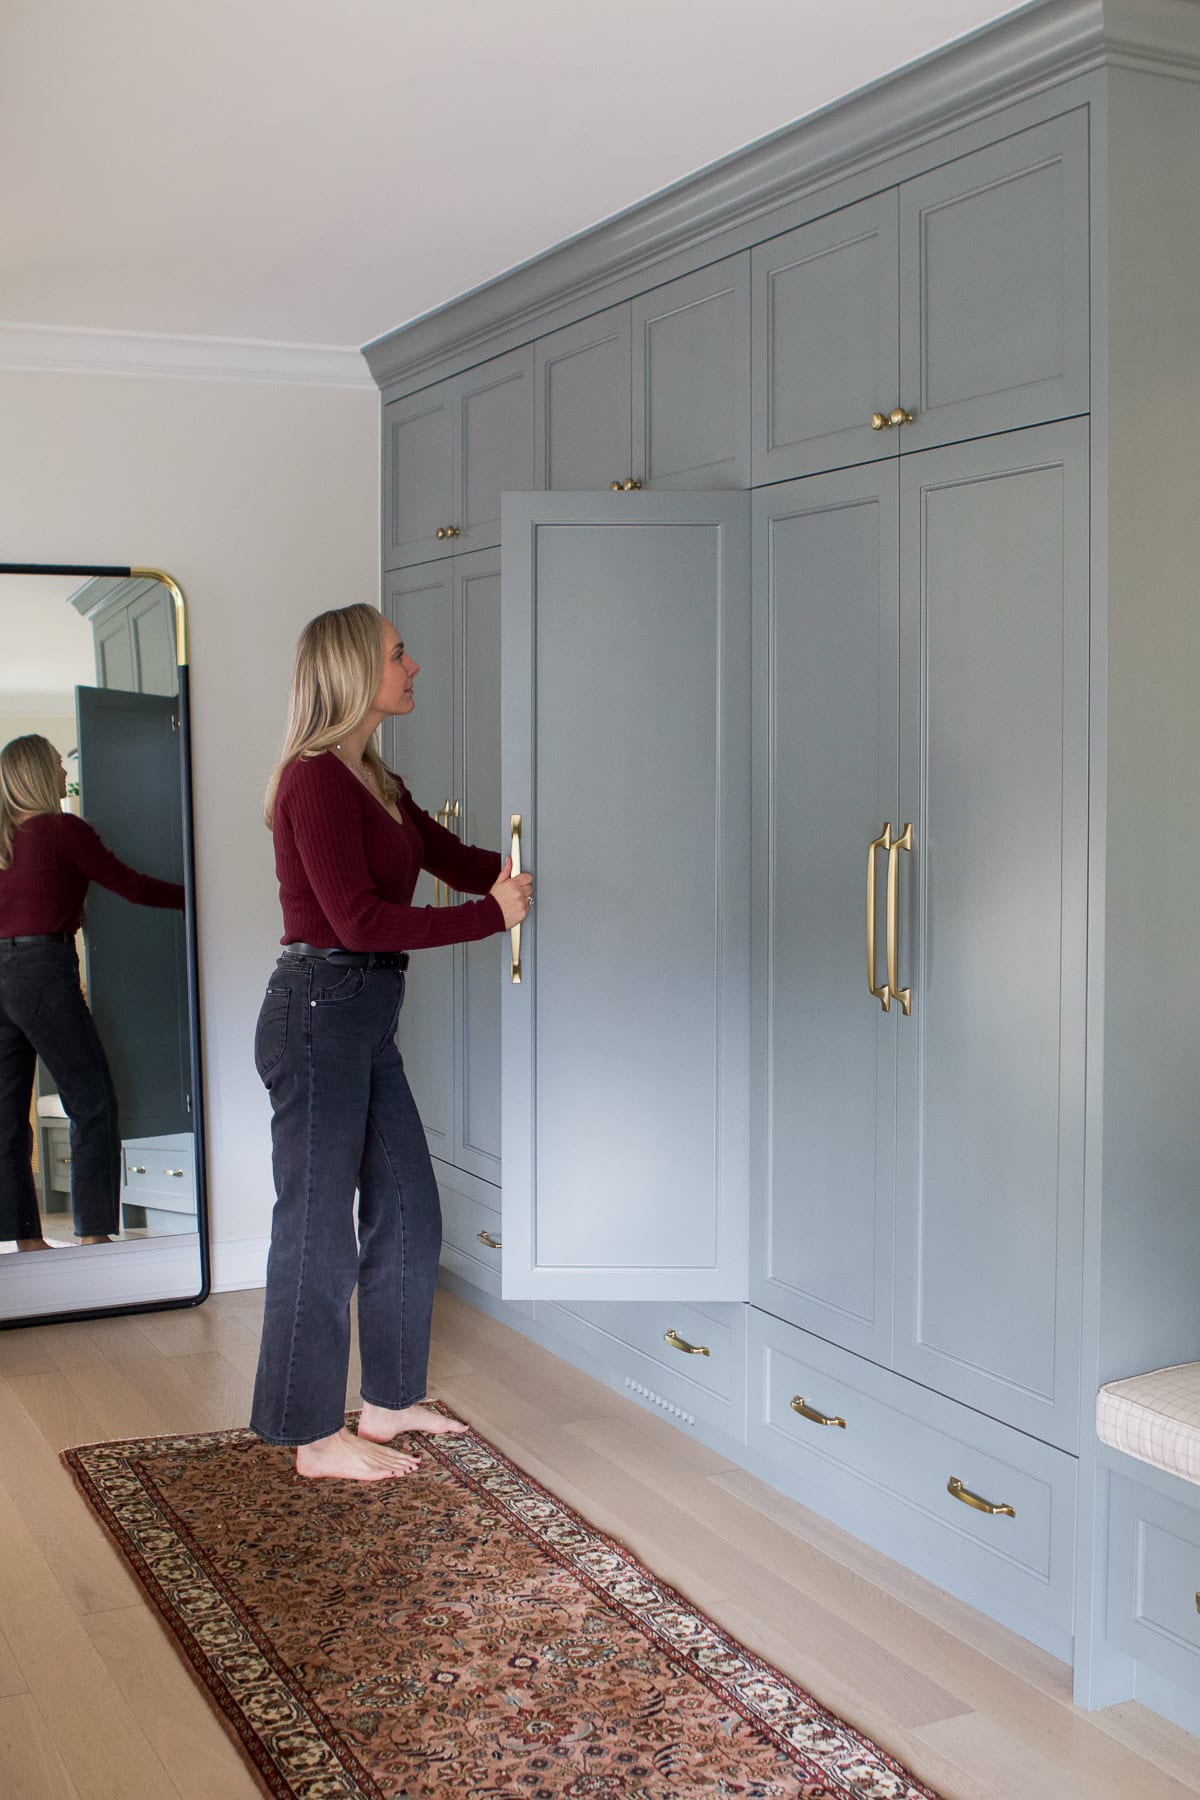
This wall of lockers is hands down the most transformative part of the entire mudroom. Before, we had bags piled in the kitchen, coats stuffed into a tiny closet, and our vacuum crammed in there too. Now, everything finally has a place, and there’s even room to grow into.
Kids’ Lockers
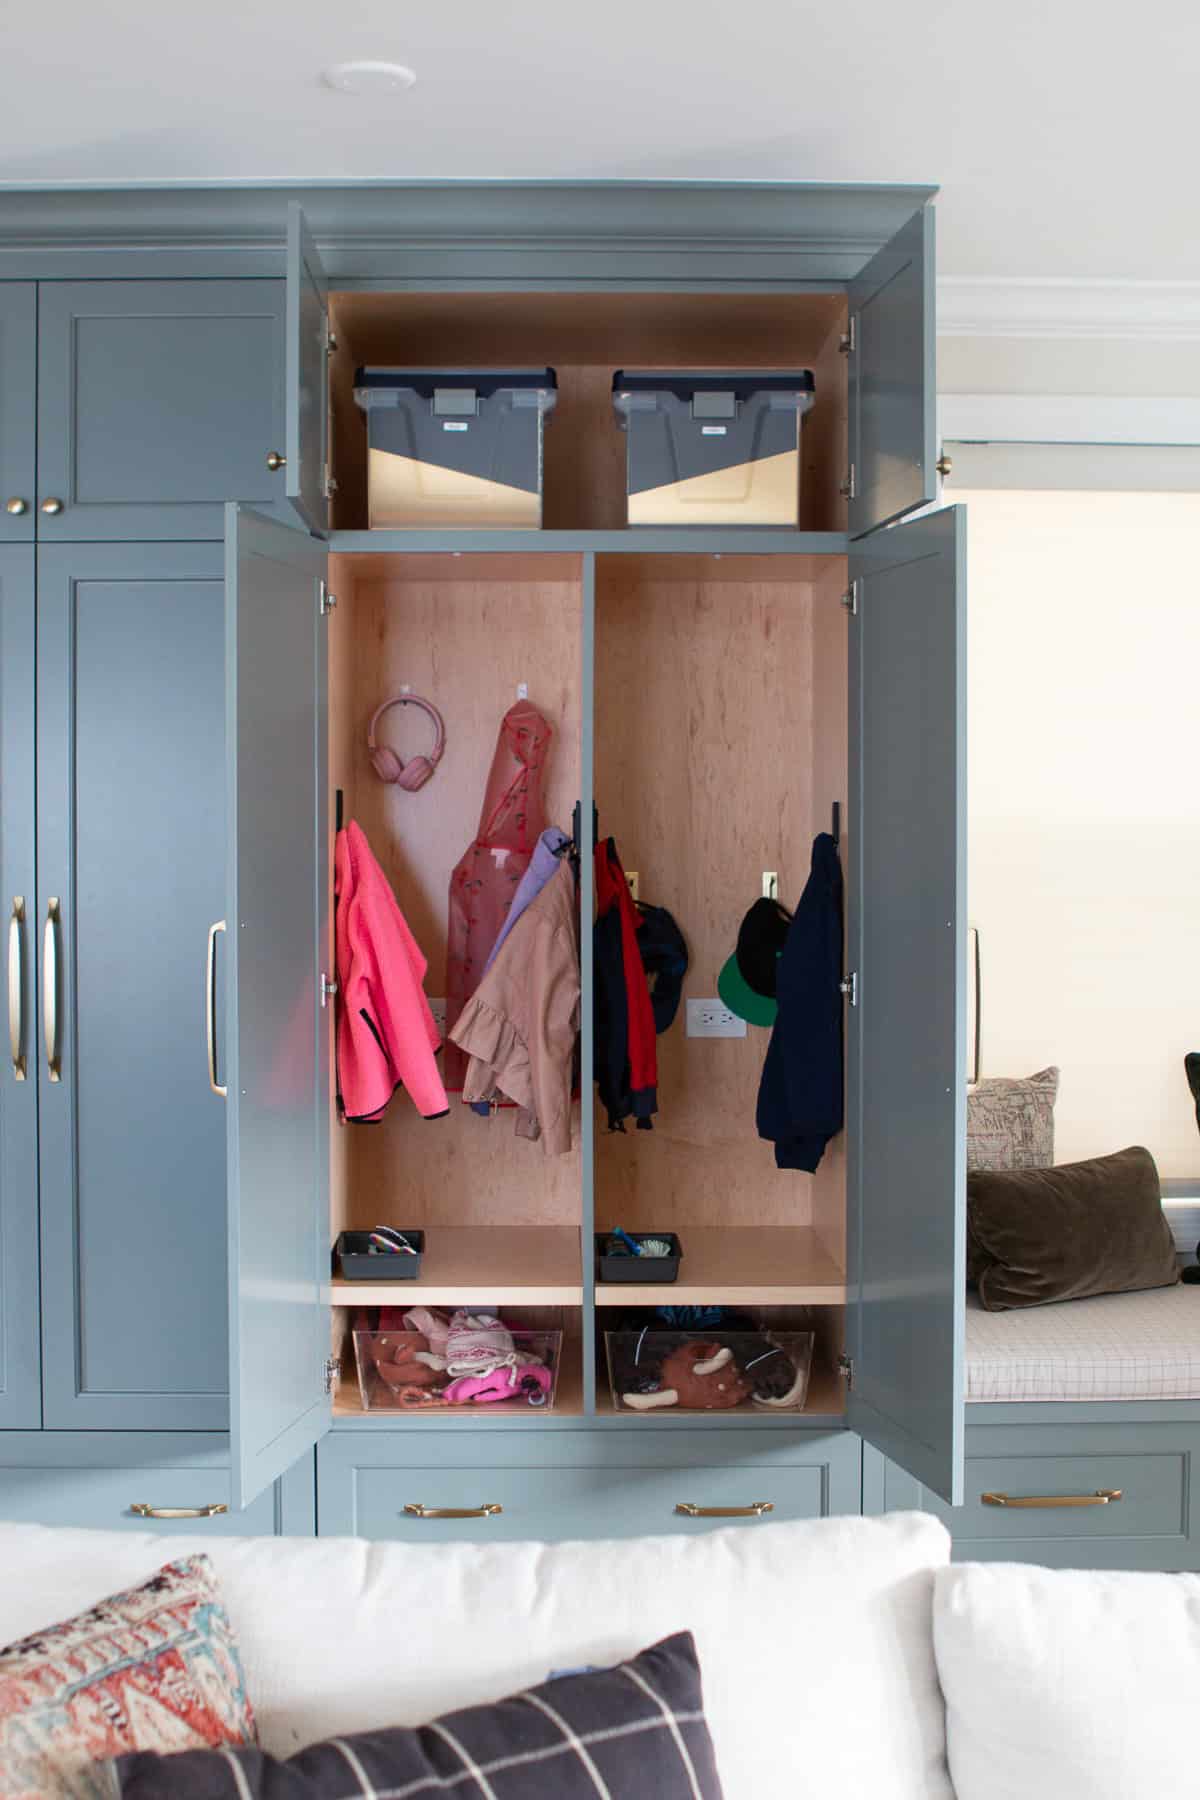
On the right, we designed two individual lockers just for the kids. They think it’s the coolest thing ever. Every morning, they run to their cubbies to grab everything they need for school. I ended up using sticky hooks for their backpacks and coats. That way I can easily adjust the height as they grow.
Ellis’ locker holds his backpack, hats, and coats (plus a toothbrush and toothpaste so he can get ready after breakfast downstairs).
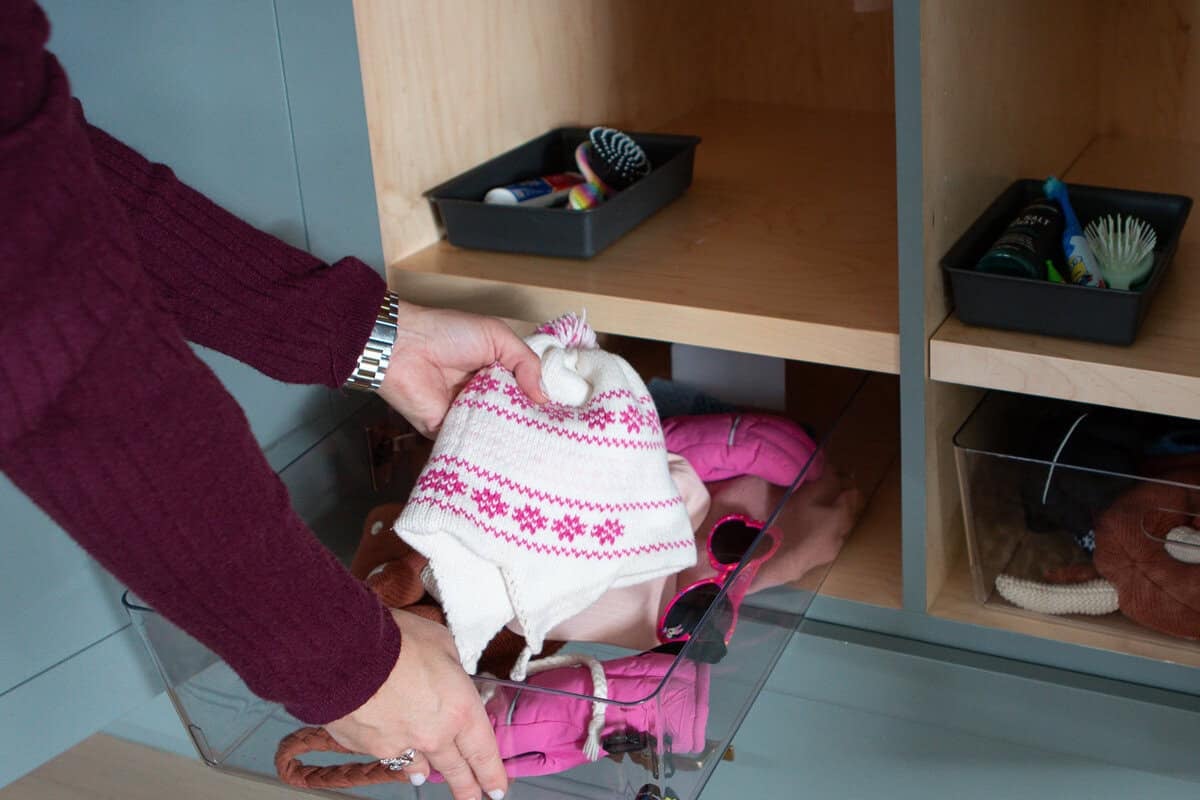
Rory’s has her school bag, daily gear, and seasonal accessories.
Above, I added these plastic file containers to hold all of their schoolwork and art. The paper piles get big quickly in our house, so I like being able to file the best of the best away right here.
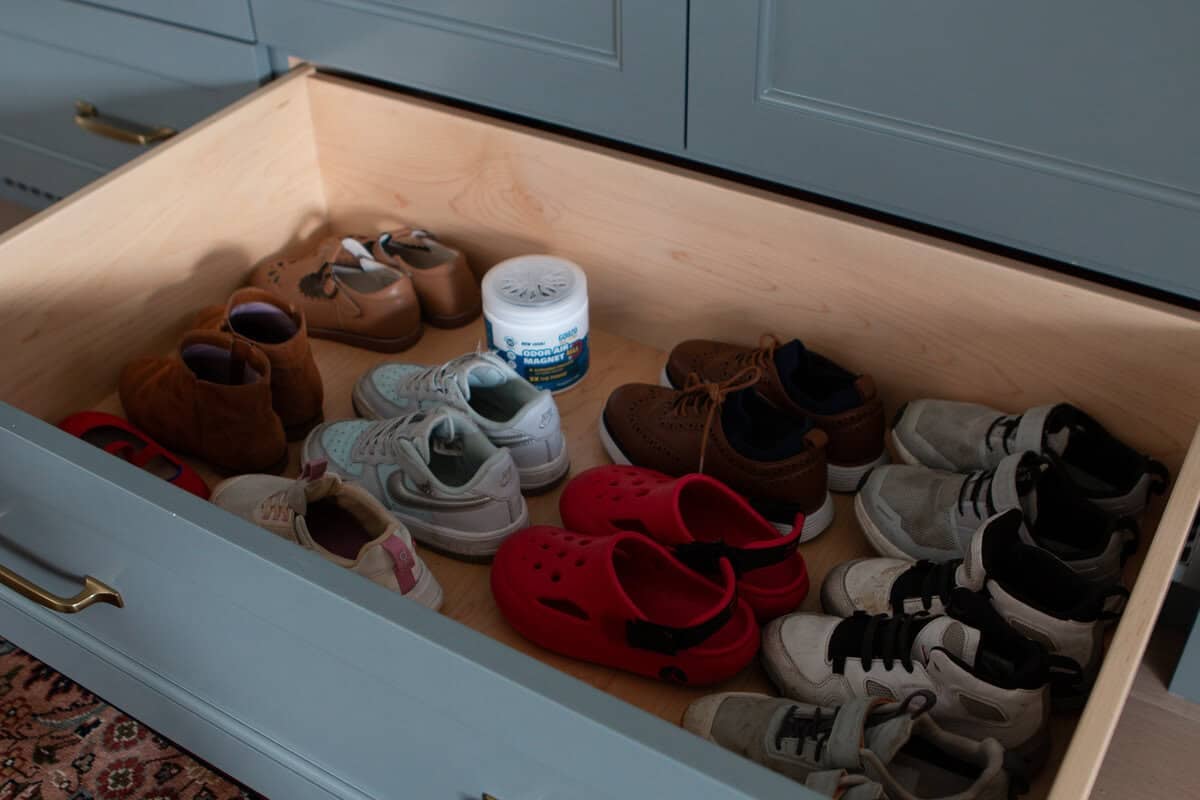
The deep drawers underneath are dedicated shoe storage for each of them, which keeps the entry clear and clutter-free. It’s so nice that every family member has their own little space.
Coats & Bags
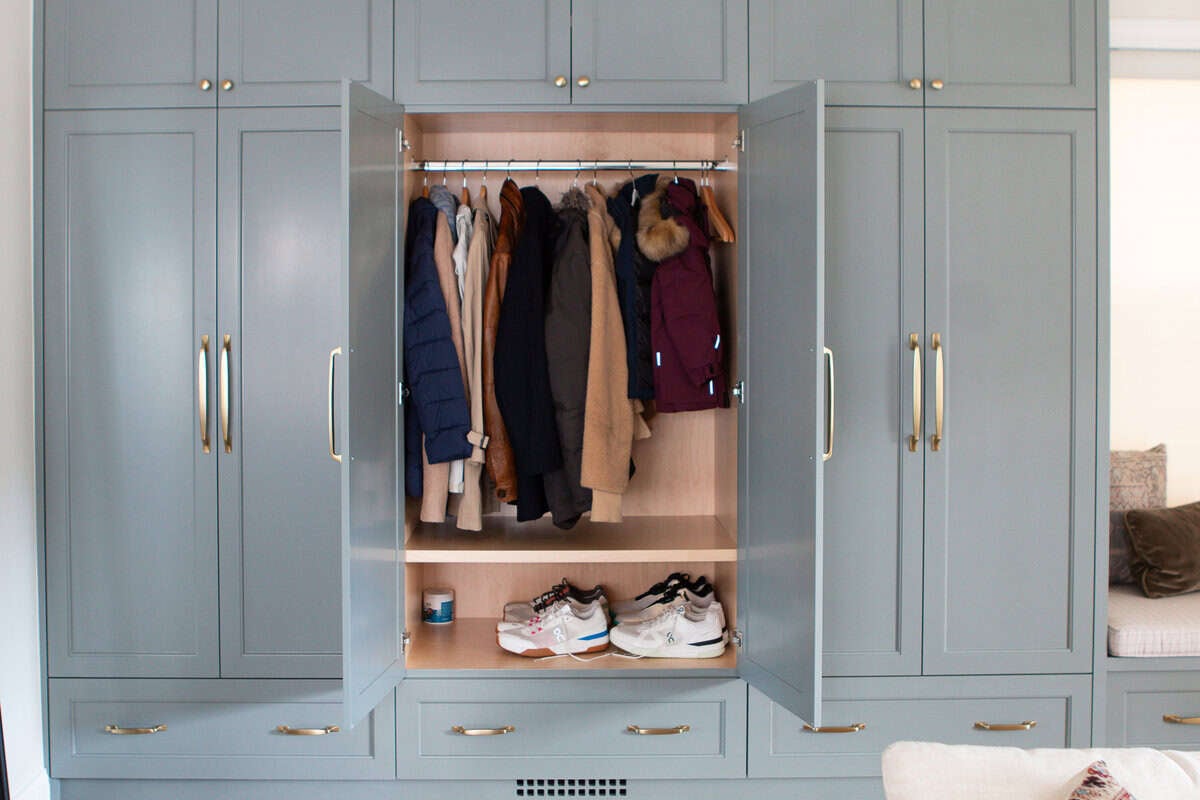
Next to the kids’ lockers, we added tall cabinets with rods for coats. These hold all of the adult jackets, along with some of Finn’s shoes. Above we store our soccer bag, pool bag, and the family backpack we grab for bike rides and outings.
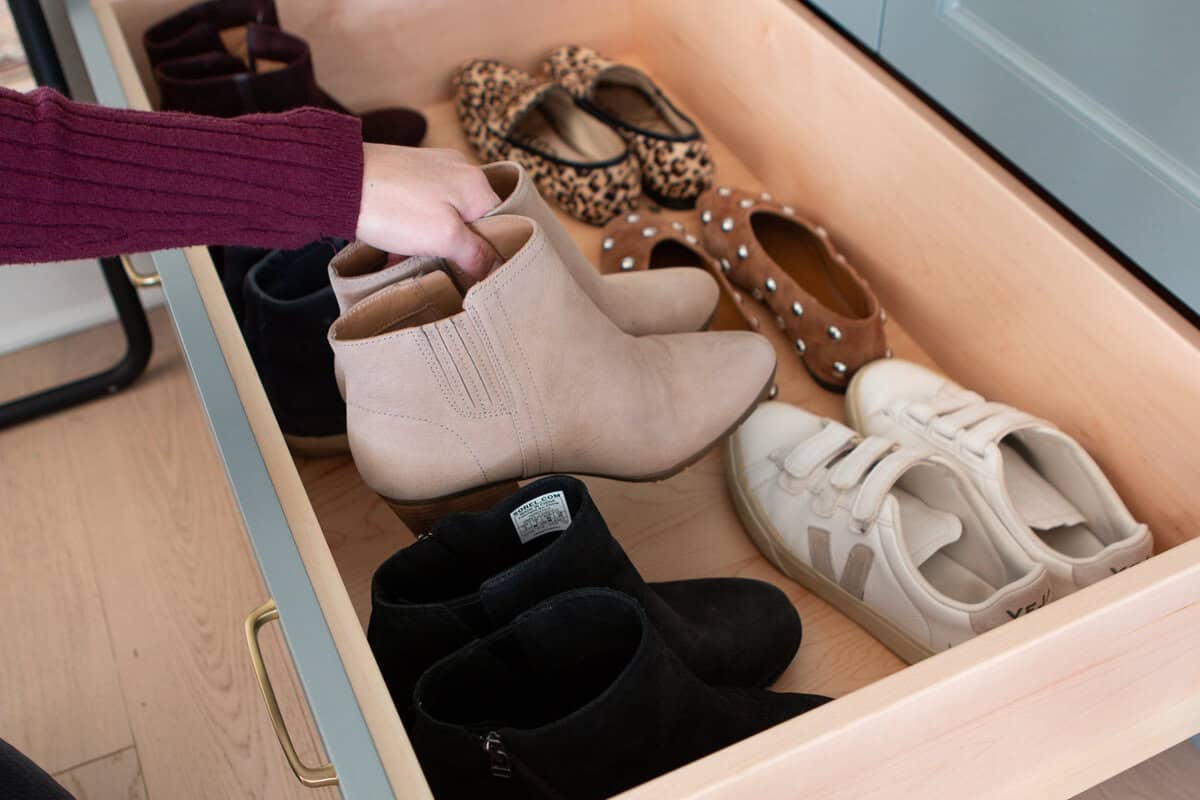
Finn and I also store our everyday shoes in the deep drawers, so it’s easy to keep everything corralled in one spot.
Utility Storage
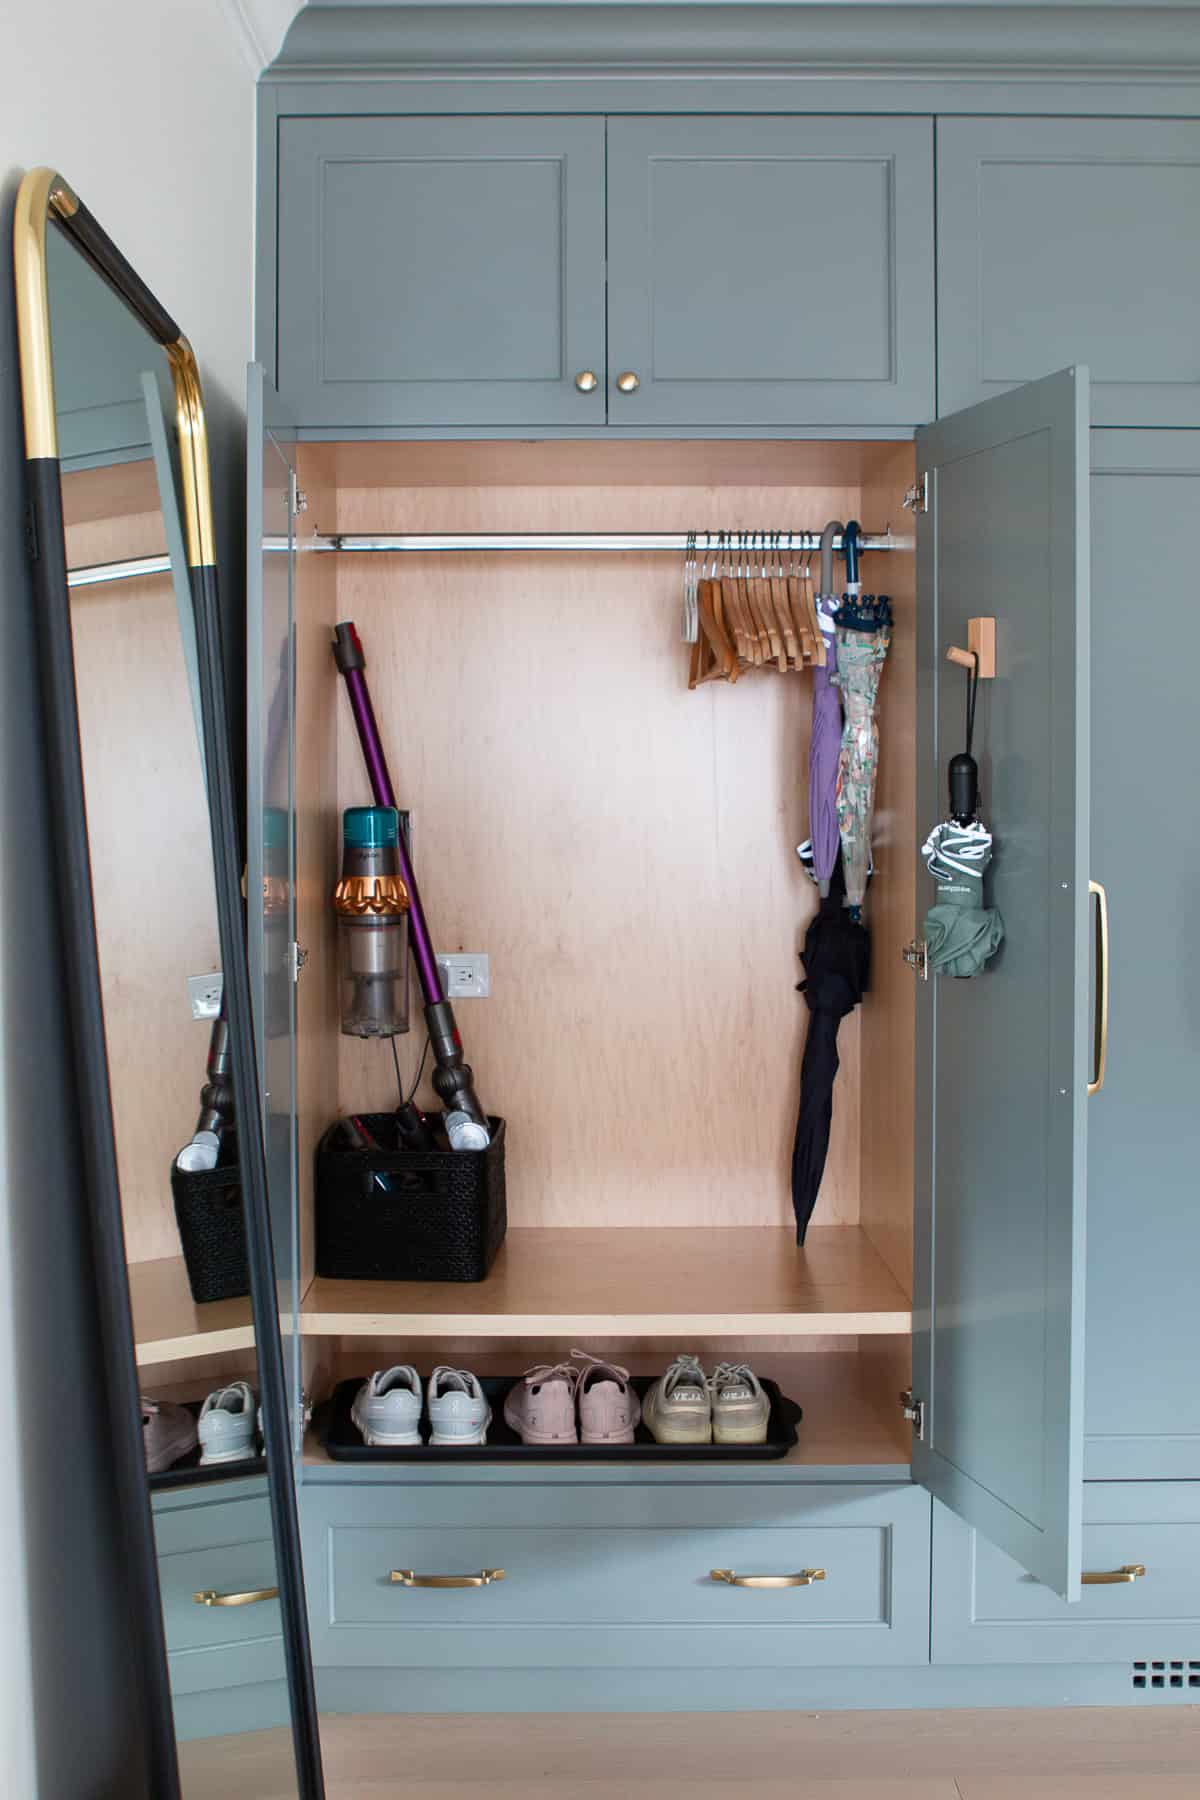
On the far left, there’s a tall cabinet for the vacuum, vacuum accessories, umbrellas, and even space for guest coats. Plus, a shoe tray for any wet or super dirty shoes.
This setup makes such a difference in keeping the rest of the house from feeling cluttered. Everything lives here instead of spilling into the living room or kitchen.
Room to Grow
One of my favorite parts? The upper cabinets are still mostly empty. I’m still figuring out exactly how I want to organize every inch of these, and I’ll eventually share a whole post on our locker organization system. But for now, it’s pretty amazing to have more storage than we need, which is a rarity in a city home.
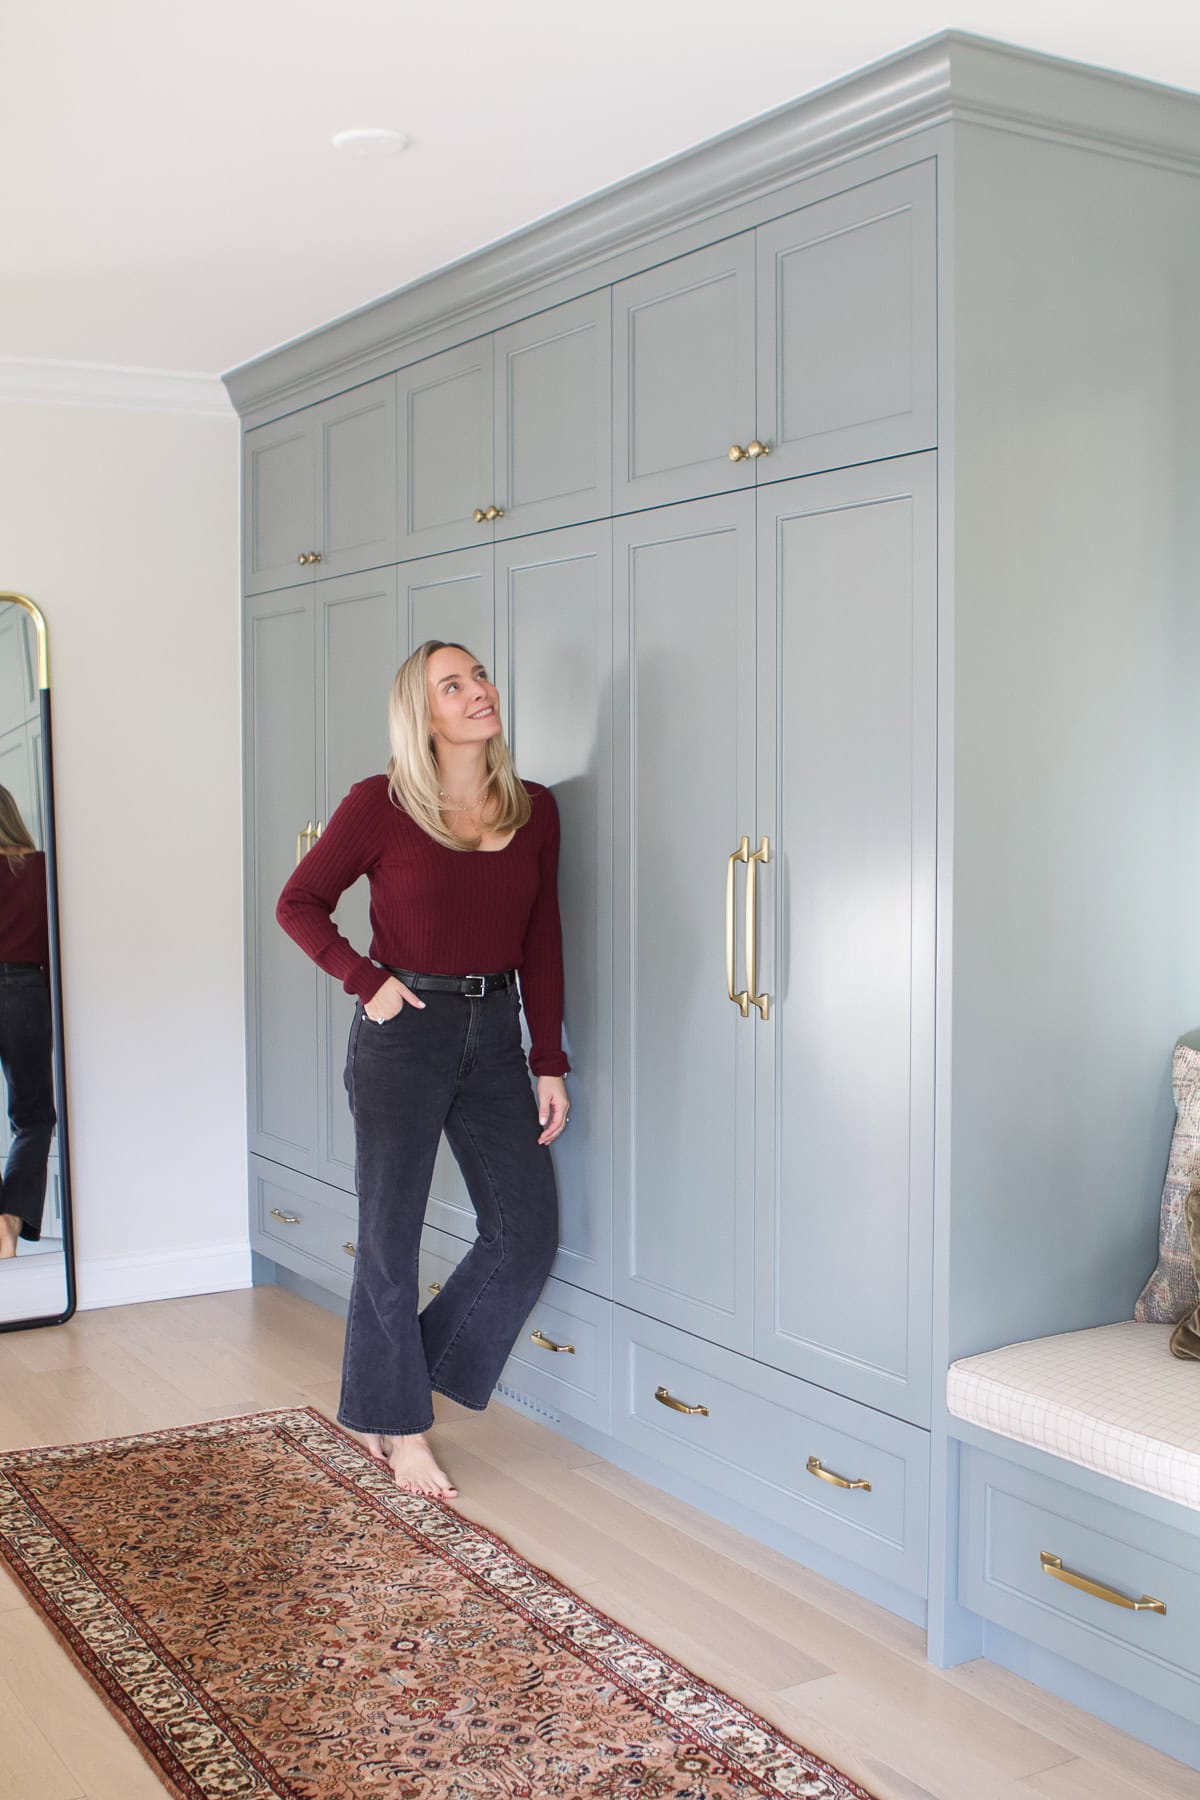
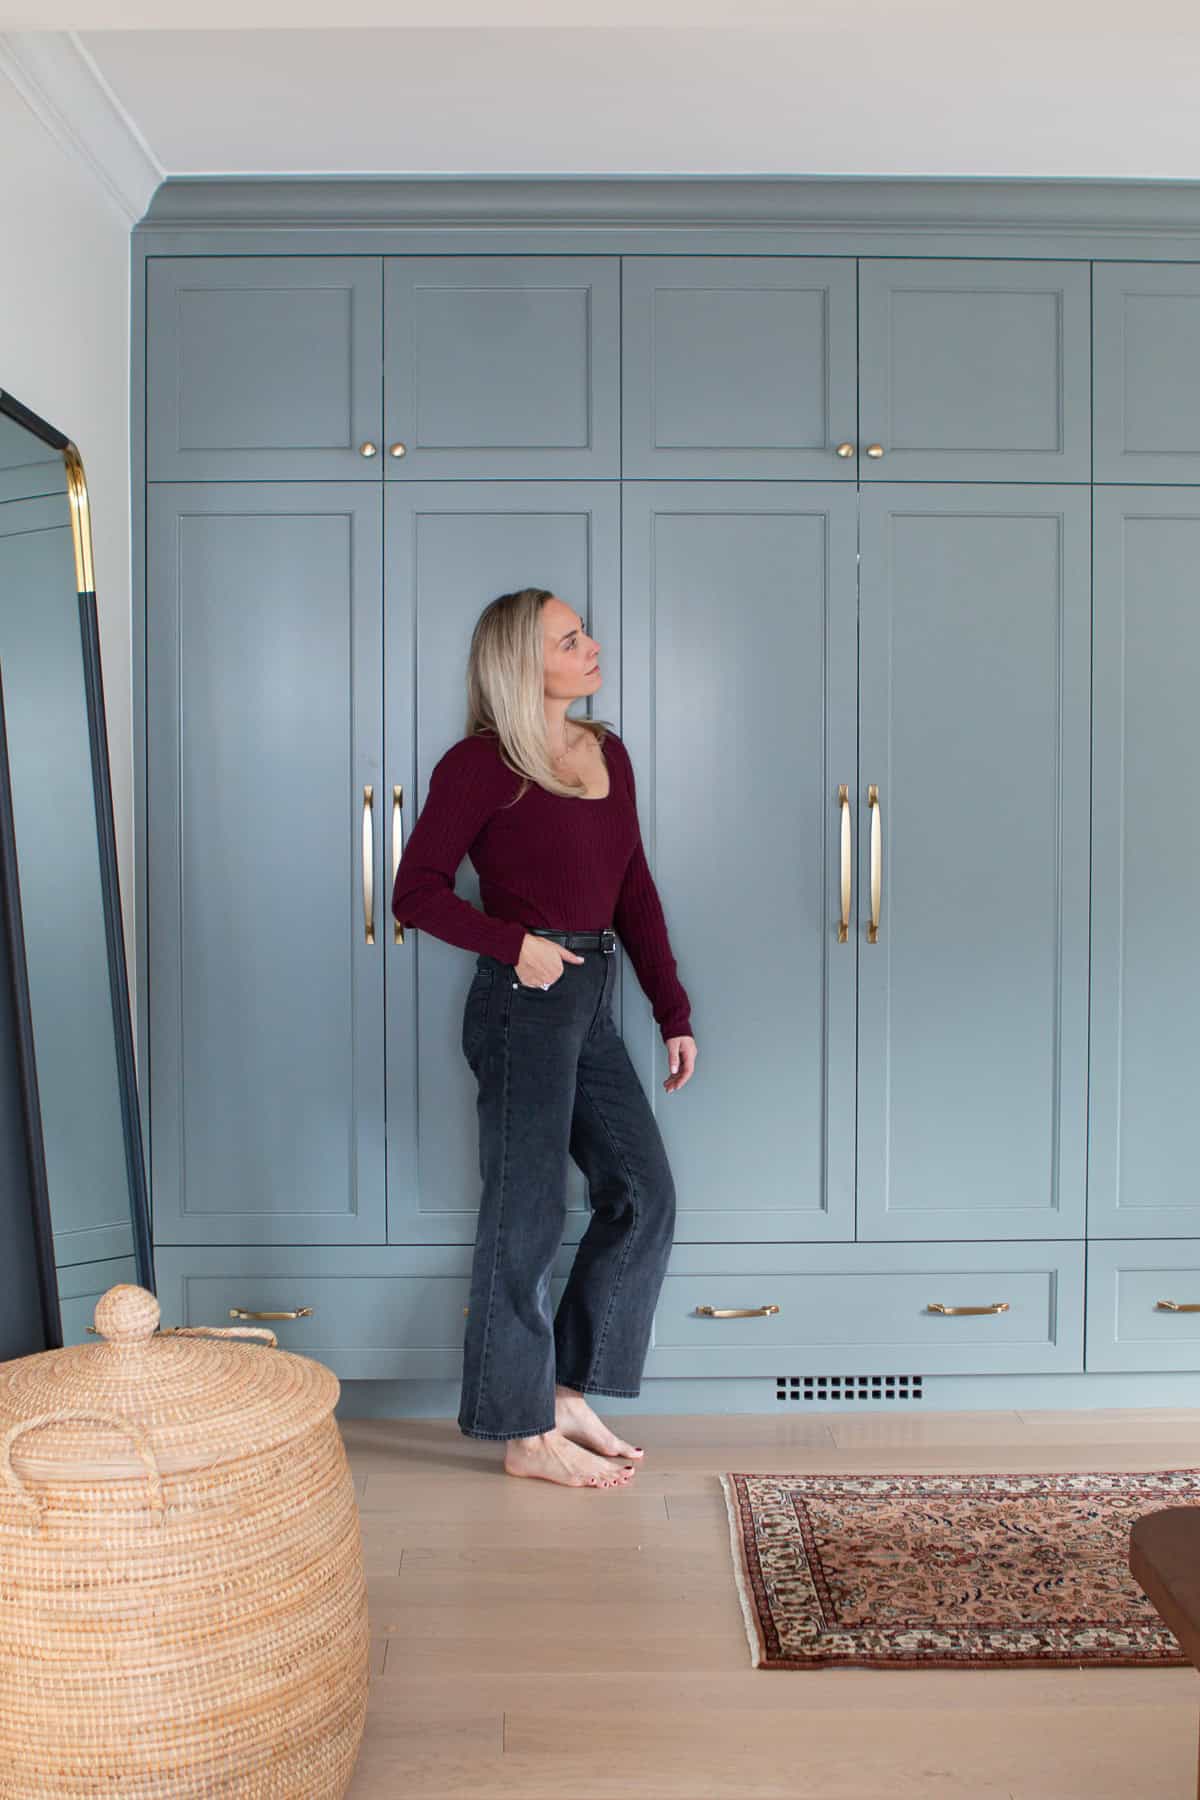
The Color & Finish
One of the details I’m most excited about is the paint color on our cabinetry. We first used it in Rory’s bedroom. Her bookshelves are from KraftMaid in the color “Bonsai.” I then repeated that same cabinet color on our kitchen island.
Because these mudroom cabinets were custom-made, my painter actually took a door from our kitchen island to the paint store to have it perfectly color-matched. I’ll include the exact color code below in case you want to try it yourself.
101-4Y19.5, 107-2Y14.5, 113-1Y4.5, 203-10
What I love most about this shade is how much it shifts depending on the light. In the morning, it feels like a soft sage green, while later in the day, you catch more blue or gray tones. The satin finish keeps it durable but still soft to the touch, and it pairs so nicely with the brass hardware.
Repeating this color throughout our home creates such a cohesive look—a reminder that when you’re aiming for a pulled-together feel, it often comes down to repeating key finishes and tones from room to room. For us, tying the mudroom into spaces like the kitchen and Rory’s bedroom makes the whole house feel more intentional and connected.
Before & After: A Complete Transformation
Sometimes the best way to see the impact of a renovation is to look at the wide shots side by side. These before-and-after photos really show how much this little corner of our home has changed for the better. And the pop of color that green adds…wowza!

- Right Side Drop Zone – What used to be a dark, cluttered coat closet is now a marble-topped counter with cane cabinets, open shelving, and hidden tech storage.
- Bench & Window Wall – Instead of wasted space, we now have a cozy bench under the window with deep drawers for shoes and a custom cushion that makes it both functional and inviting.
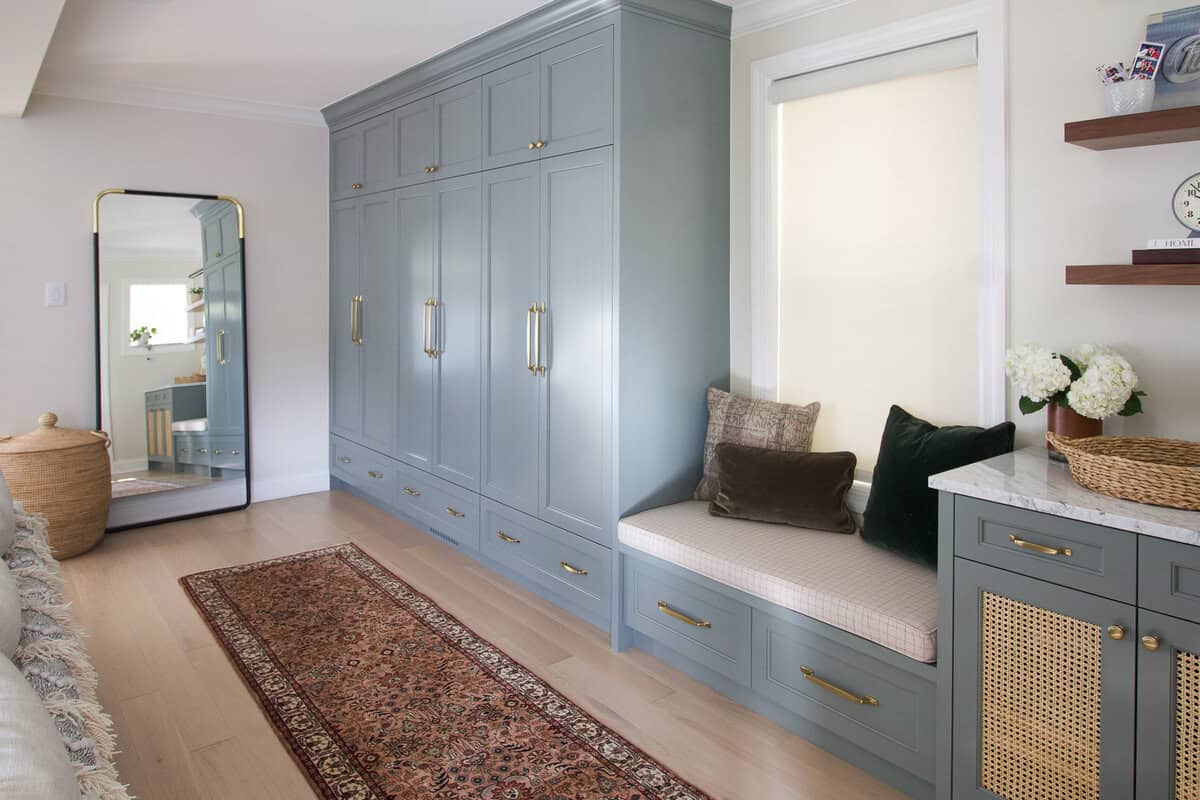
- Locker Wall – The biggest change of all: a full wall of custom cabinetry with lockers for the kids, tall cabinets for coats and bags, and utility storage for our vacuum and umbrellas.
Every inch of this mudroom is working harder for our family, and the before-and-after comparison makes me wonder why we didn’t do this years ago.
Budget Breakdown
I know you appreciate it when I share real numbers so you can plan for future renovations. So here’s the full breakdown of what we spent on this mudroom renovation.
- Phase 1: Demo, Electrical, & Prep – $5,000
- Closet demo and debris removal
- Electrical work (outlets, new switches, rerouting cords)
- Hardwood floor patching
- Drywall, mudding, sanding, and paint prep
- Phase 2: Custom-Made Cabinetry & Install – $16,900
- Fabrication of custom cabinetry (maple plywood with solid maple doors, drawers, and fronts) – $15,200
- Installation, crown molding, and trim for a true built-in look – $1,700
- Phase 3: Painting – $4,900
- Prepped and sprayed all cabinetry on-site
- Two coats in our custom color in a satin finish
- Additional Costs
- Marble countertop remnant & installation – $782
- Custom cushion – $422
- Cabinet hardware (knobs + pulls) – $542
- Picture frame light – $250
- Wood shelves – $500
Grand Total: $29,296
I know that’s a large amount of money, and it might make some people pause. For us, though, this project feels worth every penny. It’s not only going to help our home’s value in the long run, but it has completely changed how we live day-to-day. Having a designated mudroom space for coats, shoes, bags, and gear has made our home feel calmer and more functional.
Could we have DIY’d the cabinetry and saved money? Sure. But with two young kids, a packed schedule, and my book deadlines, the trade-off of hiring professionals was well worth it. Instead of a six-month DIY slog, we now have a finished space that works beautifully for our family.
This isn’t just a pretty wall of cabinets—it’s a hardworking hub that keeps us organized every single day.
Mudroom Sources
Wall Color, Benjamin Moore “Ballet White” // Trim Color, Benjamin Moore “Simply White” // Cabinet Paint Color: 101-4Y19.5, 107-2Y14.5, 113-1Y4.5, 203-10 // Brass Hardware (pulls & knobs) // Wood Shelves (36″ long, 10 ” deep, 2″ thick) // Picture Frame Light // Runner (vintage from this shop) // Custom Cushion // Waterproof Drawer Liners // Blanket Basket // Clock // Planter
Final Thoughts
I never thought we’d have a true mudroom in this house. Between the garage door out back and the busy front door, there just wasn’t an obvious spot. But by rethinking this small space, we turned a cluttered corner into one of the most functional spaces in our home.
Now with custom cabinetry, a bench seat, and smart storage like drawers, hooks, and baskets, every family member has a place for their things. The best part is hearing guests walk in and say, “Whoa, this looks amazing!” because it’s the first place they see when they walk into our home.
Oh, and just for funsies…let’s do a little before and after from when we bought the house to now. It’s a completely new space.

I hope this inspires you to find a little space in your own home that could be reimagined into a hardworking drop zone. Even a few open cubbies or wicker baskets can make a big difference.
Want to see how we organized inside every single cabinet and drawer? I break down our mudroom cabinet organization for real life right here.


