How To Make a Mood Board In Canva (Step-by-Step Tutorial)
Before I commit to a single purchase, I always create a mood board to test-drive my ideas. Today, I’m sharing exactly how I do it in Canva so you can use the same trick for your own home projects.
One of the first things I do when designing a space is create a mood board. It’s such a great way to visualize paint colors, furniture, and decor items BEFORE you get to work purchasing anything!
While I feel like I can look at an empty room and see the potential, it’s sometimes hard for me to explain my vision to Finn. I find that it’s always a good idea to present him with a mood board, so he can get a good sense of what I want to do, and he can get excited about the design!
I use Adobe Lightroom to edit all of my photos for the blog (you can find my Lightroom tutorial here), but I am not proficient with Photoshop. Honestly, I find it overwhelming and a bit of a time-waster for something simple like this.
Instead, I use Canva. It’s a free online graphic design tool that makes it quick and approachable to create a mood board in just minutes. Even the free version works beautifully, though I’ve since upgraded to the Pro account for extra features like the background remover.
This little step has completely changed how I approach my design projects. I always encourage readers to play around with digital mood boards before shopping for a new space. It’s such a smart first step to test ideas and see what really works together before you buy!

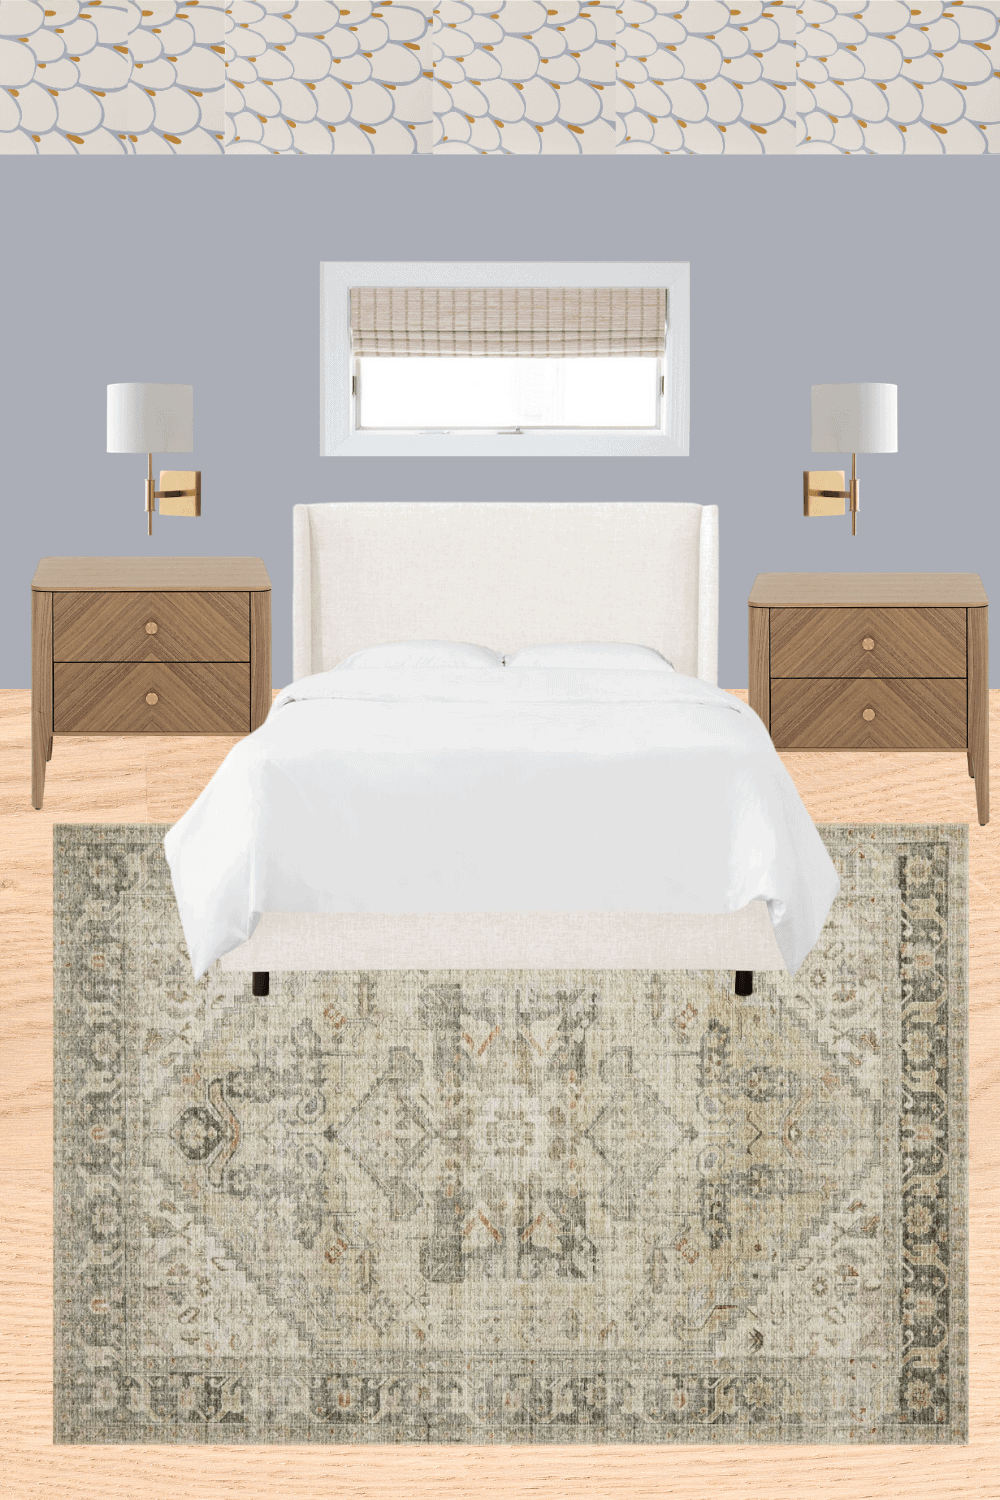
For example, the mood board for my main bedroom design was incredibly helpful as I figured out what would work best in the space. After seeing the wood nightstands in the original plan, I realized that I needed to add something a bit darker to the room, and I opted for black nightstands instead. The mood board helped me easily come to that conclusion!
Step-by-Step Mood Board Tutorial

I often get questions about how to create a mood board, so I figured I would break down my mood board tutorial right here. And while I talk a lot about Canva today, this not sponsored in anyway! It’s just the platform that I happen to use for my business.
Step 1: Create a Free Canva Account
Head to Canva.com and sign up for a free account. You can use your email or connect through Google to get started. The free version of Canva has plenty of options for beginners, but if you find yourself making a lot of design boards, upgrading to Pro is worth it for the added features, like the background remover tool I’ll share later.
Once you’re logged in, you’re ready to create your first mood board. Think of it like opening a fresh canvas for your design project! This will become your visual tool for organizing paint colors, furniture, decor, and inspiration images.
Step 2: Start a New Design Board

On the left side of the screen, click the “+ Create” tag to start a new project. Canva will open up a variety of sizing options—from Instagram posts to presentations to custom dimensions. Choose the size that best fits where you’ll be sharing or saving your mood board.
- For Pinterest: use a 2:3 ratio (1000×1500 pixels). This size is optimized for vertical pins and will display clearly on Pinterest.
- For Instagram: a 4:5 ratio works best for feed posts if you want to share your board there.
- For general design plans: I would go with a vertical option so it’s easiest to see on your phone when you’re out and about shopping. The Instagram 4:5 ratio works great.

Once you select a size, a fresh, blank design board will open. Rename the project at the top so you can easily find it later (e.g., “Living Room Inspiration Board” or “Living Room Design”). This new board becomes your visual tool for pulling together paint colors, furniture, and design elements before you start your room makeover.
Step 3: Upload Your Own Photos
Since most mood boards include specific furniture pieces, decor, or paint colors, you’ll want to upload your own images into Canva. This is what makes your design board unique to your project, instead of just a generic template.
- Find the product photo or paint swatch on the brand’s website (or search Google).
- Right click the image to save it to your desktop.
- In Canva, go to the left-hand sidebar and select Uploads to add the image to your new board.

One of my favorite tricks is to actually set the background of the mood board to the paint color I’m considering for the room. Here’s how:
- First, make sure you’ve uploaded the paint swatch image to your design board. You can just Google the color and save an image of it.
- Click anywhere on the background of your Canva project, then look at the colorful circle at the top menu bar (this is the background color tool).
- Under Photo Colors, Canva will automatically pull the exact shades from your uploaded paint swatch. Just click your chosen color and voilà—your entire background updates to match that paint color.
This way, you can instantly see how all of your furniture, fabrics, and design elements look against the actual wall color you’re considering. It’s the easiest way to avoid surprises once you paint!
If you know you’ll be using the same paint colors or fabric tones across multiple projects, you can save them into Canva’s Brand Kit/Color Palette tool. That way, your exact shades are always ready with one click.
Step 4: Remove Background for a Clean Look
When you’re building a mood board, nothing throws it off faster than images with busy or colored backgrounds. If you upload a chair that’s sitting in a fully staged room photo, the extra stuff makes it harder to see how it will actually look in your space.


Canva makes this step super easy with its Background Remover tool (a Pro feature). To use it:
- Upload your photo and place it on your design board.
- Select the image, then choose BG Remover at the top. Canva will instantly strip out the background and leave you with a clean cut-out of the item.
Step 5: Use Canva’s Photo Library

Sometimes you don’t have all of the product photos you need, or you just want to test out a design idea without committing to specific pieces. That’s where Canva’s built-in photo library comes in handy.
Use the “Elements” section in the left-hand sidebar to search for inspiration images or filler pieces that help round out your board. For example, you can type in “hardwood floors,” “potted plant,” or “linen texture” to give your design board more context.
This is a great way to:
- Add inspiration images when you’re still in the brainstorming phase.
- Layer in design elements like rugs, flooring, or greenery.
- Create a more realistic inspiration board before you’ve sourced all the exact products.
Step 6: Add Text & Annotations

Once your images are in place, it’s helpful to add a few notes so your mood board doubles as a specific plan for your design project. Canva makes this easy with its wide variety of fonts, text boxes, and symbols.
Here are some ways I like to use text on my boards:
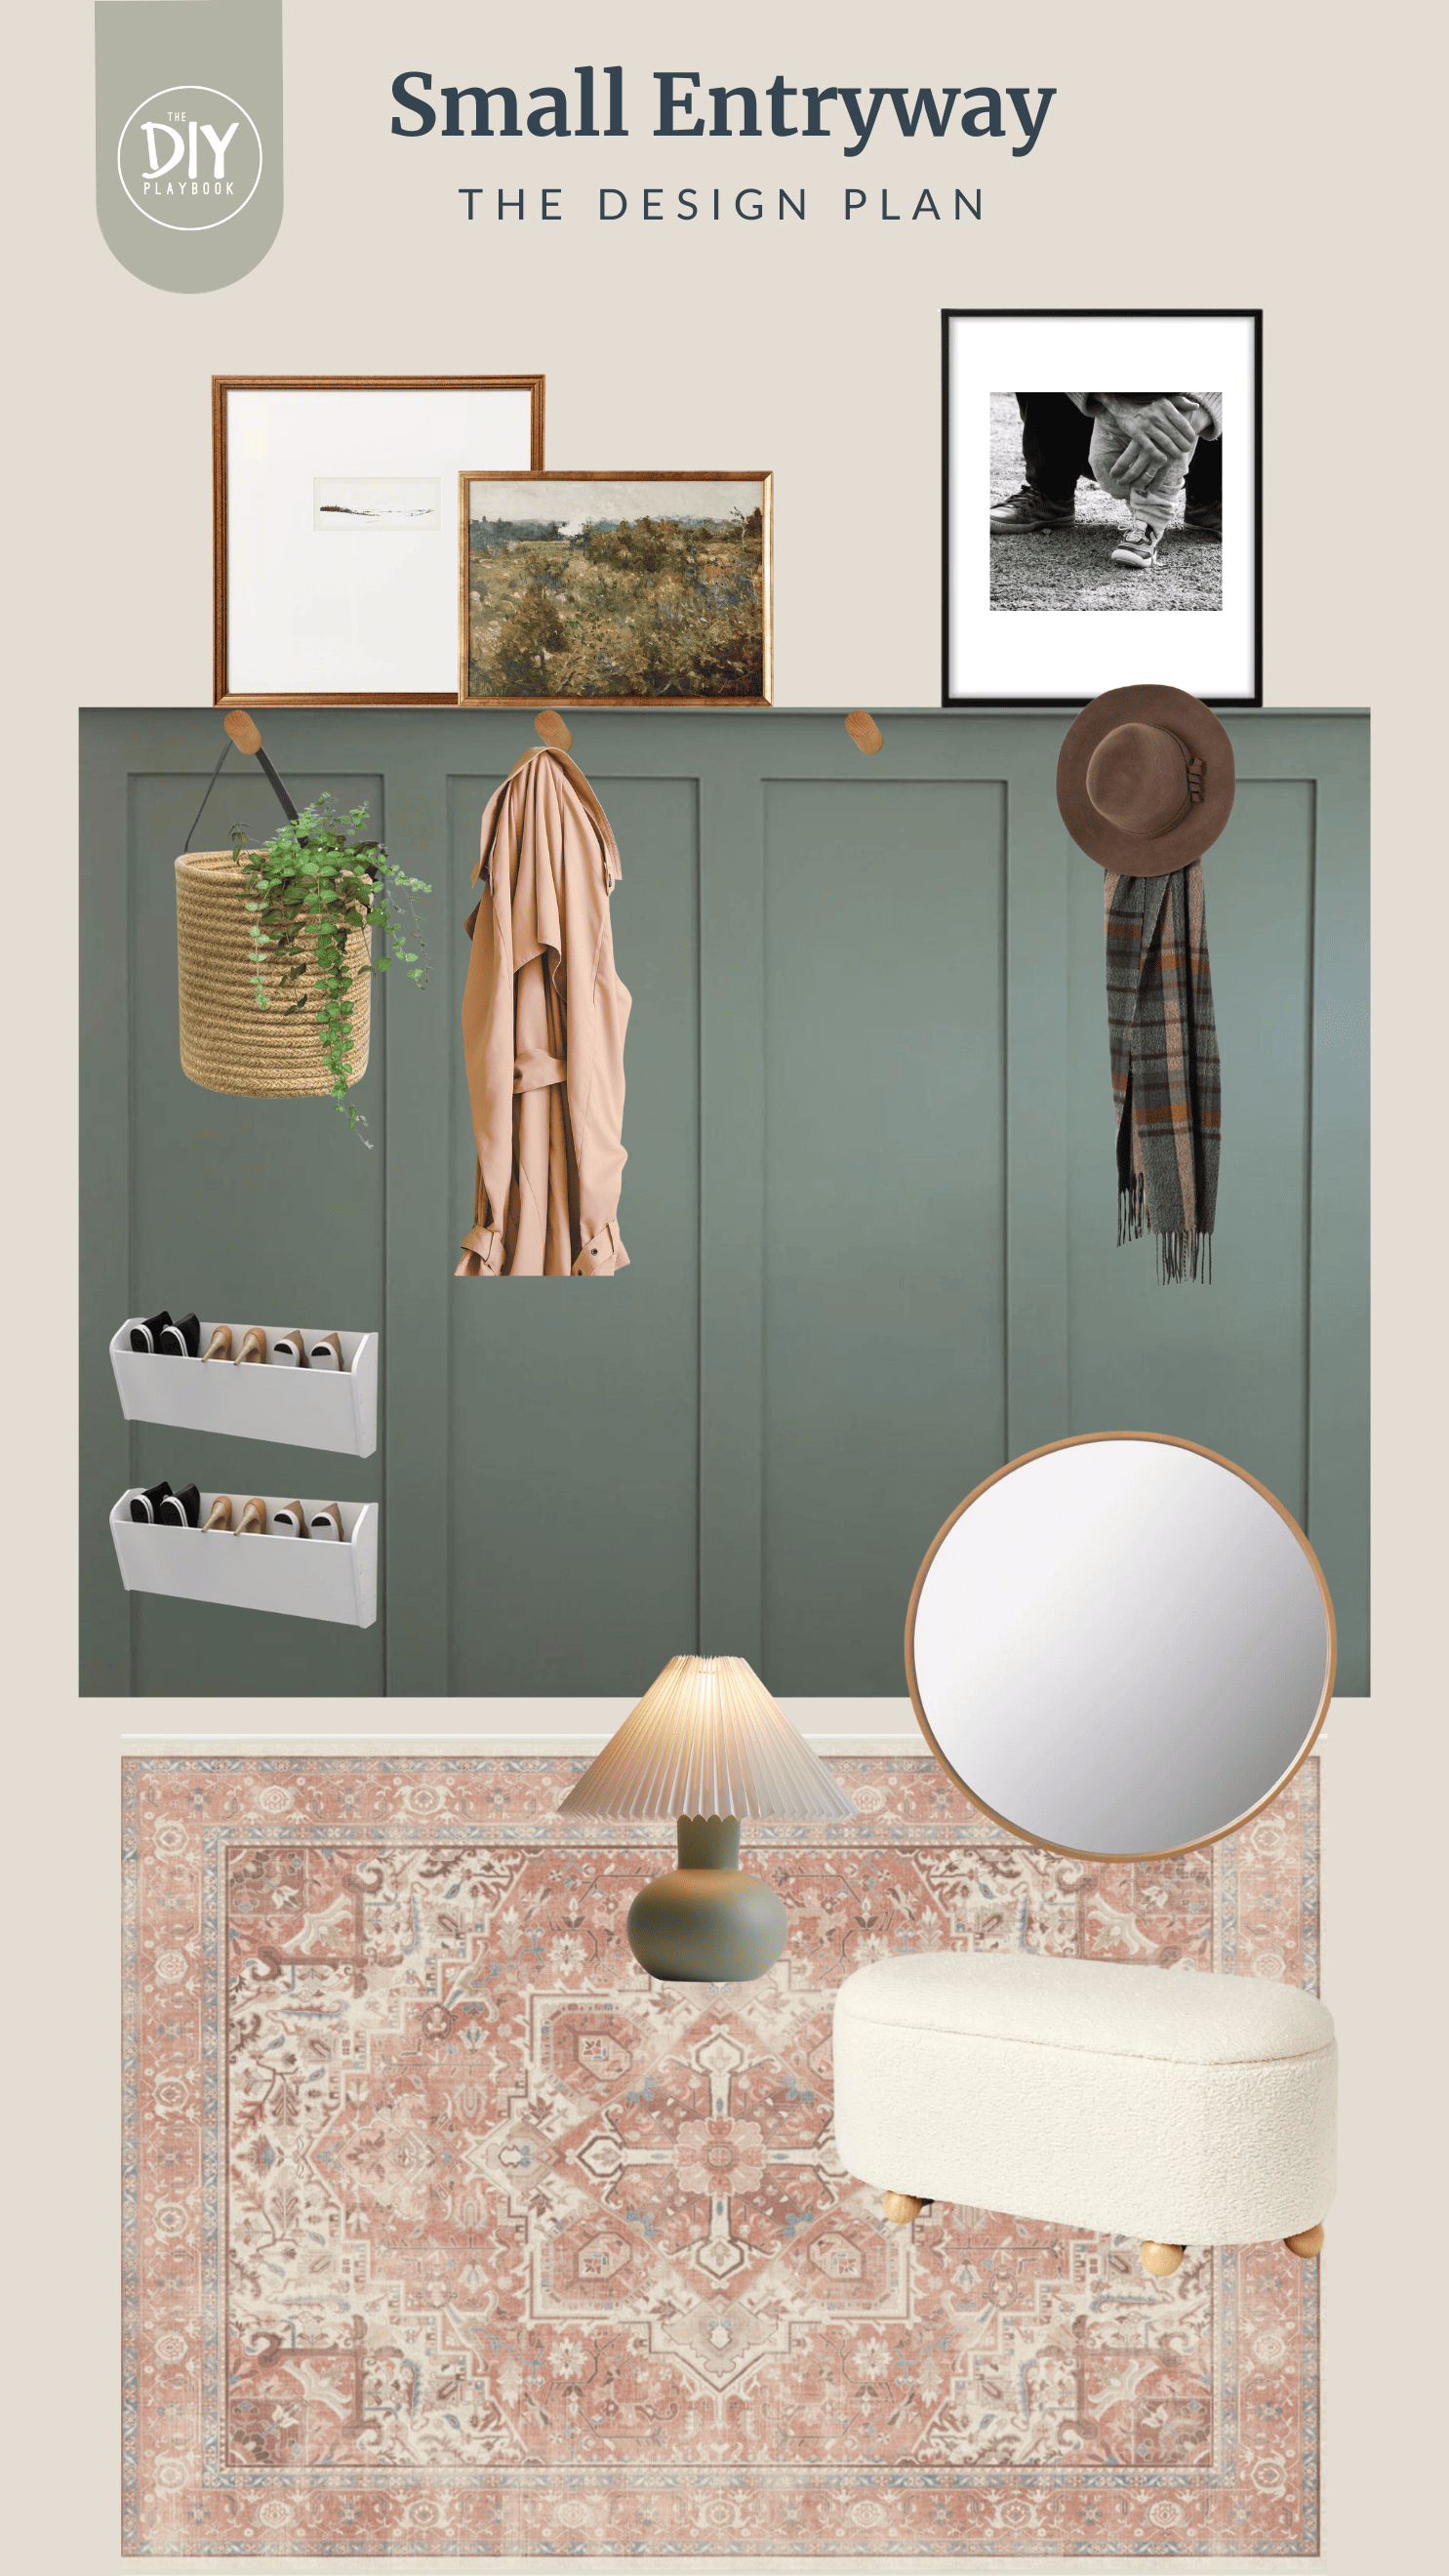
- Label paint colors with their names (e.g., Benjamin Moore Tarrytown Green).
- Add description words like “airy,” “cozy,” or “modern” to define the vibe.
- Use arrows or numbers to call out important design elements.
- Note where you found items (helpful for shopping trips)
This extra layer of detail keeps your design plans organized and makes your board more functional—not just pretty.
Step 7: Download & Save Your Mood Board

The great thing about Canva is that it automatically saves your work as you go, so you never have to worry about losing progress. But once your design board is complete, you’ll want to download a copy so it’s easy to access when you need it.
Click the “Share” button in the upper right corner and then “Download”. Canva offers several file options.
- PNG or JPG: best for saving to your mobile device or sharing online.
- PDF: perfect if you want to print your board as part of your design plans.
I usually keep a copy on both my desktop and my phone. That way, if I’m out shopping and spot a piece I like, I can quickly pull up my board and see if it works with my color palette and overall room design.
Download your board before you leave home. If you’re relying on the Canva app in-store, you’ll often need a Wi-Fi connection to access or download your file, and not every store makes that easy. Save the mood board ahead of time so you’re never stuck without it.
Step 8: How to Use Your Mood Board

Now that you’ve built your board, the fun part begins – actually putting it to use! A mood board isn’t just a pretty collage; it’s a visual tool that can guide every step of your room makeover or design project.
Here are some of the best ways to use it:
- While shopping: Keep a copy saved directly on your phone so you can reference it in the aisles. I always compare new finds to my color palette before buying, which helps me stick to my color scheme and avoid impulse purchases.
- For partner buy-in: If your partner or roommate has difficulty visualizing, show them the board. It’s the easiest way to get everyone on the same page.
- With a professional designer or contractor: Share your mood board to communicate your style, color scheme, and overall vision. It’s like handing them a roadmap instead of trying to explain every detail.
- As part of your design process: Treat it as the first step in creating a cohesive plan for your home, just like a project instructor would.
Want to Take It a Step Further?

Creating a mood board in Canva is the easiest way to start planning your space, but lately I’ve been experimenting with taking things even further. I’ve been playing around with ways to turn my mood boards into realistic renderings using AI, and it’s been such a fun tool for visualizing design ideas in a whole new way.

If you would like to learn how to turn your mood board into an AI rendering, please head to this blog post. I walk you through the entire step-by-step process.
Casey