Installing Kitchen Cabinets In A Laundry Room
Installing kitchen cabinets in your laundry room can be an affordable and stylish option to update this much-used space. You’ll need to add key finishing touches to make them look custom. Here’s how we did it and how you can, too!
When we designed our new laundry room, we wanted stylish storage on a budget. We opted to install kitchen cabinets from IKEA in our laundry room because we wanted a custom, built-in look on a budget.
Finn and I spent many weekends bringing this space to life, and I couldn’t be happier with the results. I never imagined having a dedicated laundry room—let alone one that looks this good!
 As discussed in this blog post, I actually went into IKEA and worked with a kitchen expert to figure out exactly what we needed. IKEA stores offer this service for free!
I loved seeing the different styles and the colors of the display cabinets in person to better figure out what I wanted. Ultimately, I decided to use the SEKTION system, with dark green BODBYN doors. I really loved the deep color and the traditional front on the cabinet doors. Check out the rendering they gave me:
Note: It doesn’t appear that IKEA currently carries the cabinets in the same color we chose. (I know–bummer!) However, you can always purchase kitchen cabinets in a neutral color and then paint them in something bold that better suits your personality and design plans!
After I placed my cabinet order, I only had to wait two weeks before IKEA delivered them! I highly recommend having IKEA deliver everything if you get your cabinets there. We only paid $69 (prices will vary), and it was well worth not having to stuff it all into our car and make the two-hour round trip to the store. Find out more about IKEA’s delivery options here.
Finn and I had an absolute blast installing the kitchen cabinets in our laundry room. Now, could we have hired a cabinet installer? Yes, we could have–but where would the fun be in that?!
Nine Tips to Help You Install Kitchen Cabinets 
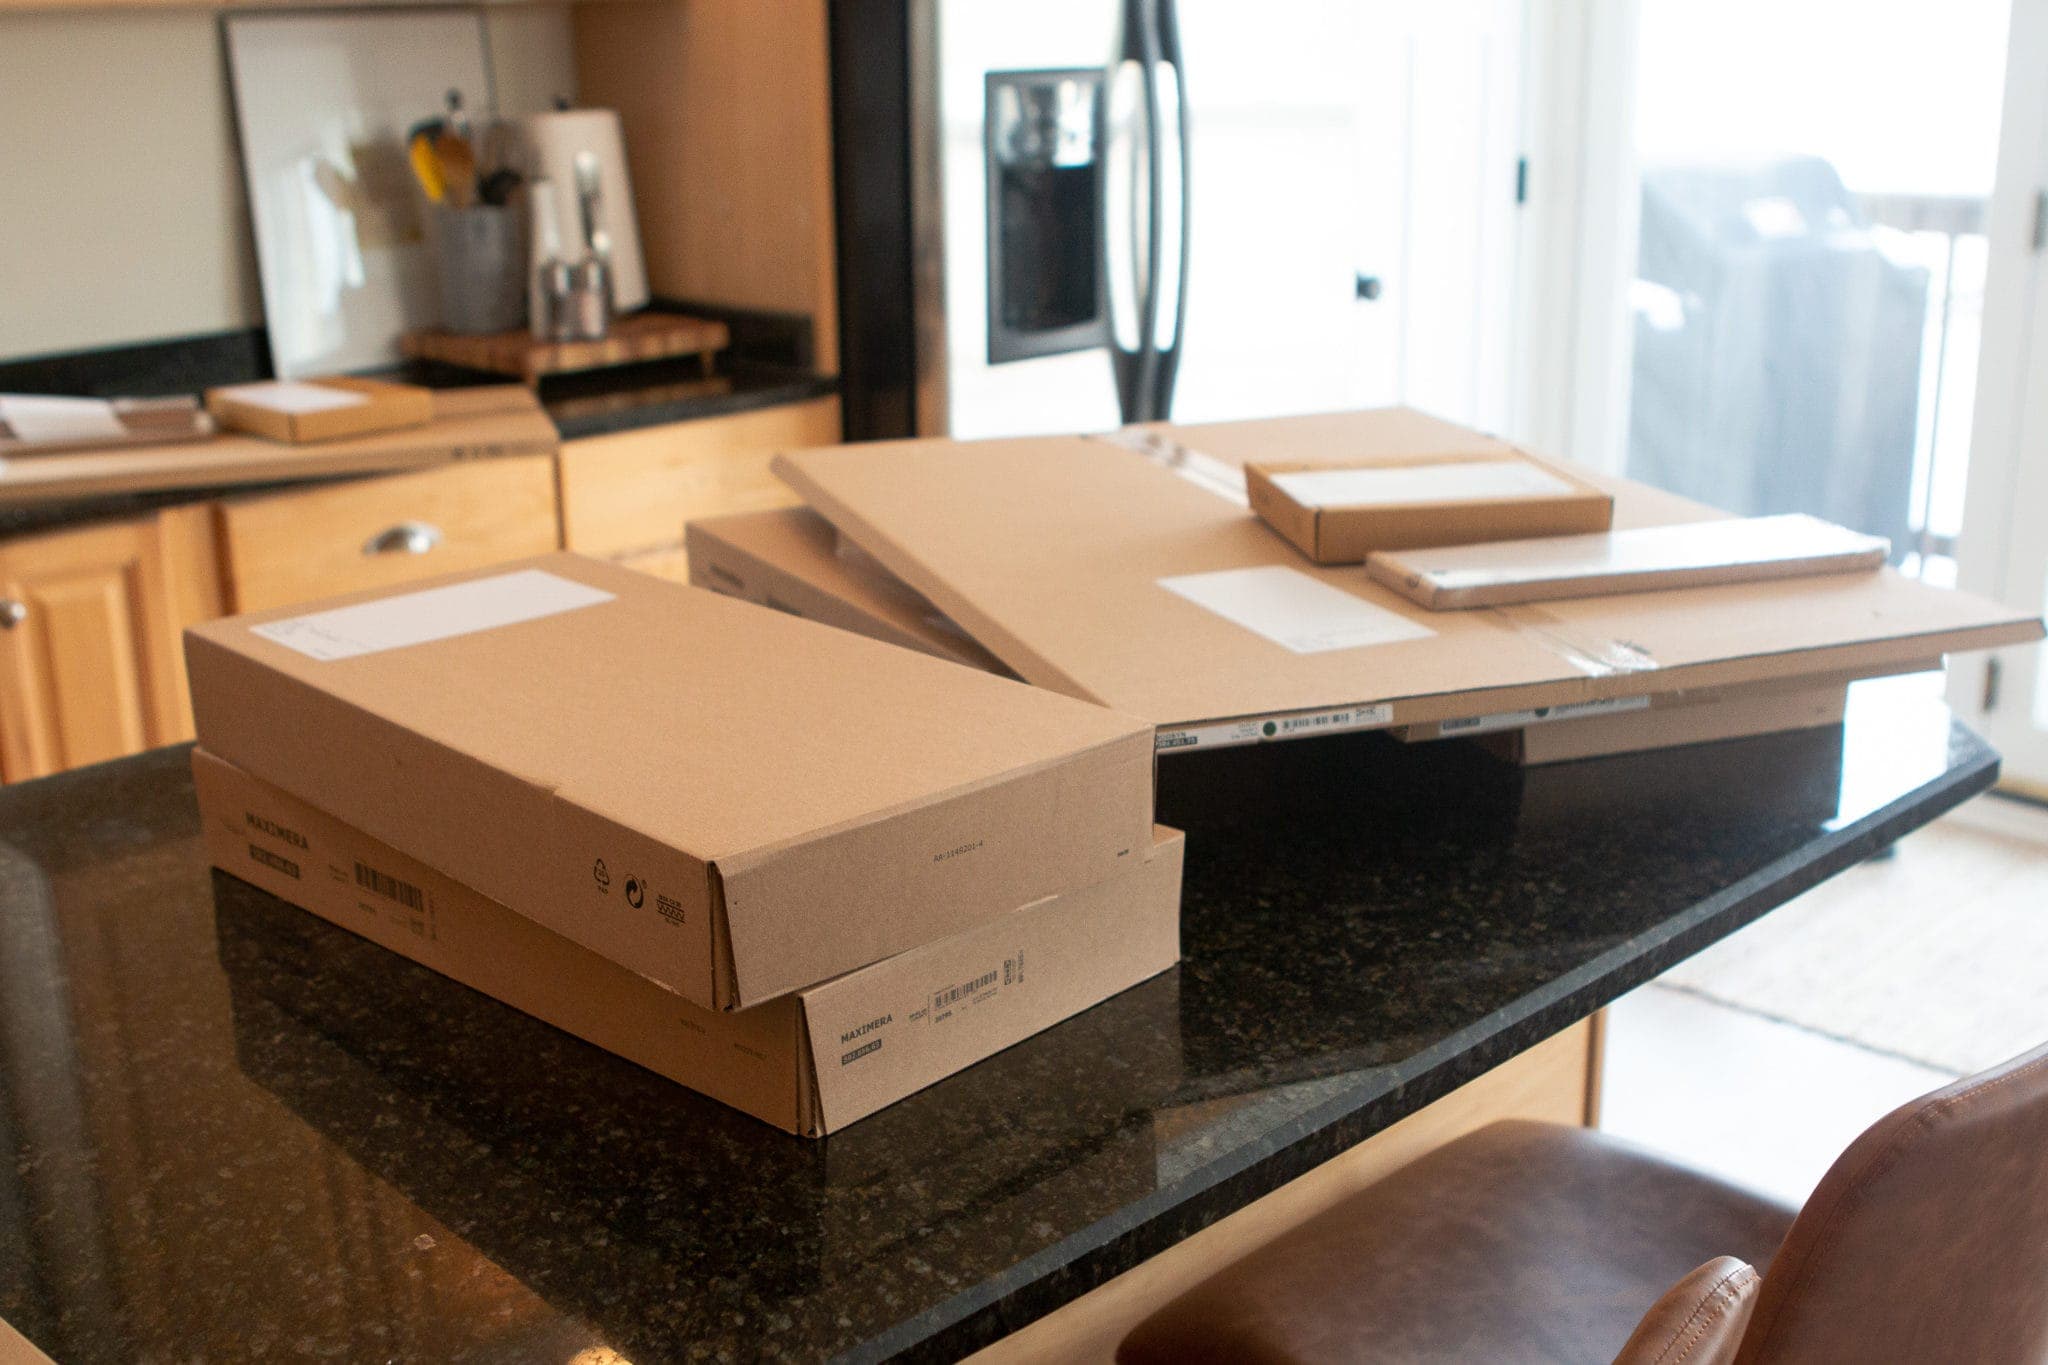
Just like when we DIY’ed our master bedroom closet, it’s overwhelming when all those IKEA boxes arrive. Like, whoa, where do you even begin?! Lucky for you, we made all of the mistakes, so you don’t have to. Here are our top nine tips for installing kitchen cabinets in your laundry room.
These tips can work for installing kitchen cabinets anywhere in your home!
1 . Plan Your Laundry Room Cabinet Layout & Organize Your Supplies.
Before ordering your cabinets, measure your space carefully and consider your functional needs.
We wanted a mix of base cabinets and upper cabinets to balance storage space and accessibility. Don’t forget to account for appliances–like your washing machine and drying rack–in your design.
Once your cabinets and supplies arrive, organize everything and ensure all pieces are accounted for before starting. Doing this ahead means you’ll have easy access to all the parts and know exactly where everything is, which helps prevent frustration once you get the project going.
2. Build Your Cabinets in the Right Location in Your House. 

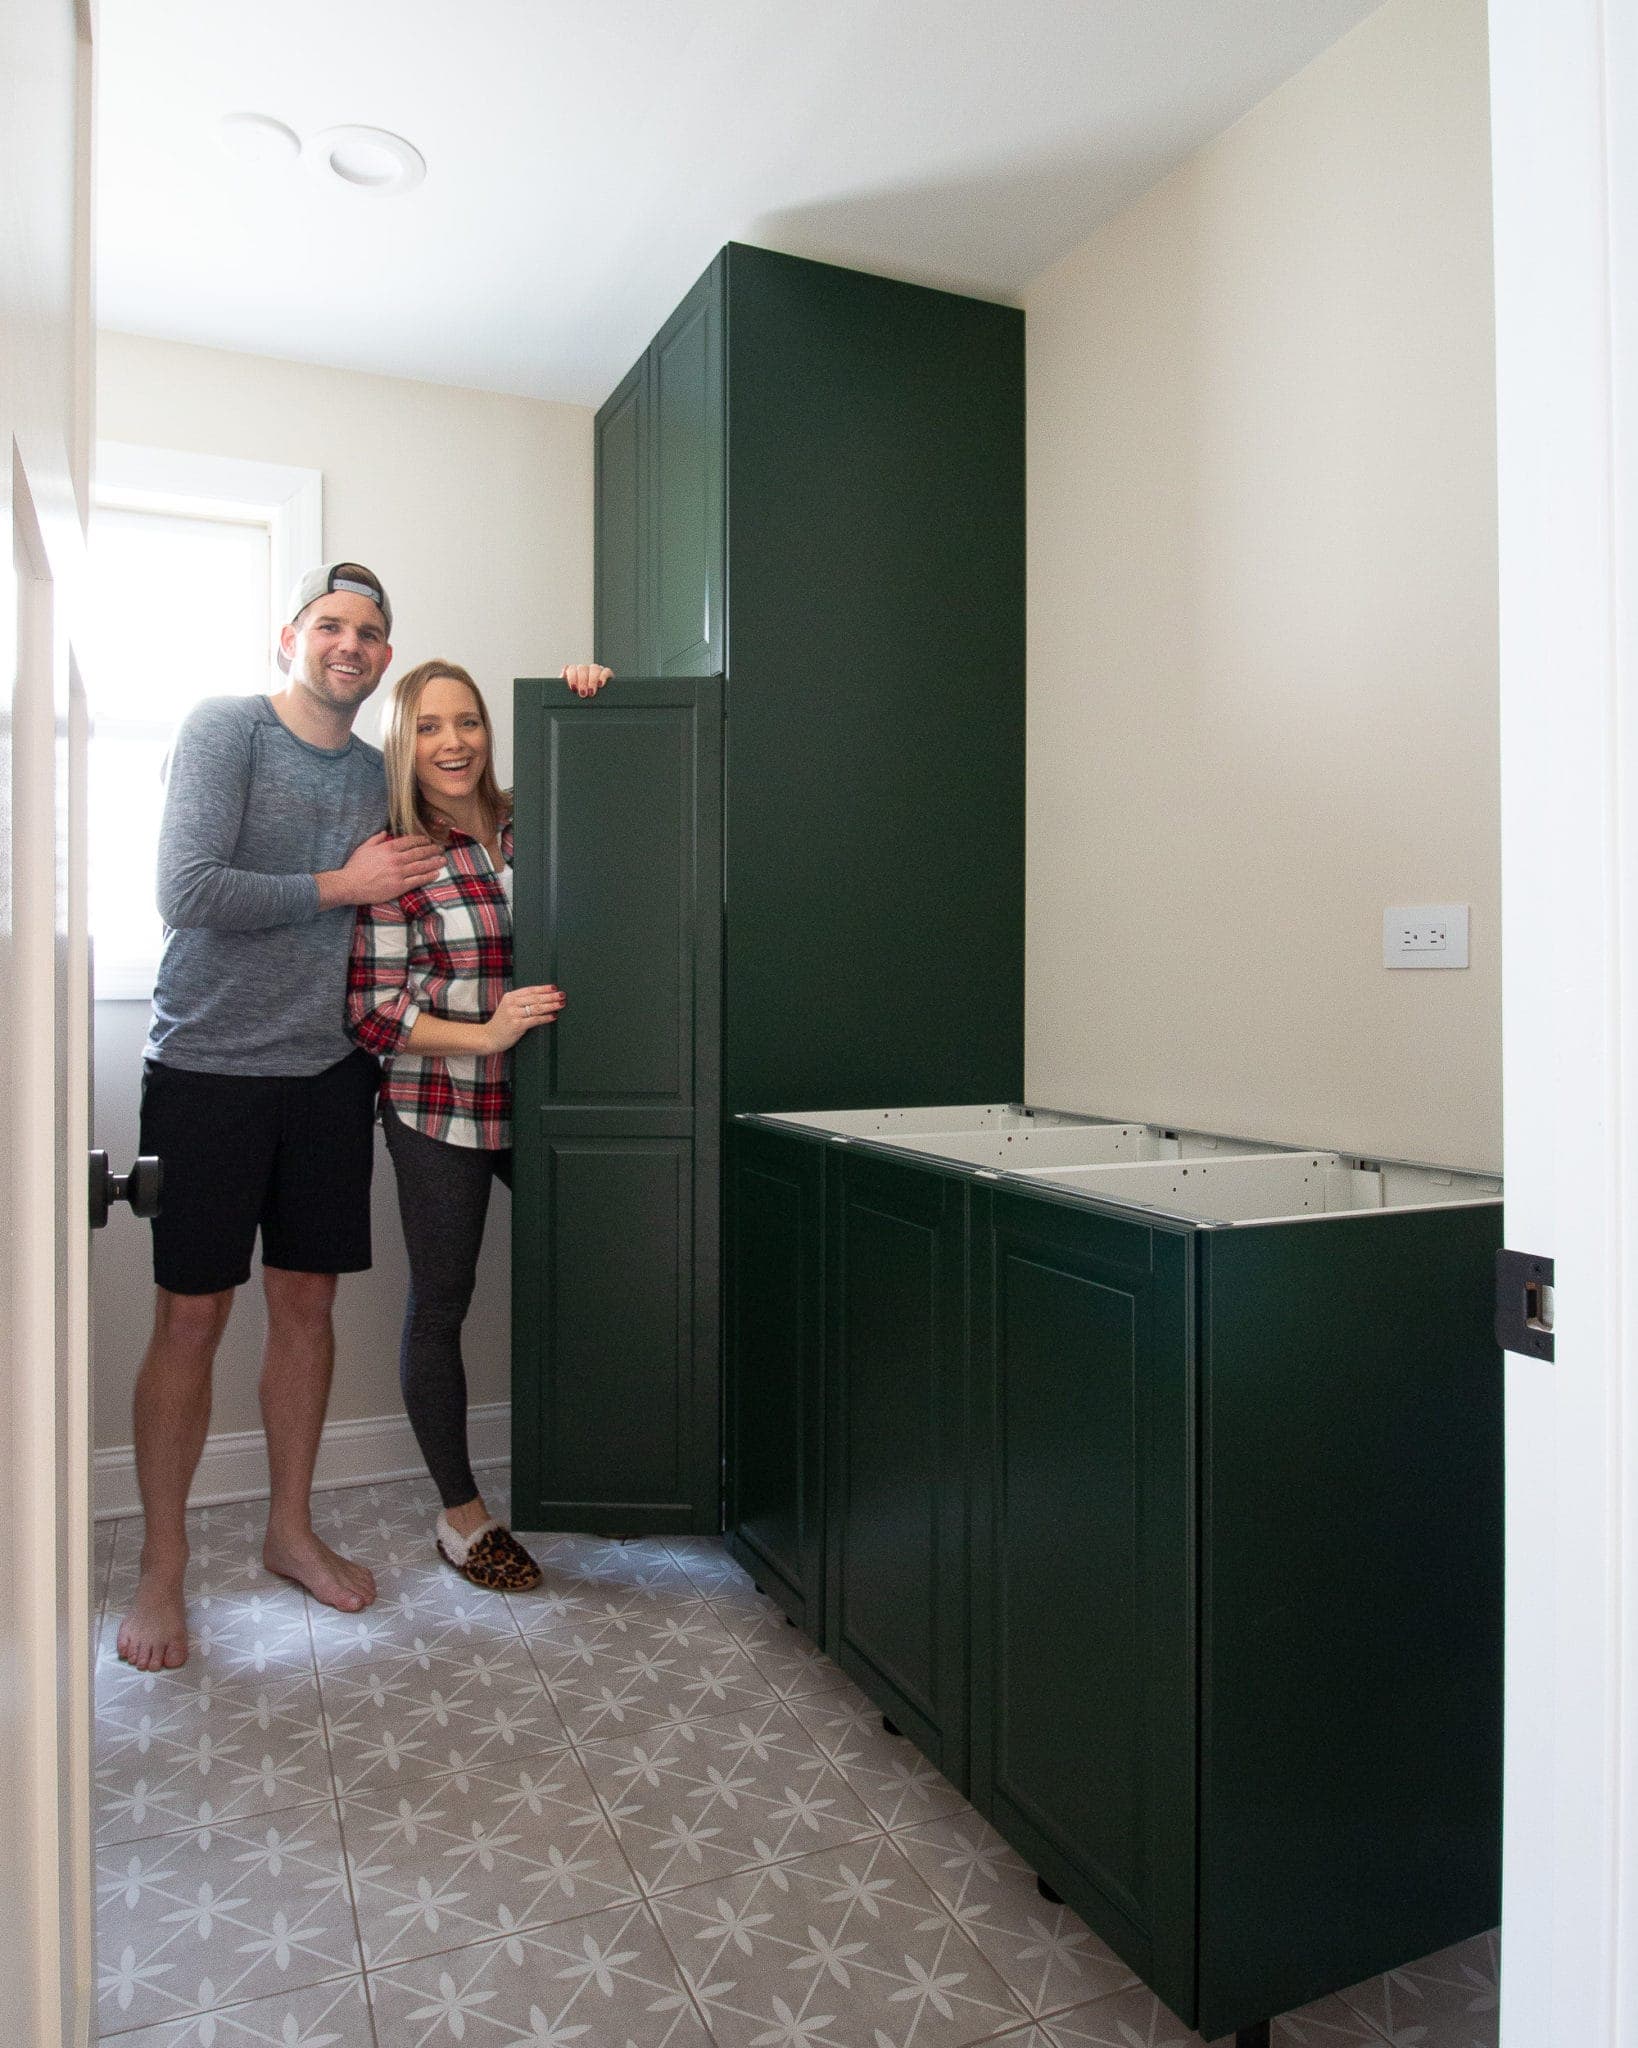
Our setup consisted of three pull-out trash cans (our hampers!) and two tall 15-inch wide and 24-inch deep cabinets. Because our laundry room isn’t huge, we knew we couldn’t build everything there. It would be way too crammed!
Instead, we put the three hamper cabinets together in our living room before getting started on anything in the actual room itself. Once those were completed, we moved on to the two tall cabinets. 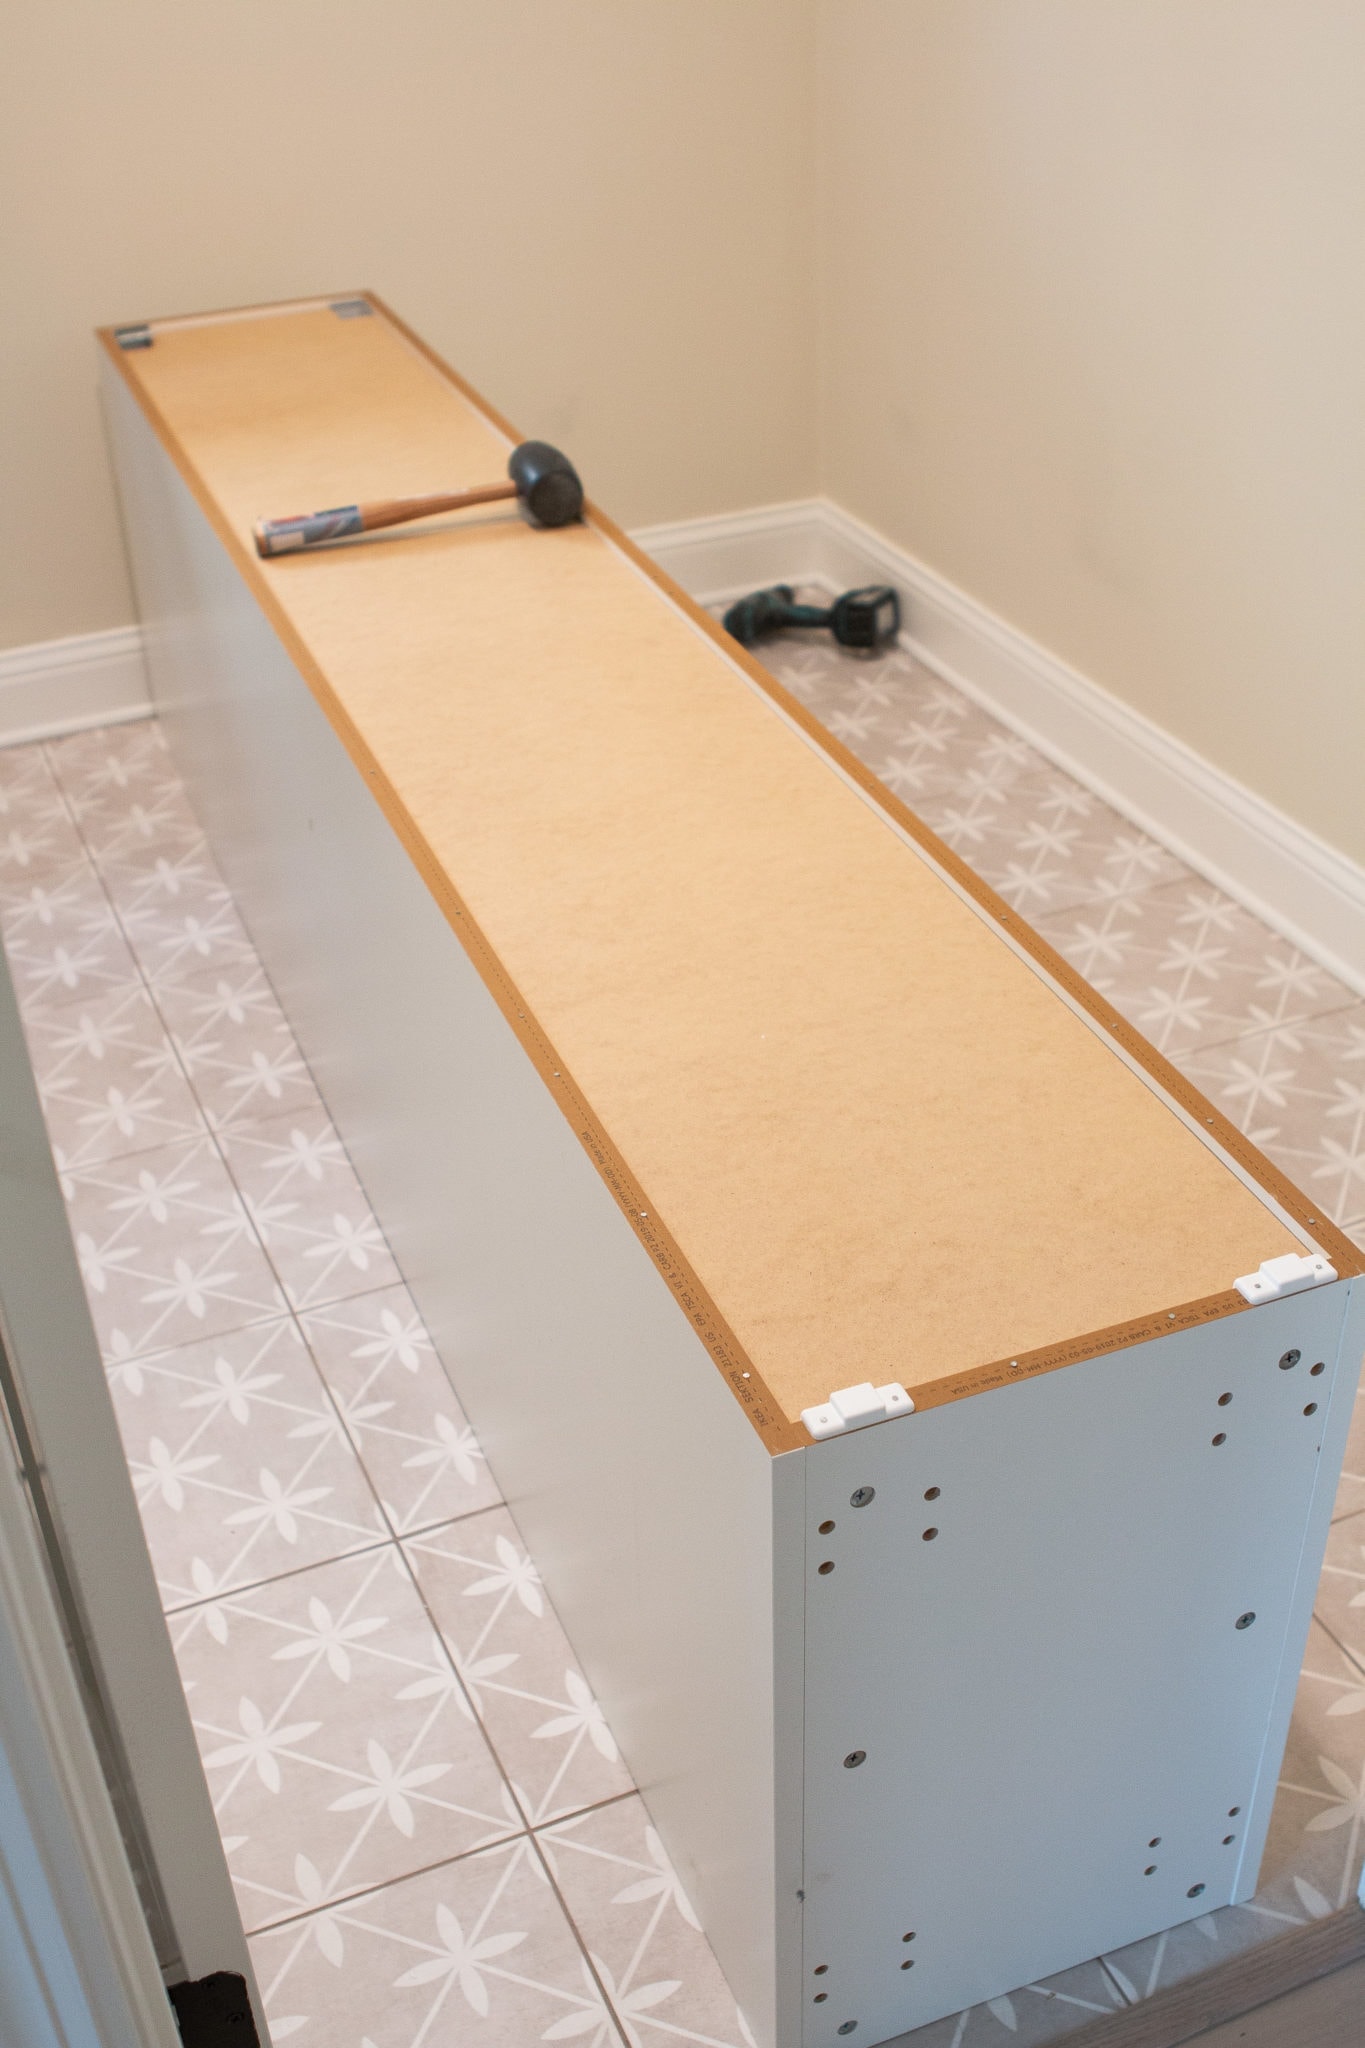 Because these cabinets are 90 inches tall and our ceilings are 96 inches high, we decided to build them right in the room. That way, we wouldn’t have to worry about squeezing them through the doorway. Plus, there was no way we would build them downstairs and carry them up.
It was tight building them in the small laundry room, but we made it work and it was that much easier standing them up since we were already in the right spot!
Quick Tip: Make sure your ceilings are tall enough for your cabinets. In our master bedroom closet, we made the mistake of building one of our units on the ground but soon realized we didn’t have enough clearance to tilt it upright. It was such a pain and slowed down our entire project.
Take lots of measurements ahead of time to make sure all your cabinets will fit!
3. Have the Right Tools Handy to Build Your Kitchen Cabinets.
 When it comes to installing kitchen cabinets, you’ll need to have lots of tools on hand. Here are some of the tools you’ll need to have available:
Affiliate links used.
- Philips Screwdriver
- Flathead Screwdriver
- Hammer
- Tape Measure
- Drills (We each had one to keep things moving!)
- Countersink Drill Bit
- Small Level
- Medium Level
- Dremel or Hacksaw (to cut the metal rail)
- Stud Finder
- Cabinet Screws
- Heavy-Duty Anchors/Screws
- Jigsaw
- Clamps
- Circular Saw
- Nail Gun
- Miter Saw
- Crowbar & Utility Knife (to remove baseboard)
Many power tools are on this list, which surprised me a bit. Depending on your setup, you might not need to use them all.
The IKEA system is secured via a long metal rail, so you will need some tools to cut that if you choose IKEA when adding cabinets to your laundry room. We used our Dremel with a metal bit but switched to a hacksaw halfway through the project because it was hard to get all the way through with our round bit (we needed a straight one for this job!).
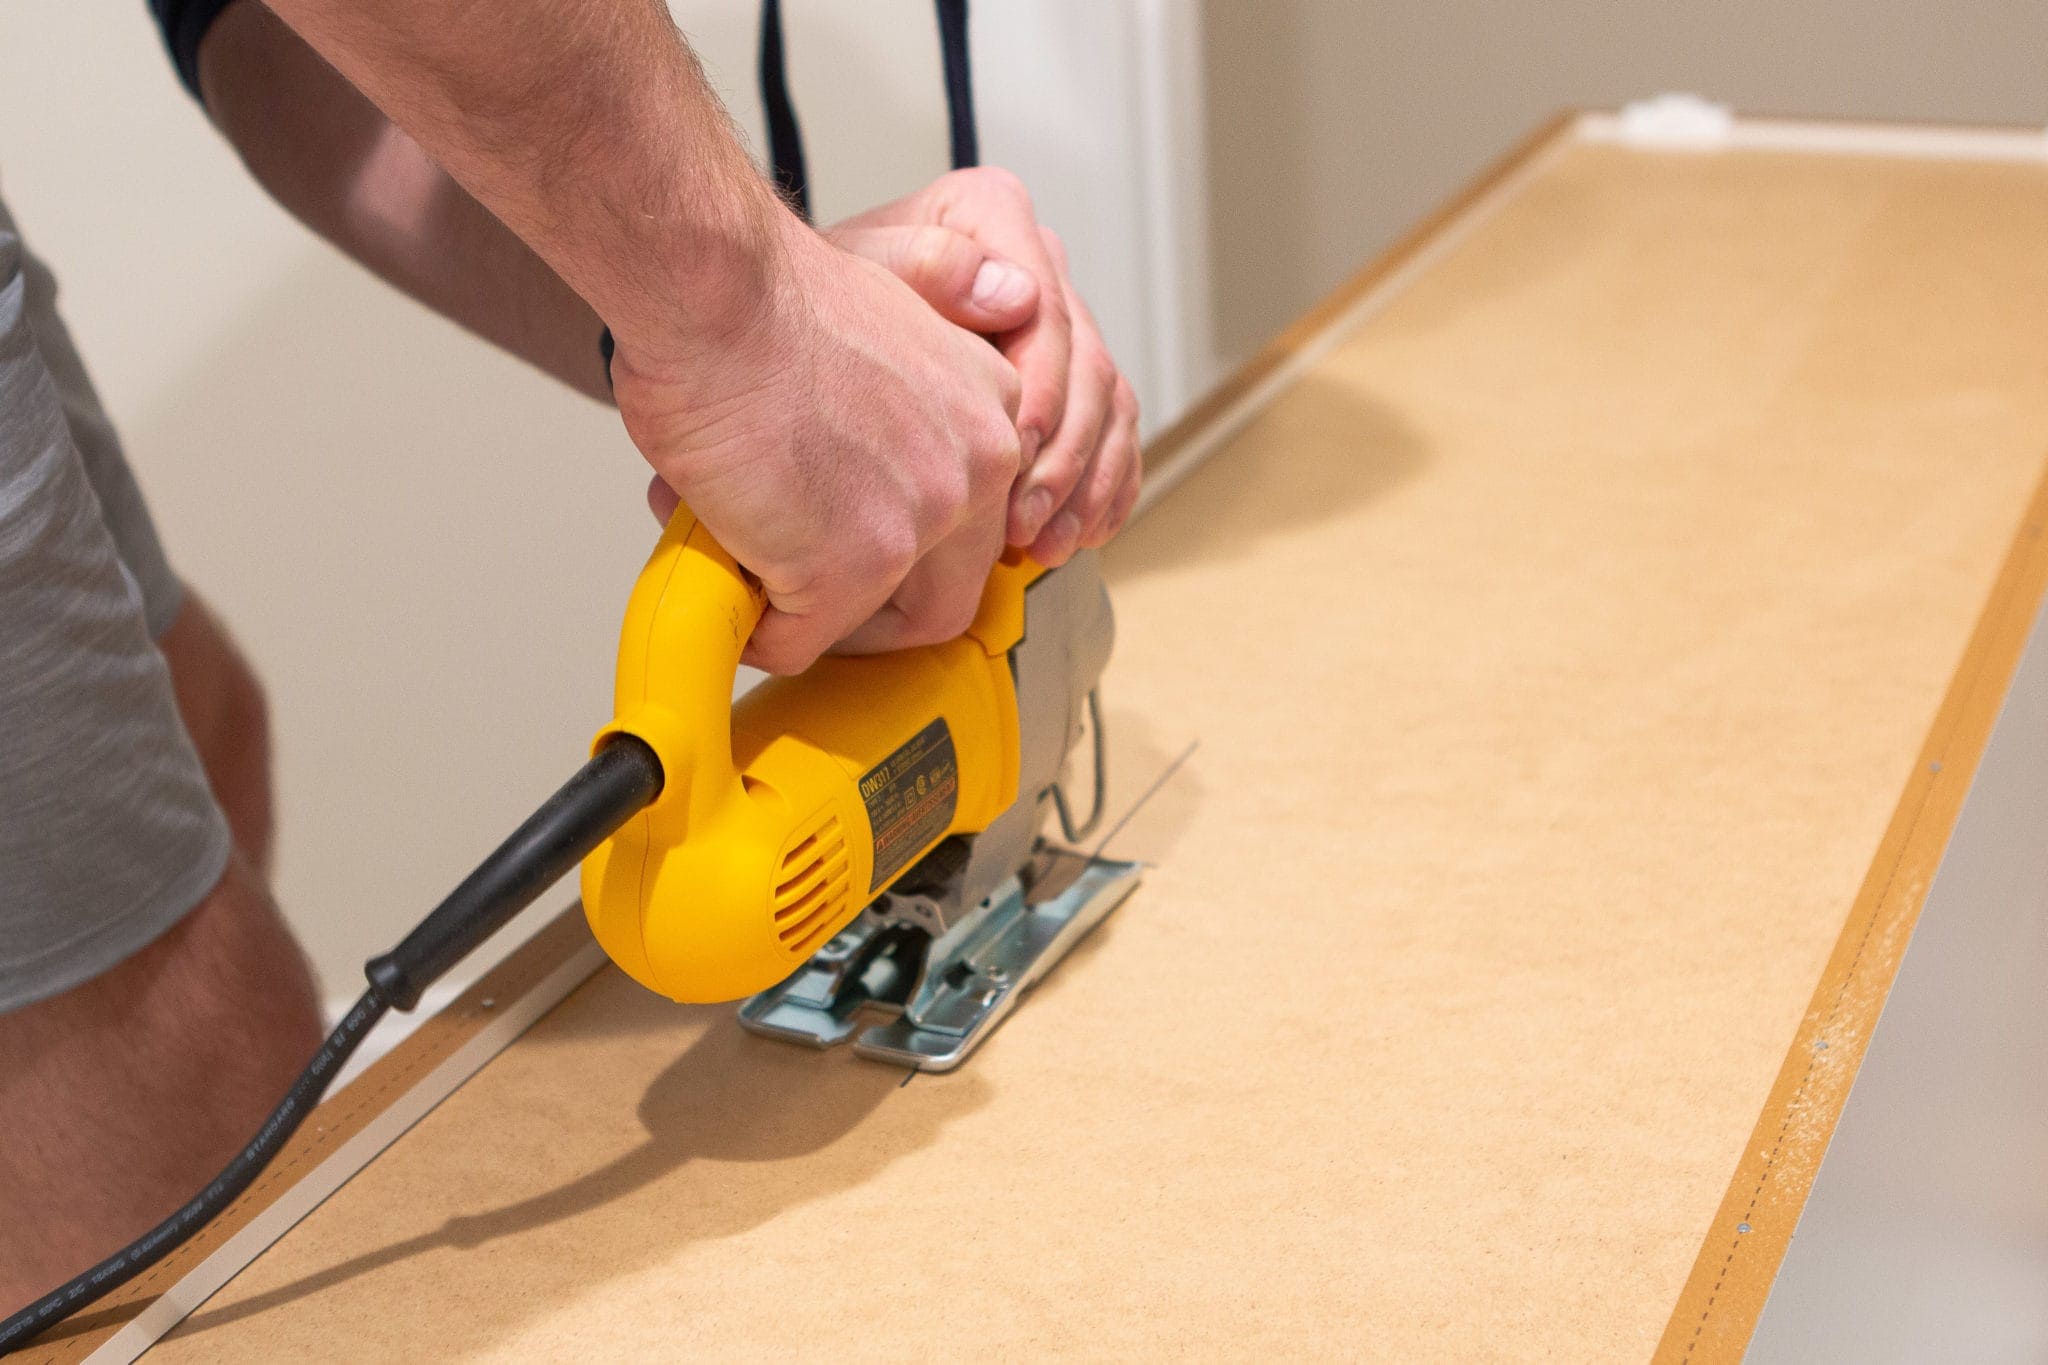
We also had to use our jigsaw to cut out a portion of the back of one cabinet, so our electrical outlet would be accessible. If you don’t have that situation, you might not need to have a jigsaw on hand. 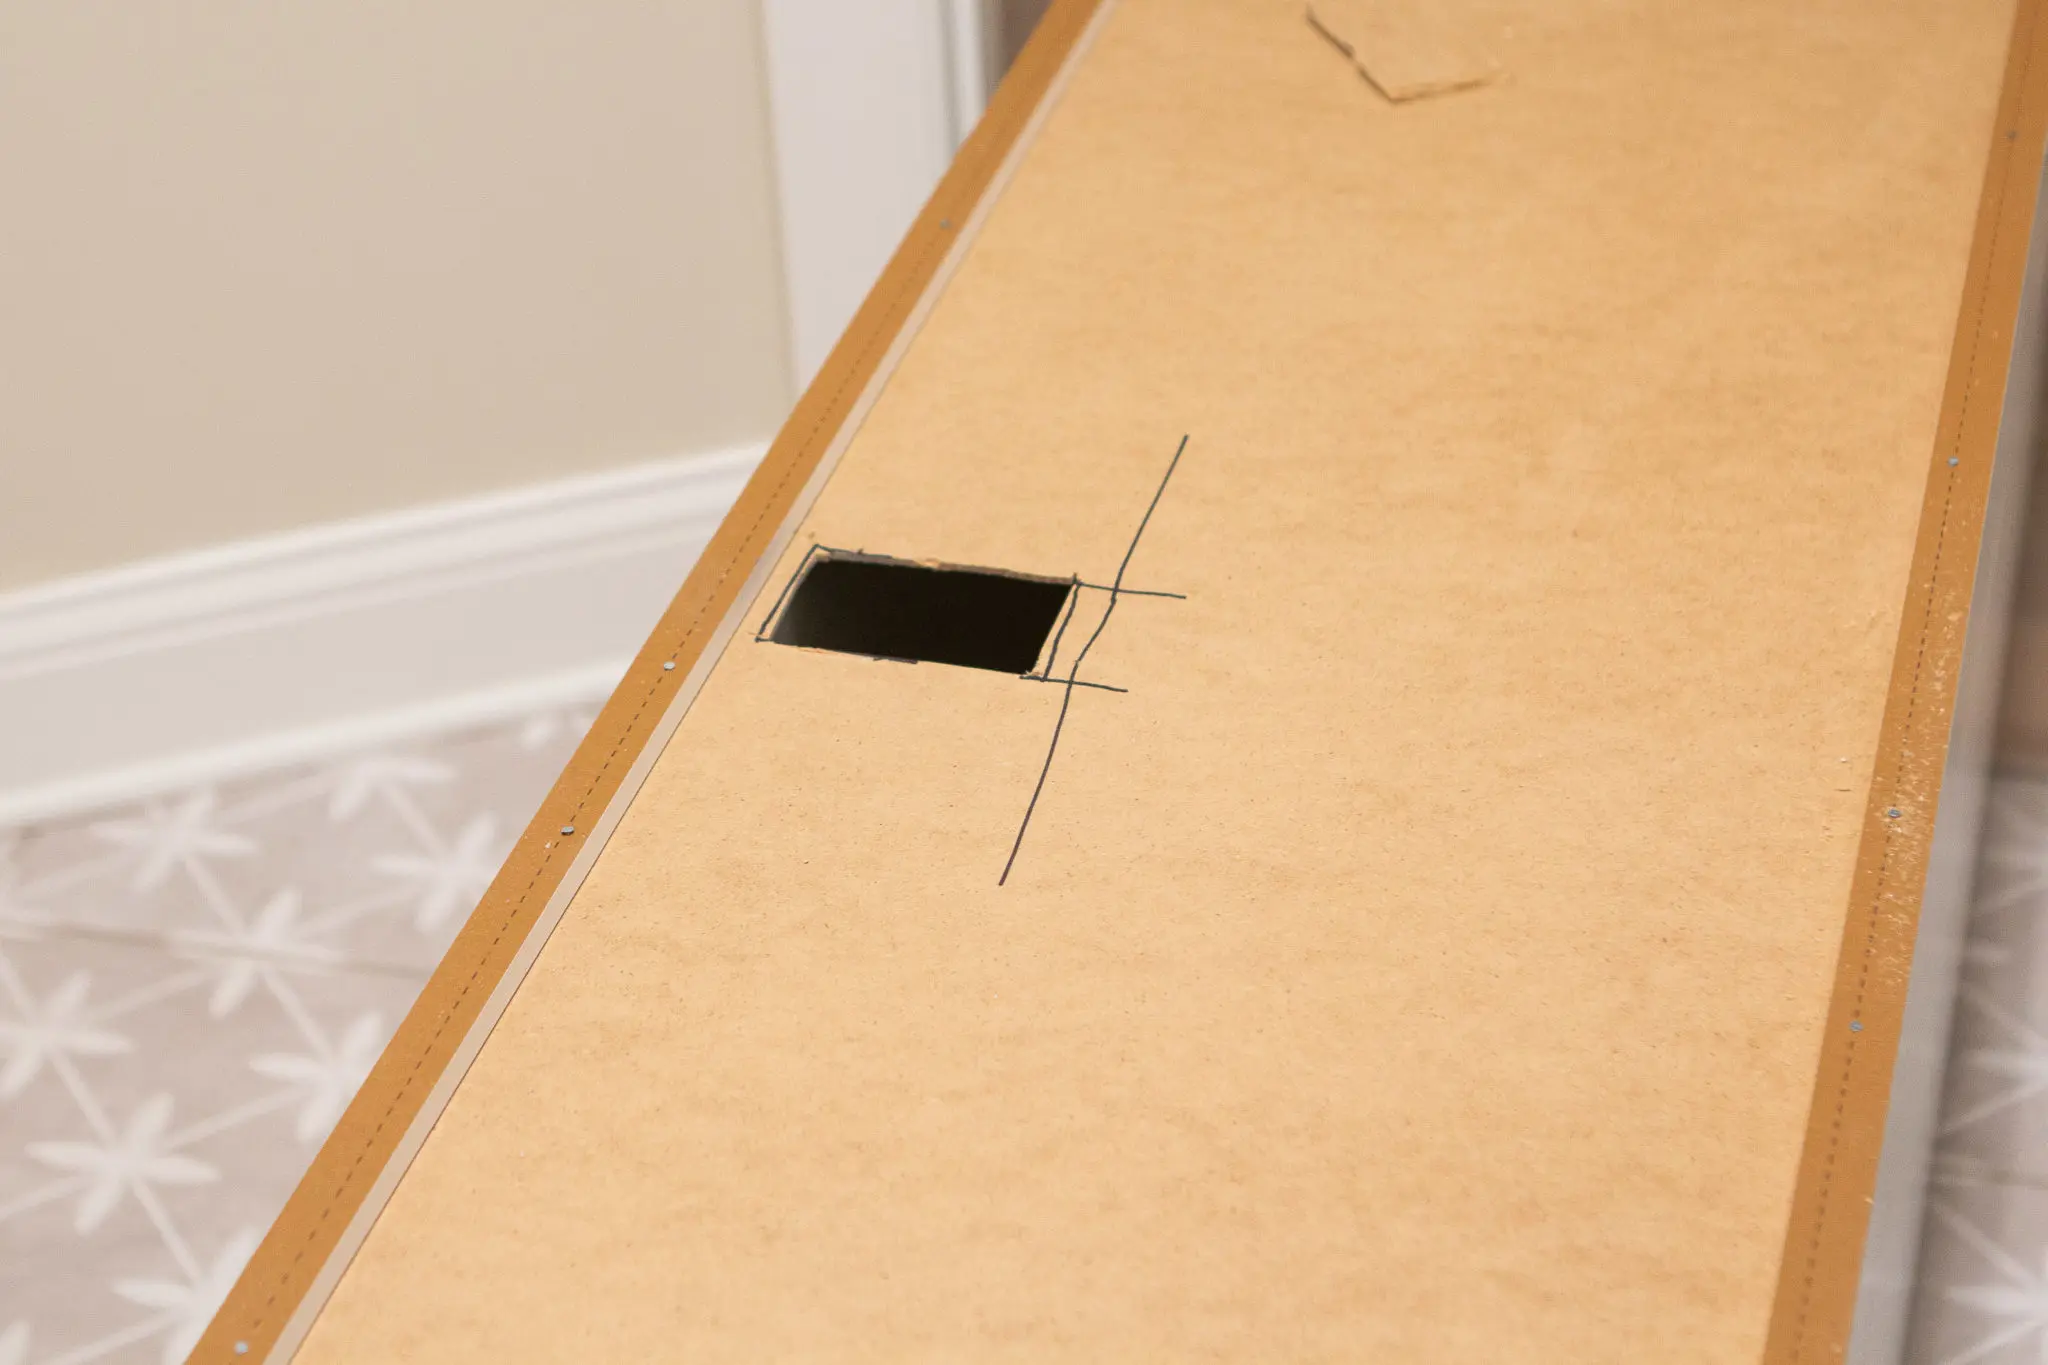
Quick Tip: If you have to cut the back of your IKEA kitchen cabinets, a few readers have a genius way to mark the exact spot on the cabinet. Put toothpaste (or lipstick) on the outline of the cabinet and then position your cabinet up to the wall so it makes a mark on there. You’ll then know where to cut!
4. Keep Things Level During Your Cabinet Installation. 
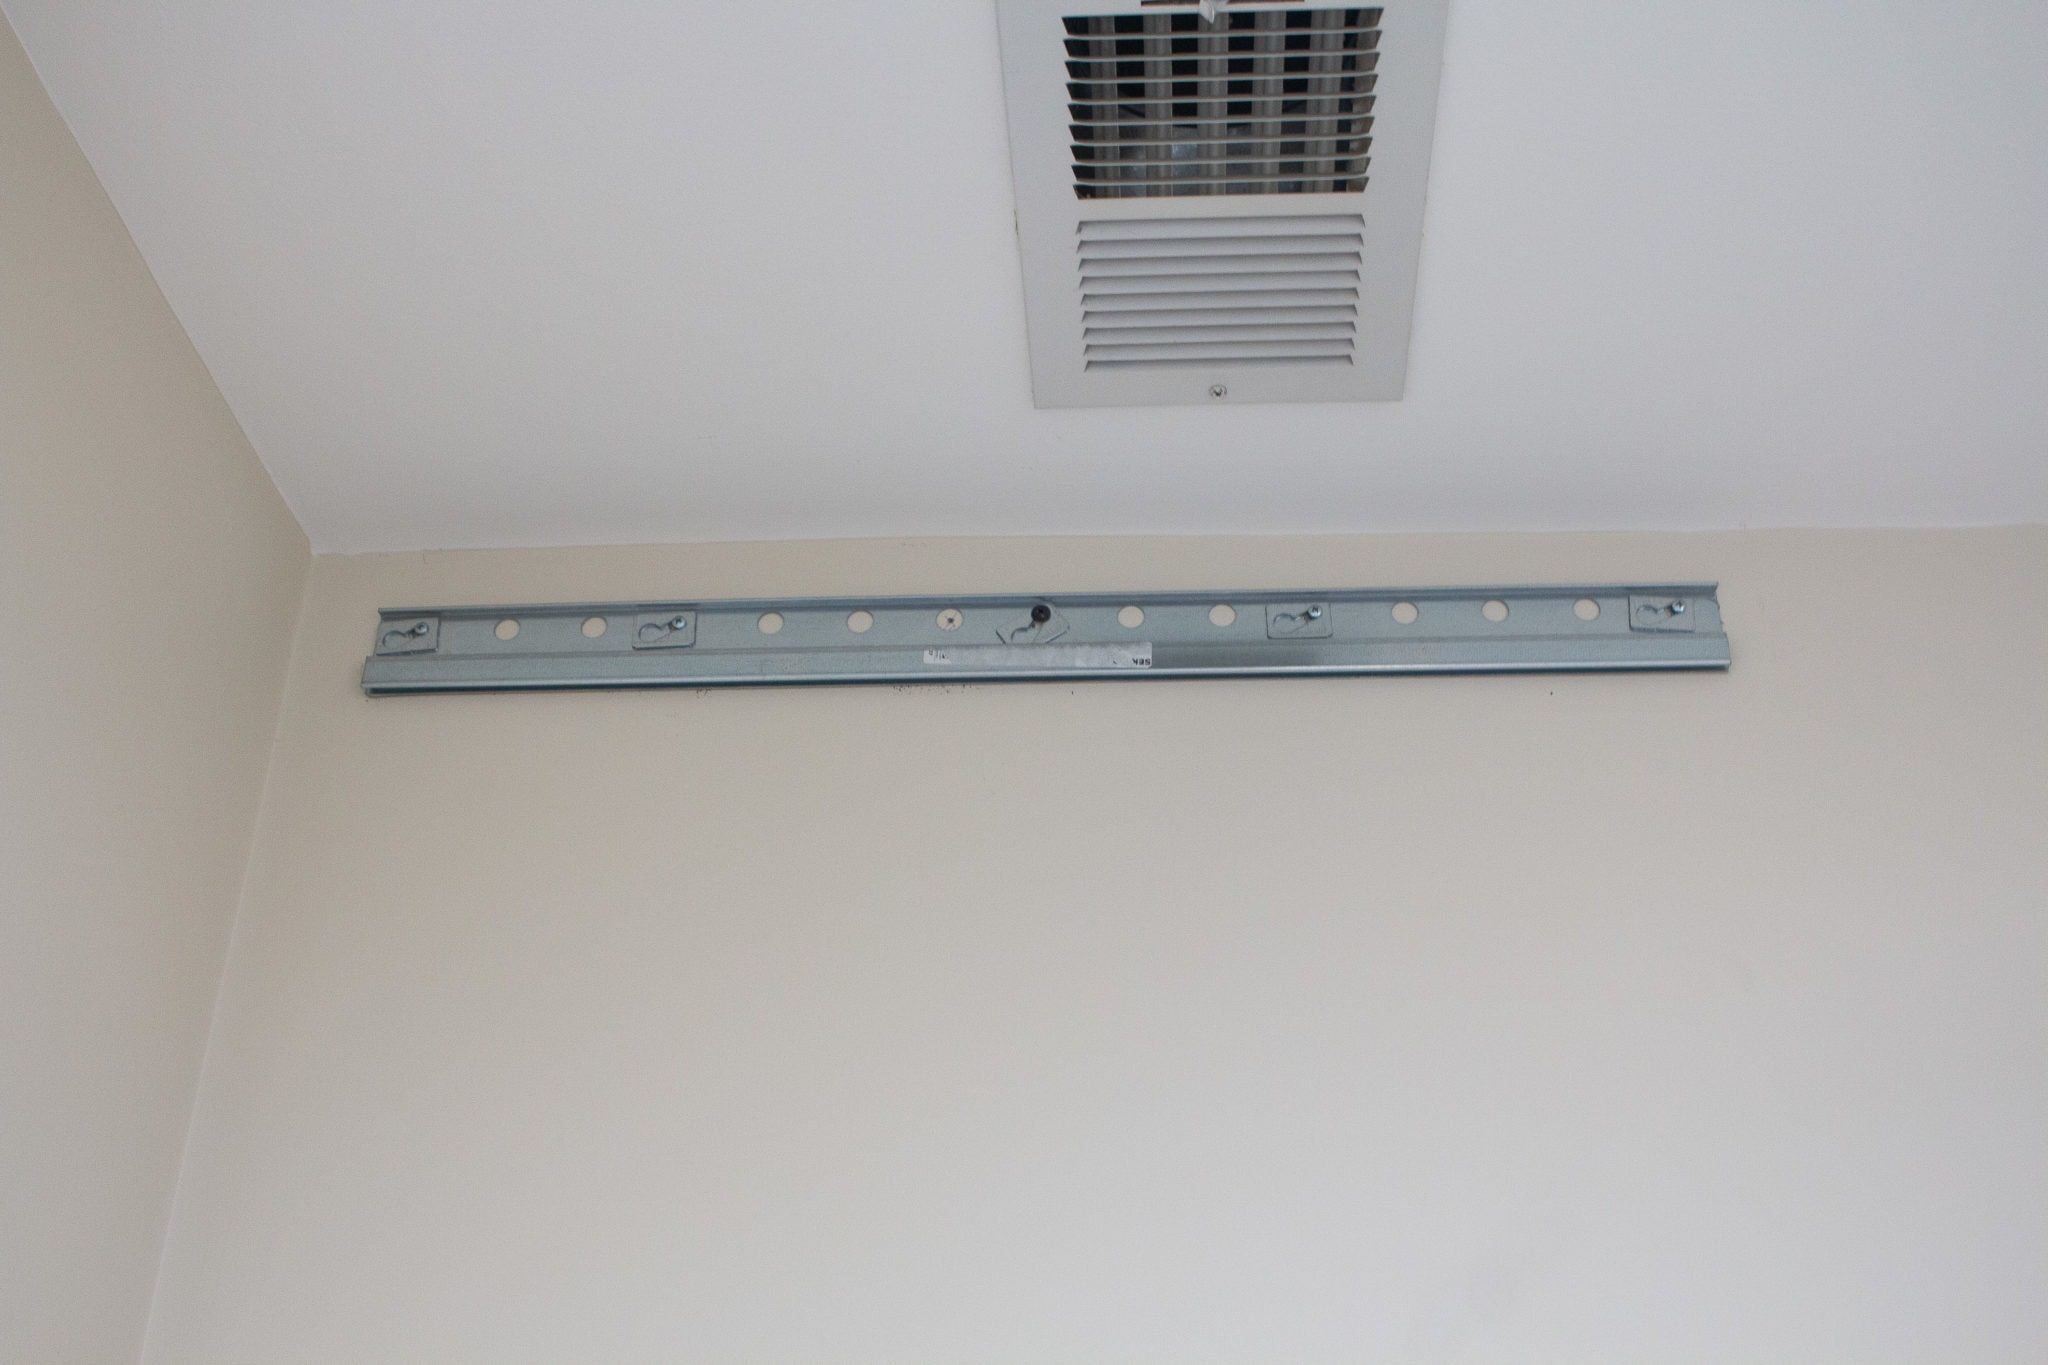
Once your cabinets are built and your rail is cut, it’s time to hang it. I can’t emphasize enough how important it is that your rail is level. Triple-check this over and over to make sure it’s perfect before screwing it in.
A level rail will affect the rest of your installation, and you don’t want wonky wall cabinets! We used both small and medium-sized levels for this project (so have both handy!).
5. Pay Attention to Stud Locations As You Install Your Kitchen Cabinets.

Before drilling, mark your stud locations to ensure secure cabinet mounting. IKEA cabinets are designed with a cabinet box system, so securing them to studs guarantees they can handle the weight of laundry baskets, detergents, and everyday life.
When hanging the rails, try your best to hit as many wall studs as possible. That will ensure that things are as sturdy and safe as possible.
IKEA recommends securing the rail to the wall every 12 inches, and since most studs are 16 inches apart, you’re bound to miss a few studs. In these areas, make sure you use heavy-duty anchors. These are the ones we used that worked like a charm!
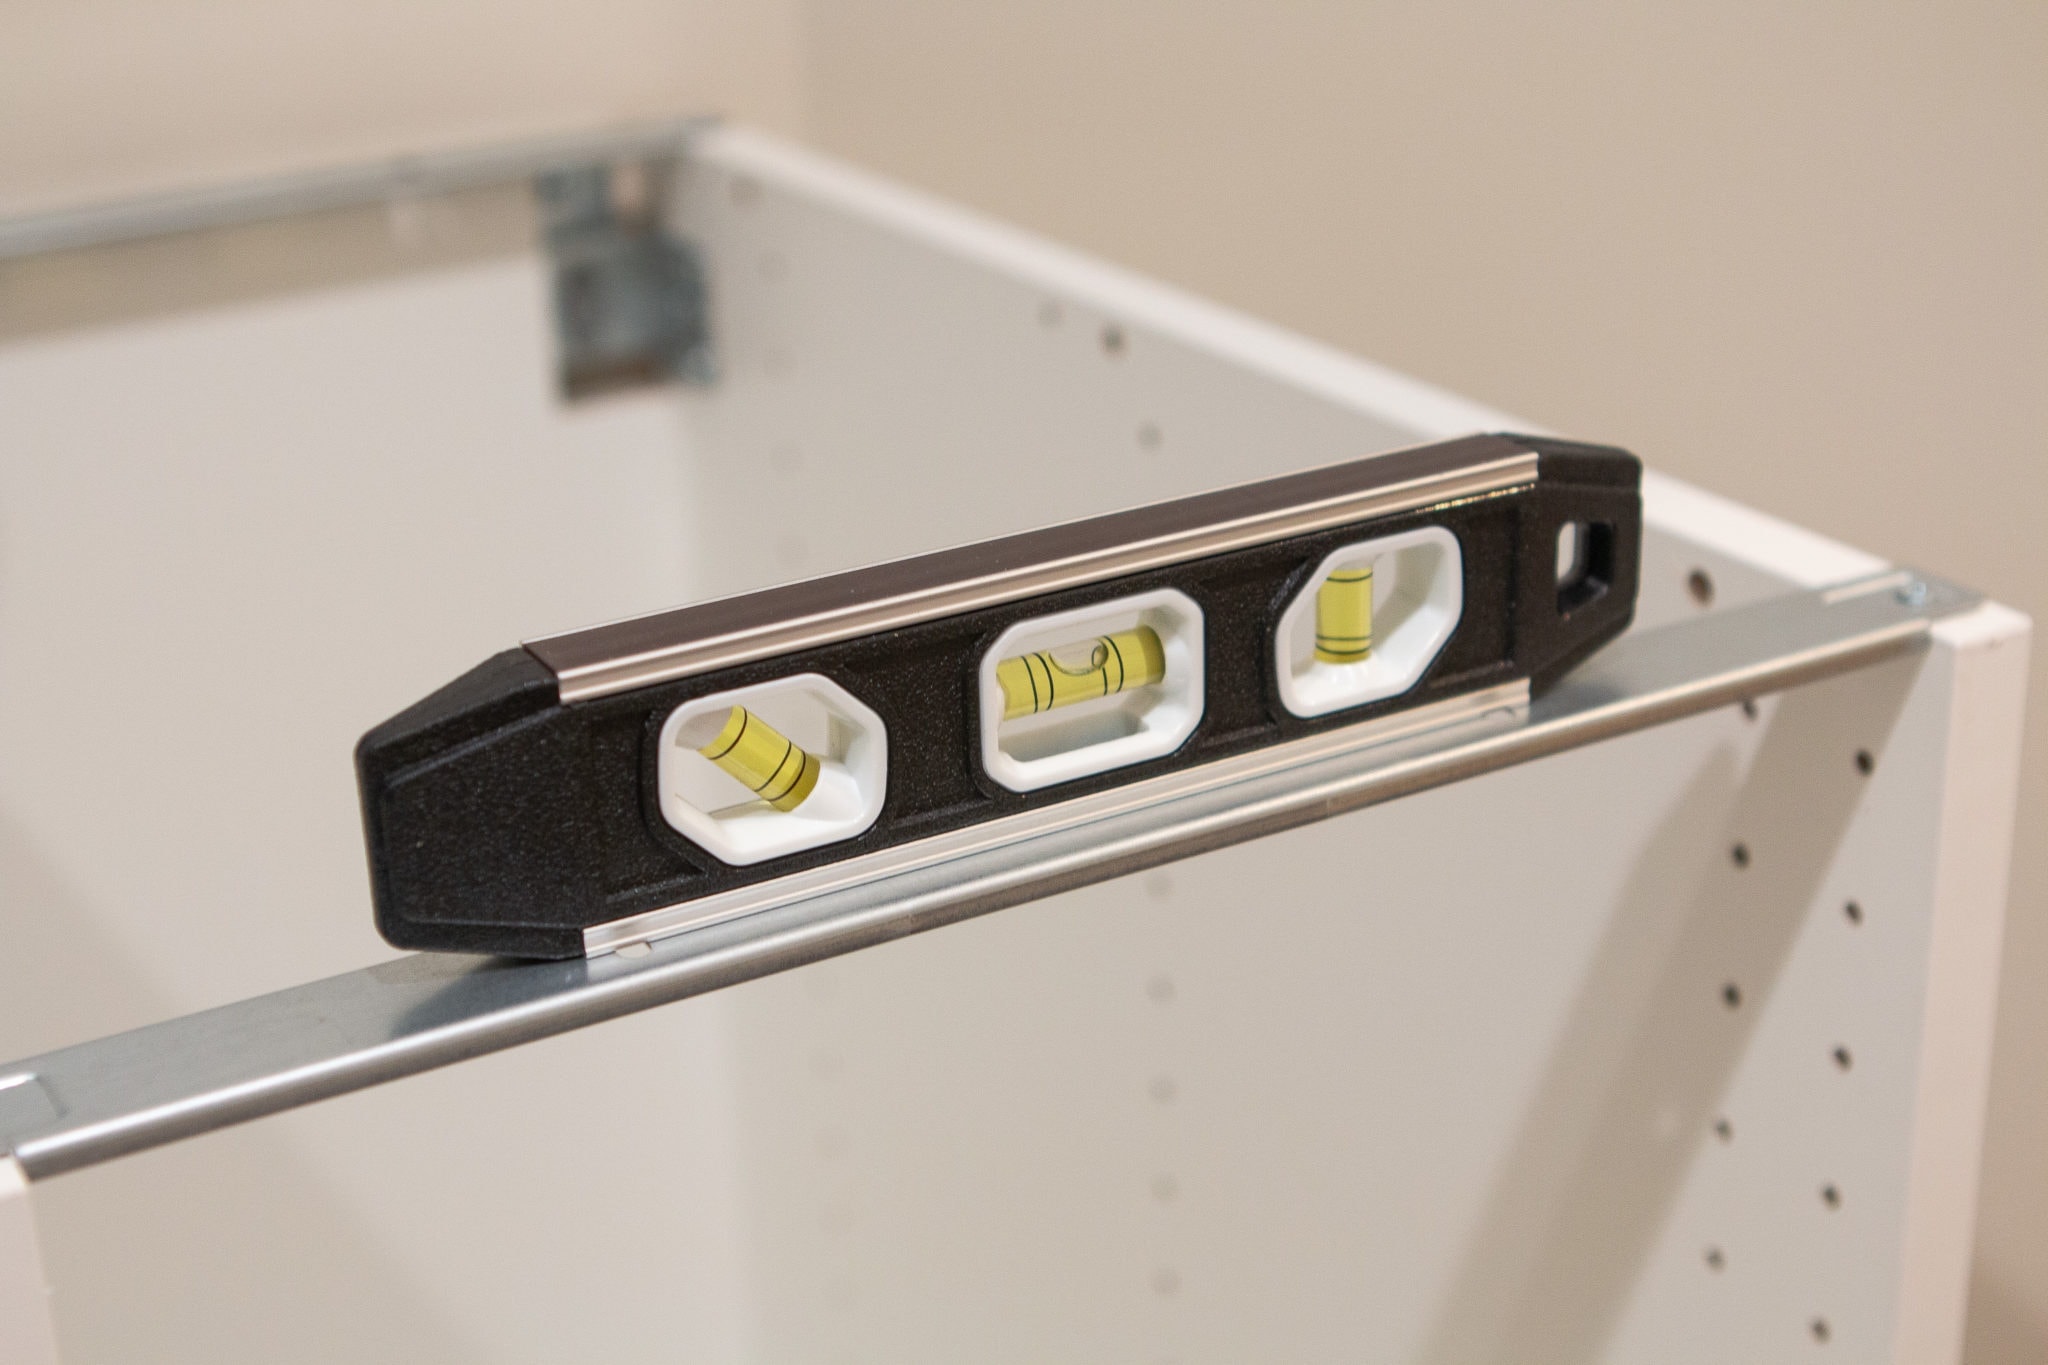 Once your cabinets are hung, you want to make sure things are still level. The legs on each cabinet will come in handy to make little tweaks.
We used our small level to ensure things were good front-to-back and side-to-side. We then moved the legs up and down accordingly. It’s vital to check that each cabinet is level and good to go before moving on to the next one!
6. Use Clamps & A Countersink Bit to Connect Cabinets.

You’ll want to connect each cabinet to the next as you install them. This is important for both lower and upper cabinets.
This is where clamps come in handy (this is a good pack of them)! When we were installing kitchen cabinets in our laundry room, we placed one clamp on the top of the cabinet and one on the bottom to squeeze the cabinets before screwing them together.
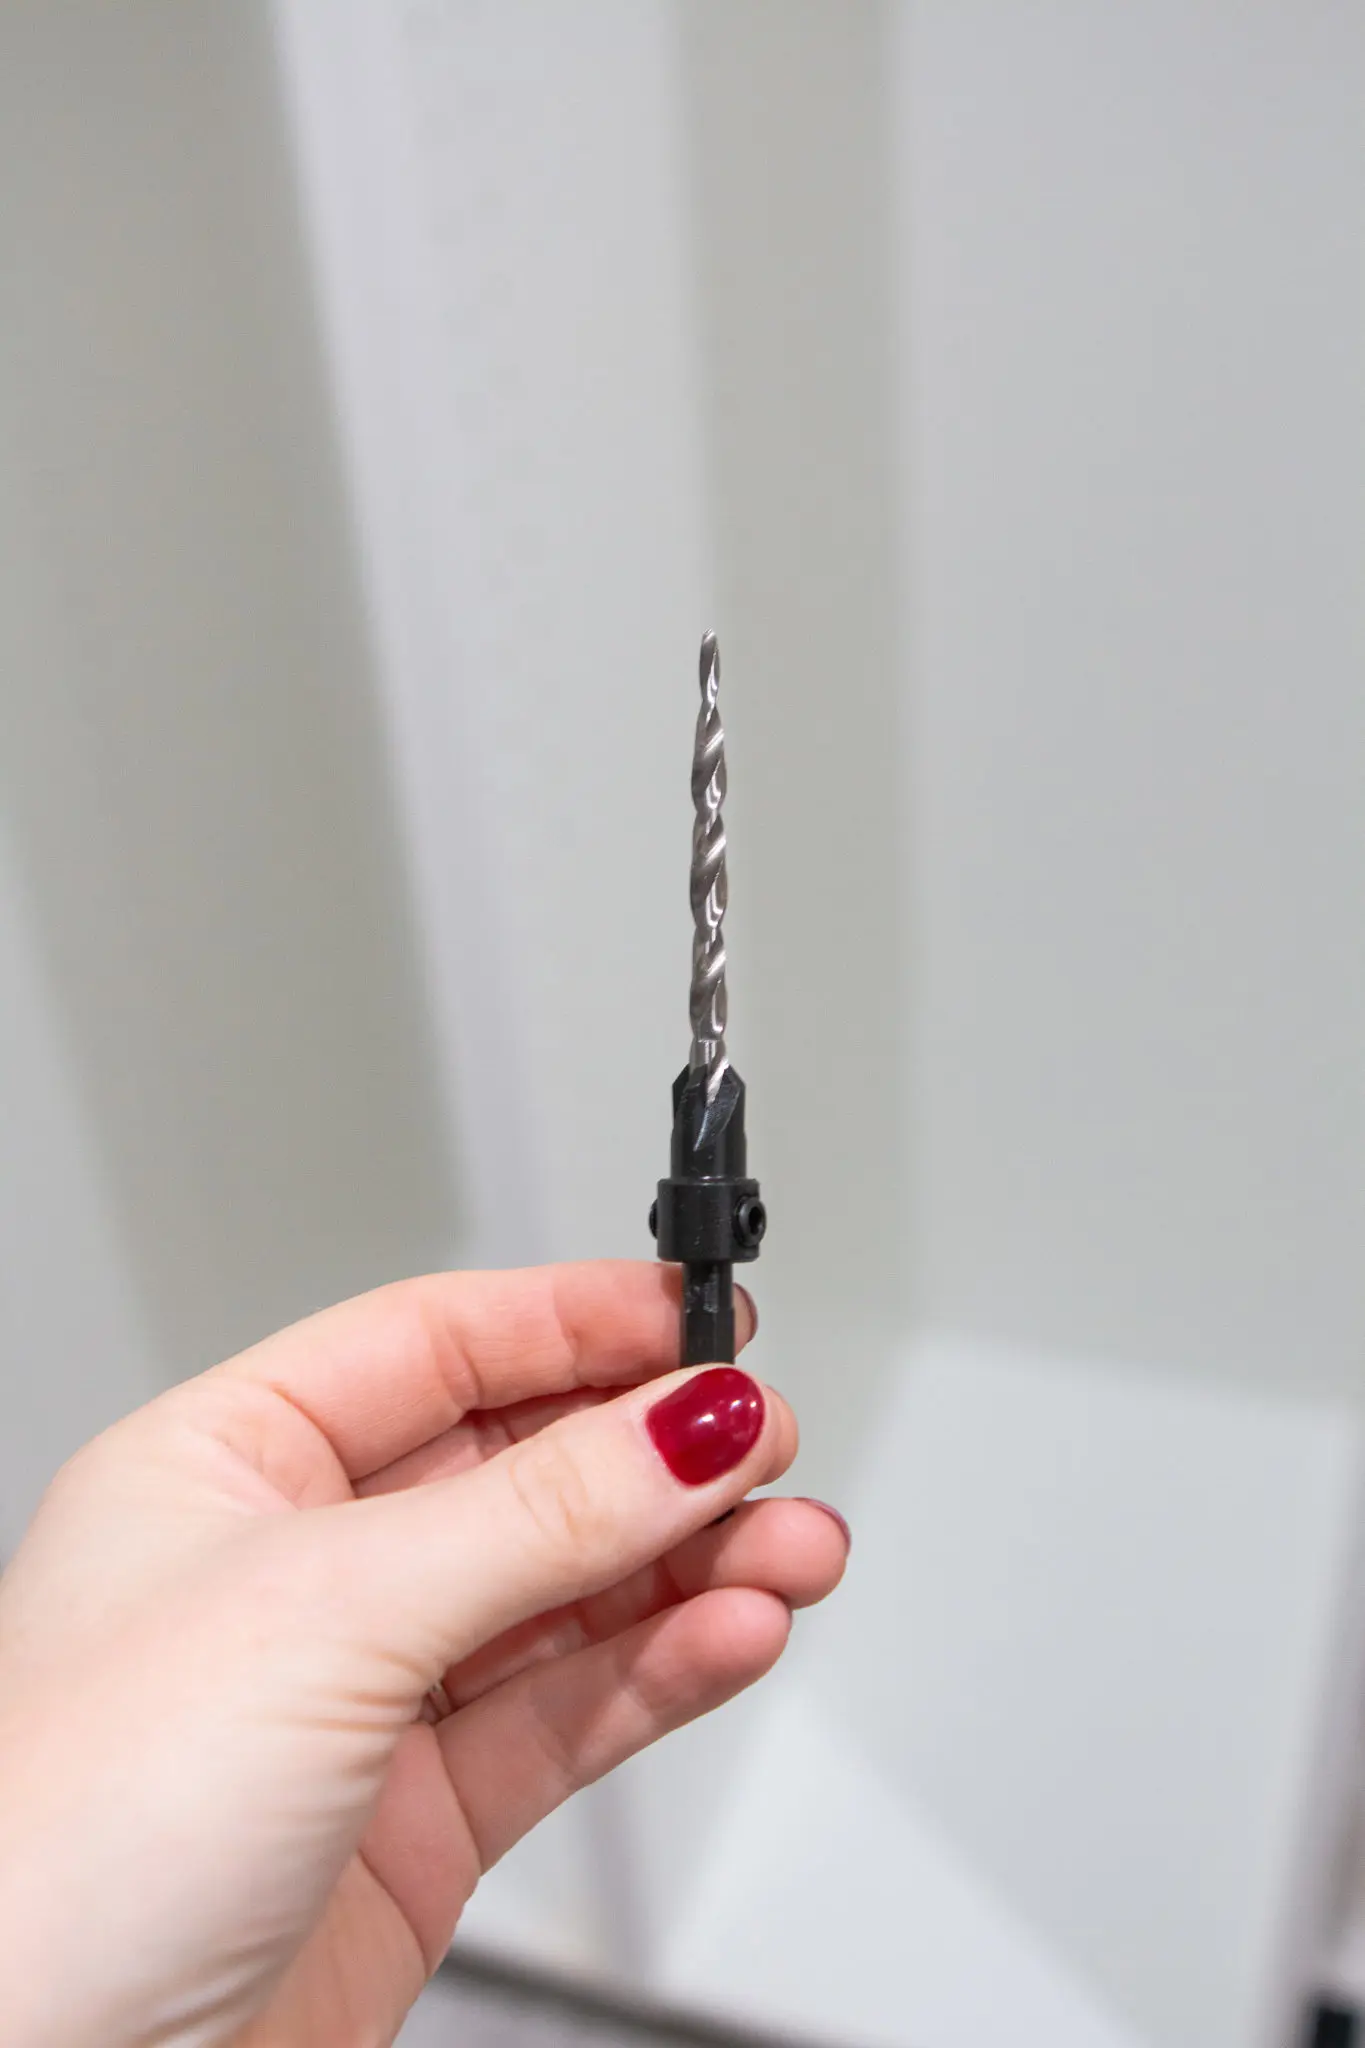
I then made pilot holes into the cabinets before attaching them. I used a countersink bit (here’s a good set of them). This type of drill bit allows a screw to sit flush against the wood (instead of sticking out). I highly recommend picking up a countersink bit, so your screws disappear into the cabinets.  Again, as you attach each cabinet together, ensure everything is level as you go. This is so very important!
7. Add A Toe Kick to Your Laundry Room Cabinets.

It’s the finishing touches that will really bring the entire look of your laundry room cabinets together. Finn and I installed all of the cabinets in one weekend and then picked up the next phase of the project the next.
I actually posted the above photo on Instagram, and a few people remarked on the “ugly cabinet legs.” I chuckled because these cabinets weren’t yet finished! Yes, they were installed, but we still needed to finish the toe kick, filler pieces, and crown to make things look amazing.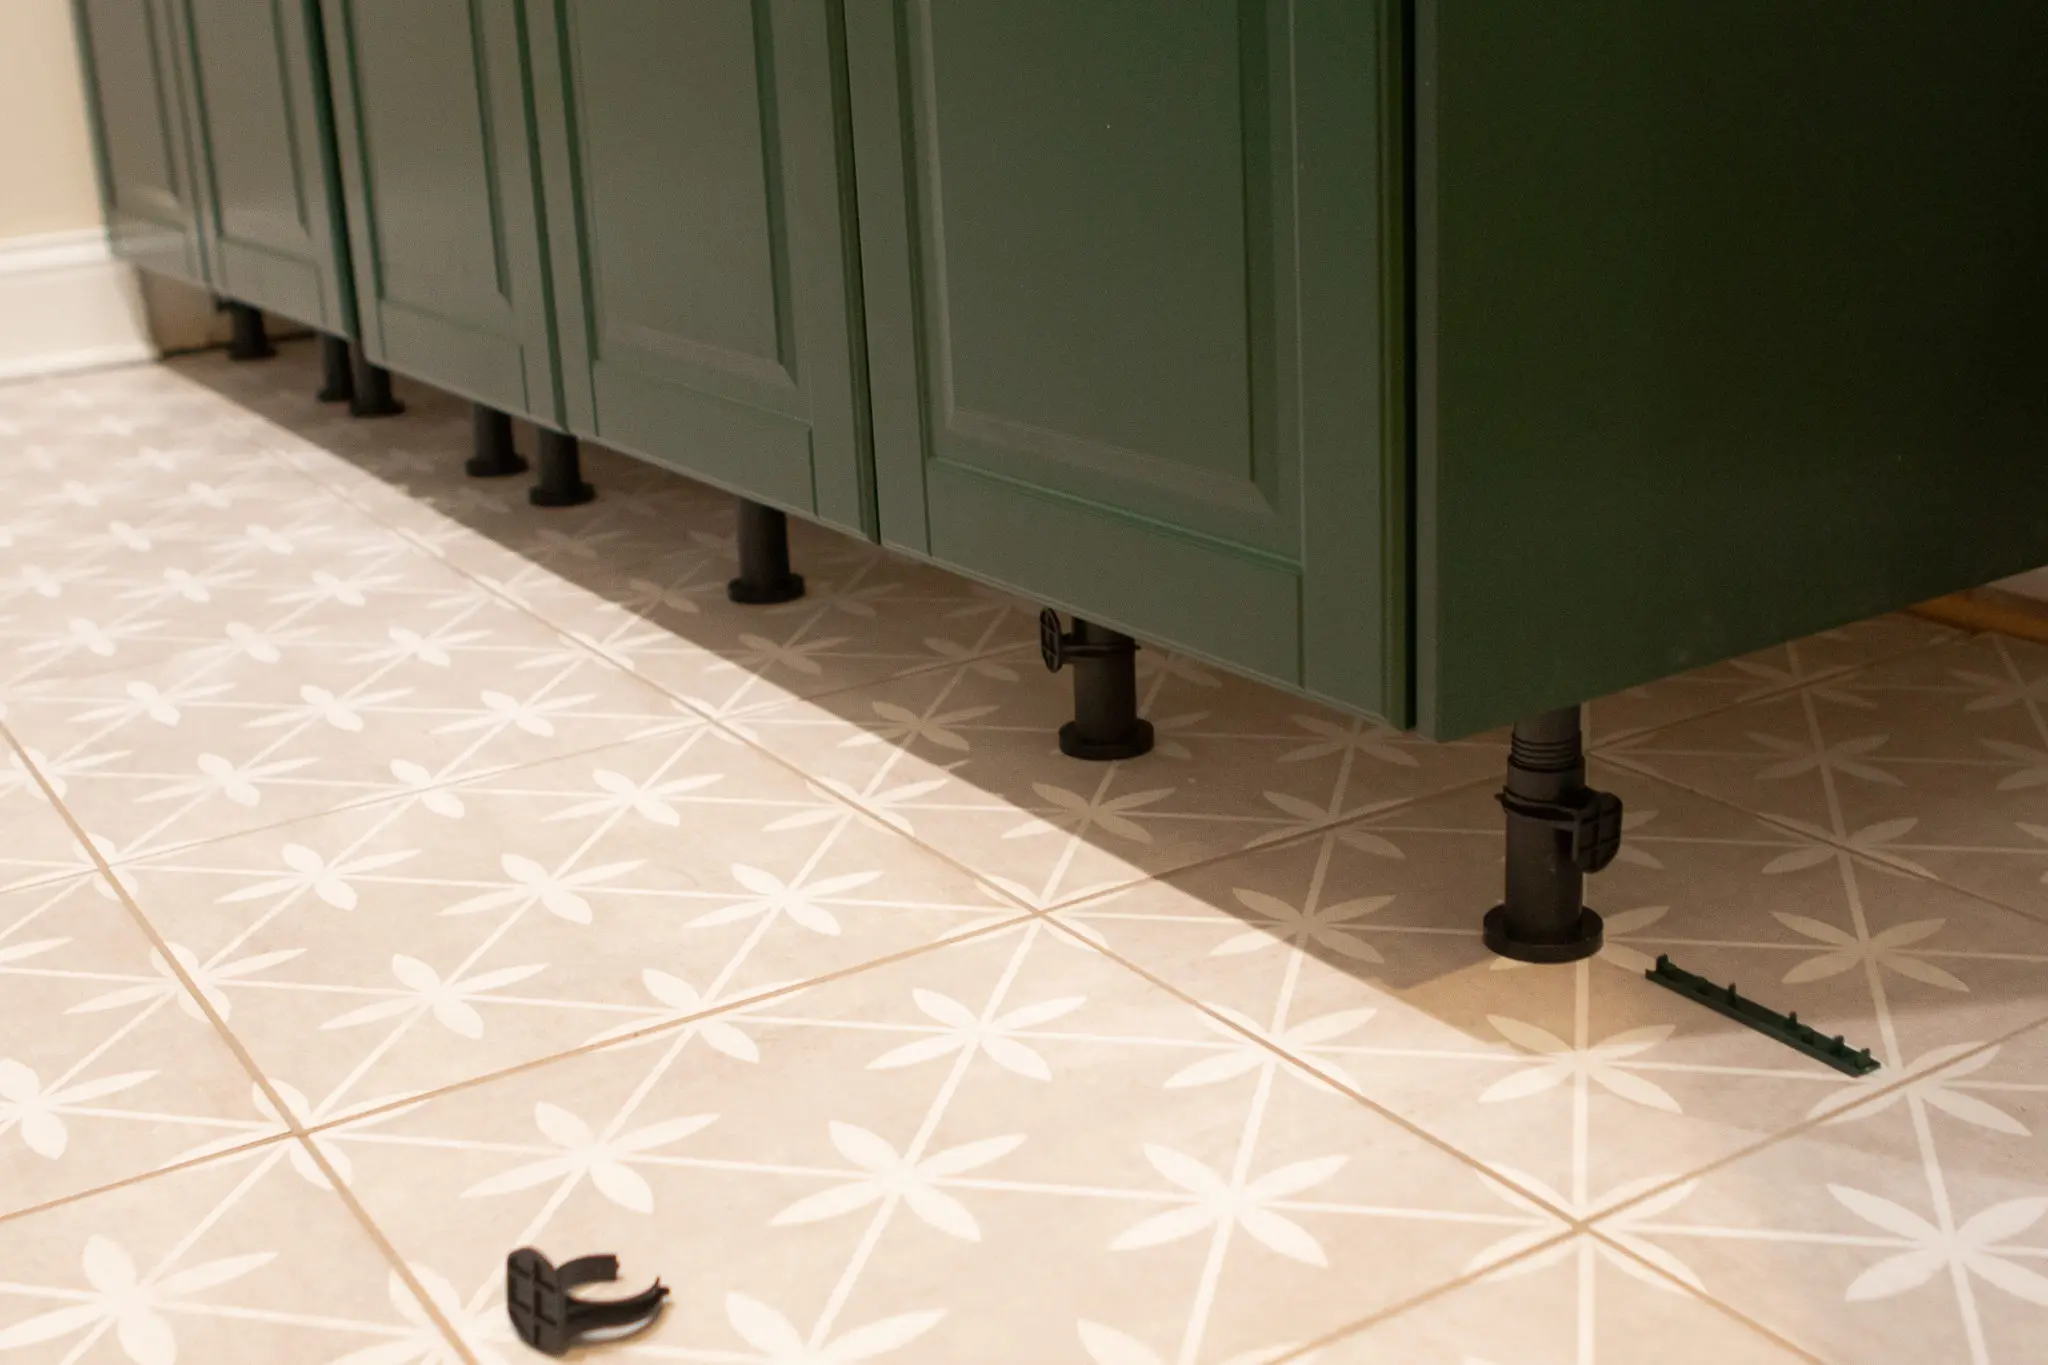
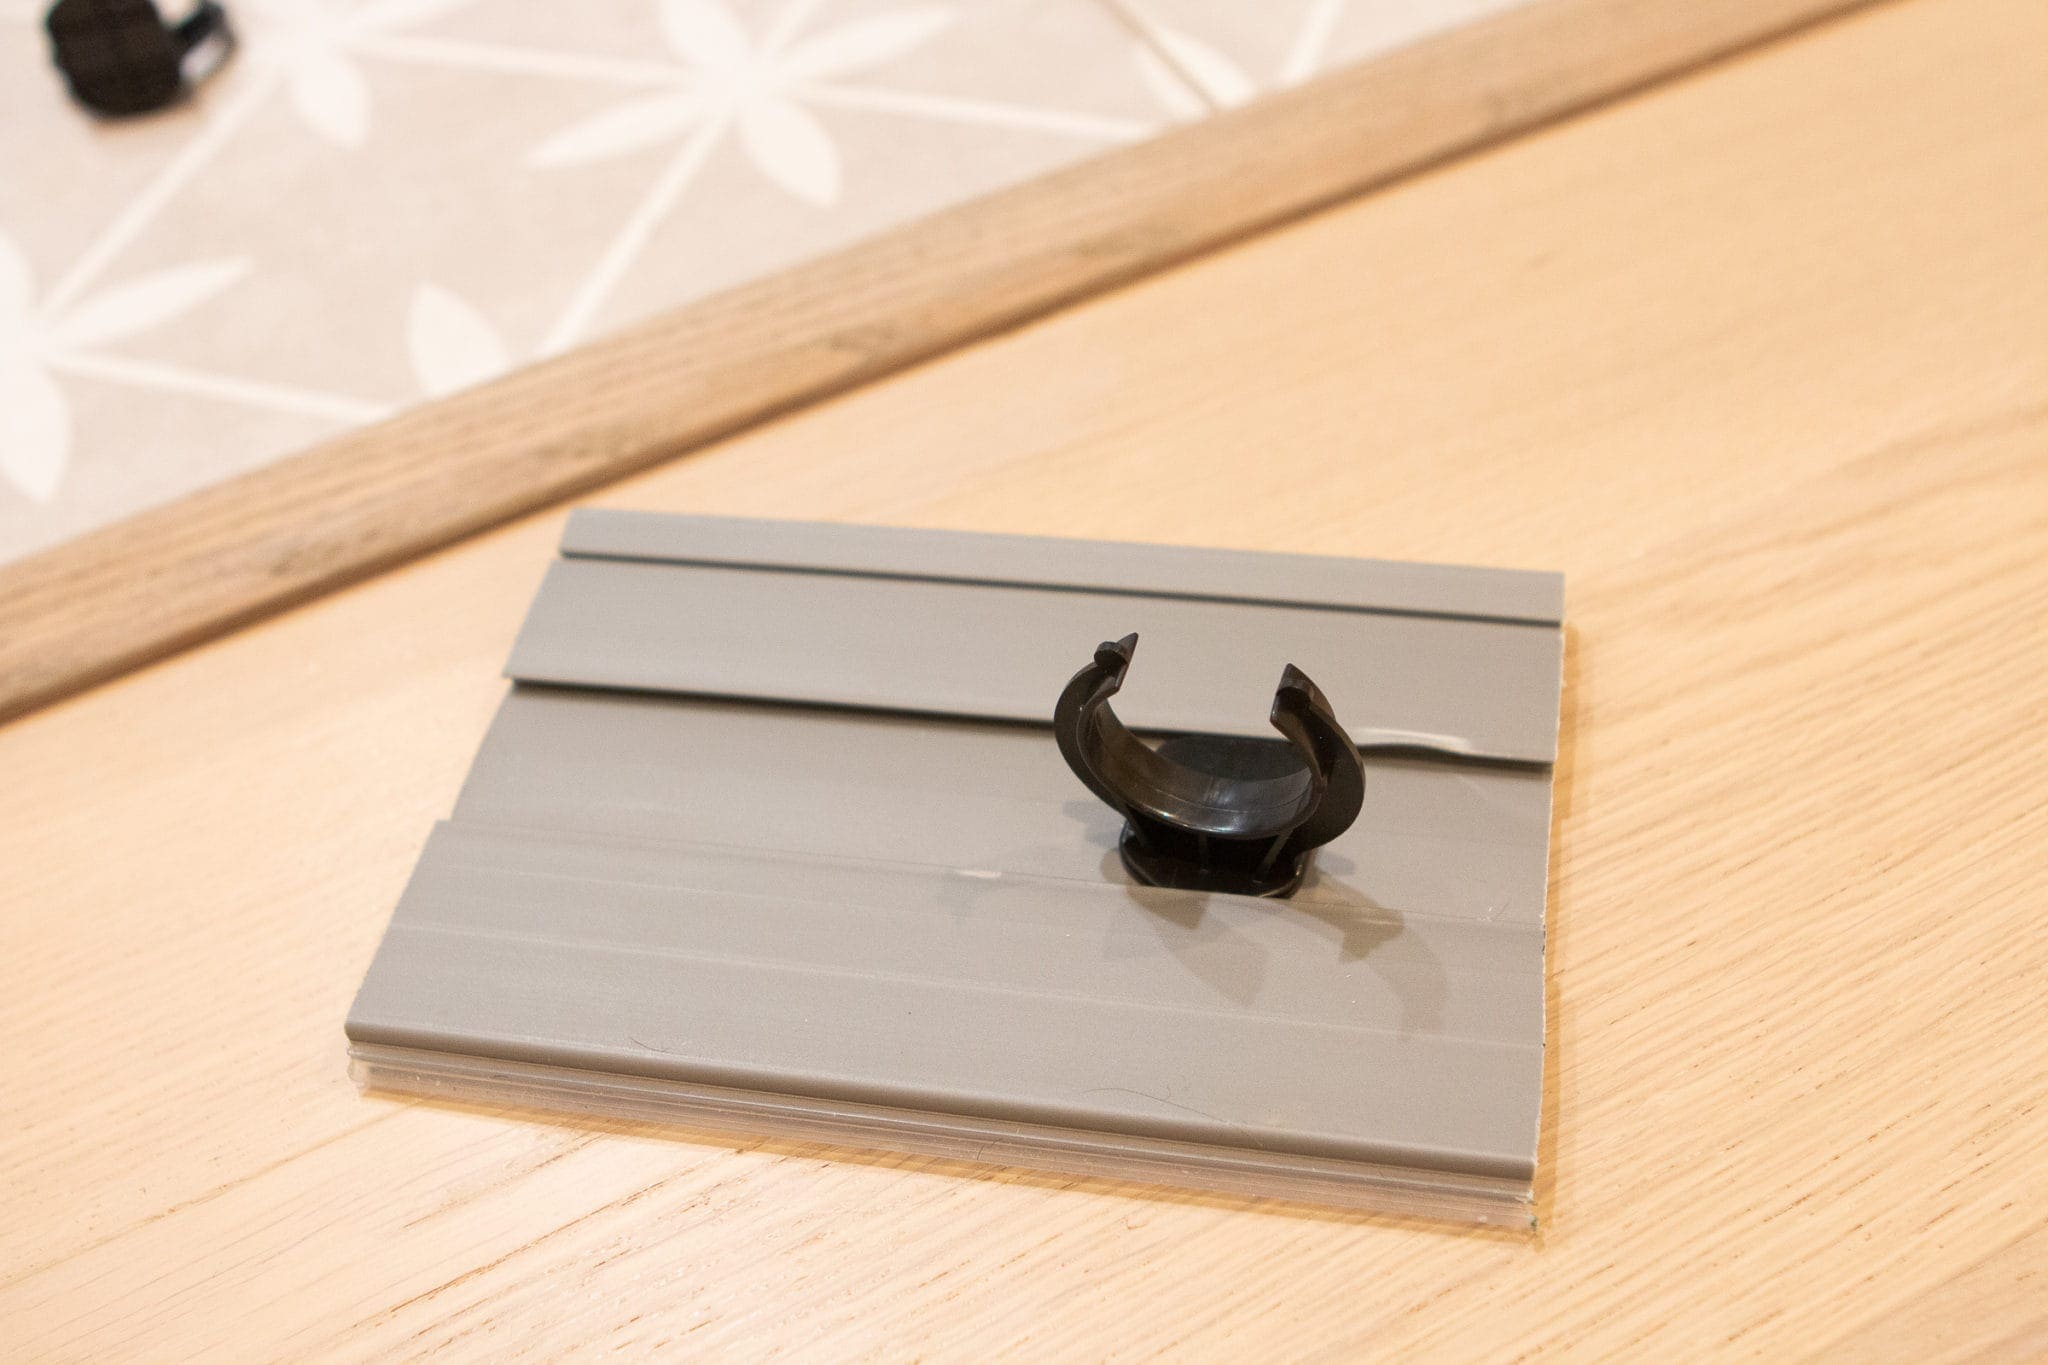 The toe kick is actually super easy to install. The toe kick (in the color to match your cabinets) has a notched side on the back where you can slide in the hooks. The hooks then directly attach to the cabinet legs for a tight grip.
  We used our miter saw to cut the exact length of the toe kick we needed and then popped one on the front and side of the cabinets.
Don’t forget to buy these pieces when you purchase your cabinets. They’re a great way to give the look of built-in, custom kitchen cabinets in your laundry room!
8. Use Our Side Panel Trick for a Custom Cabinet Look.
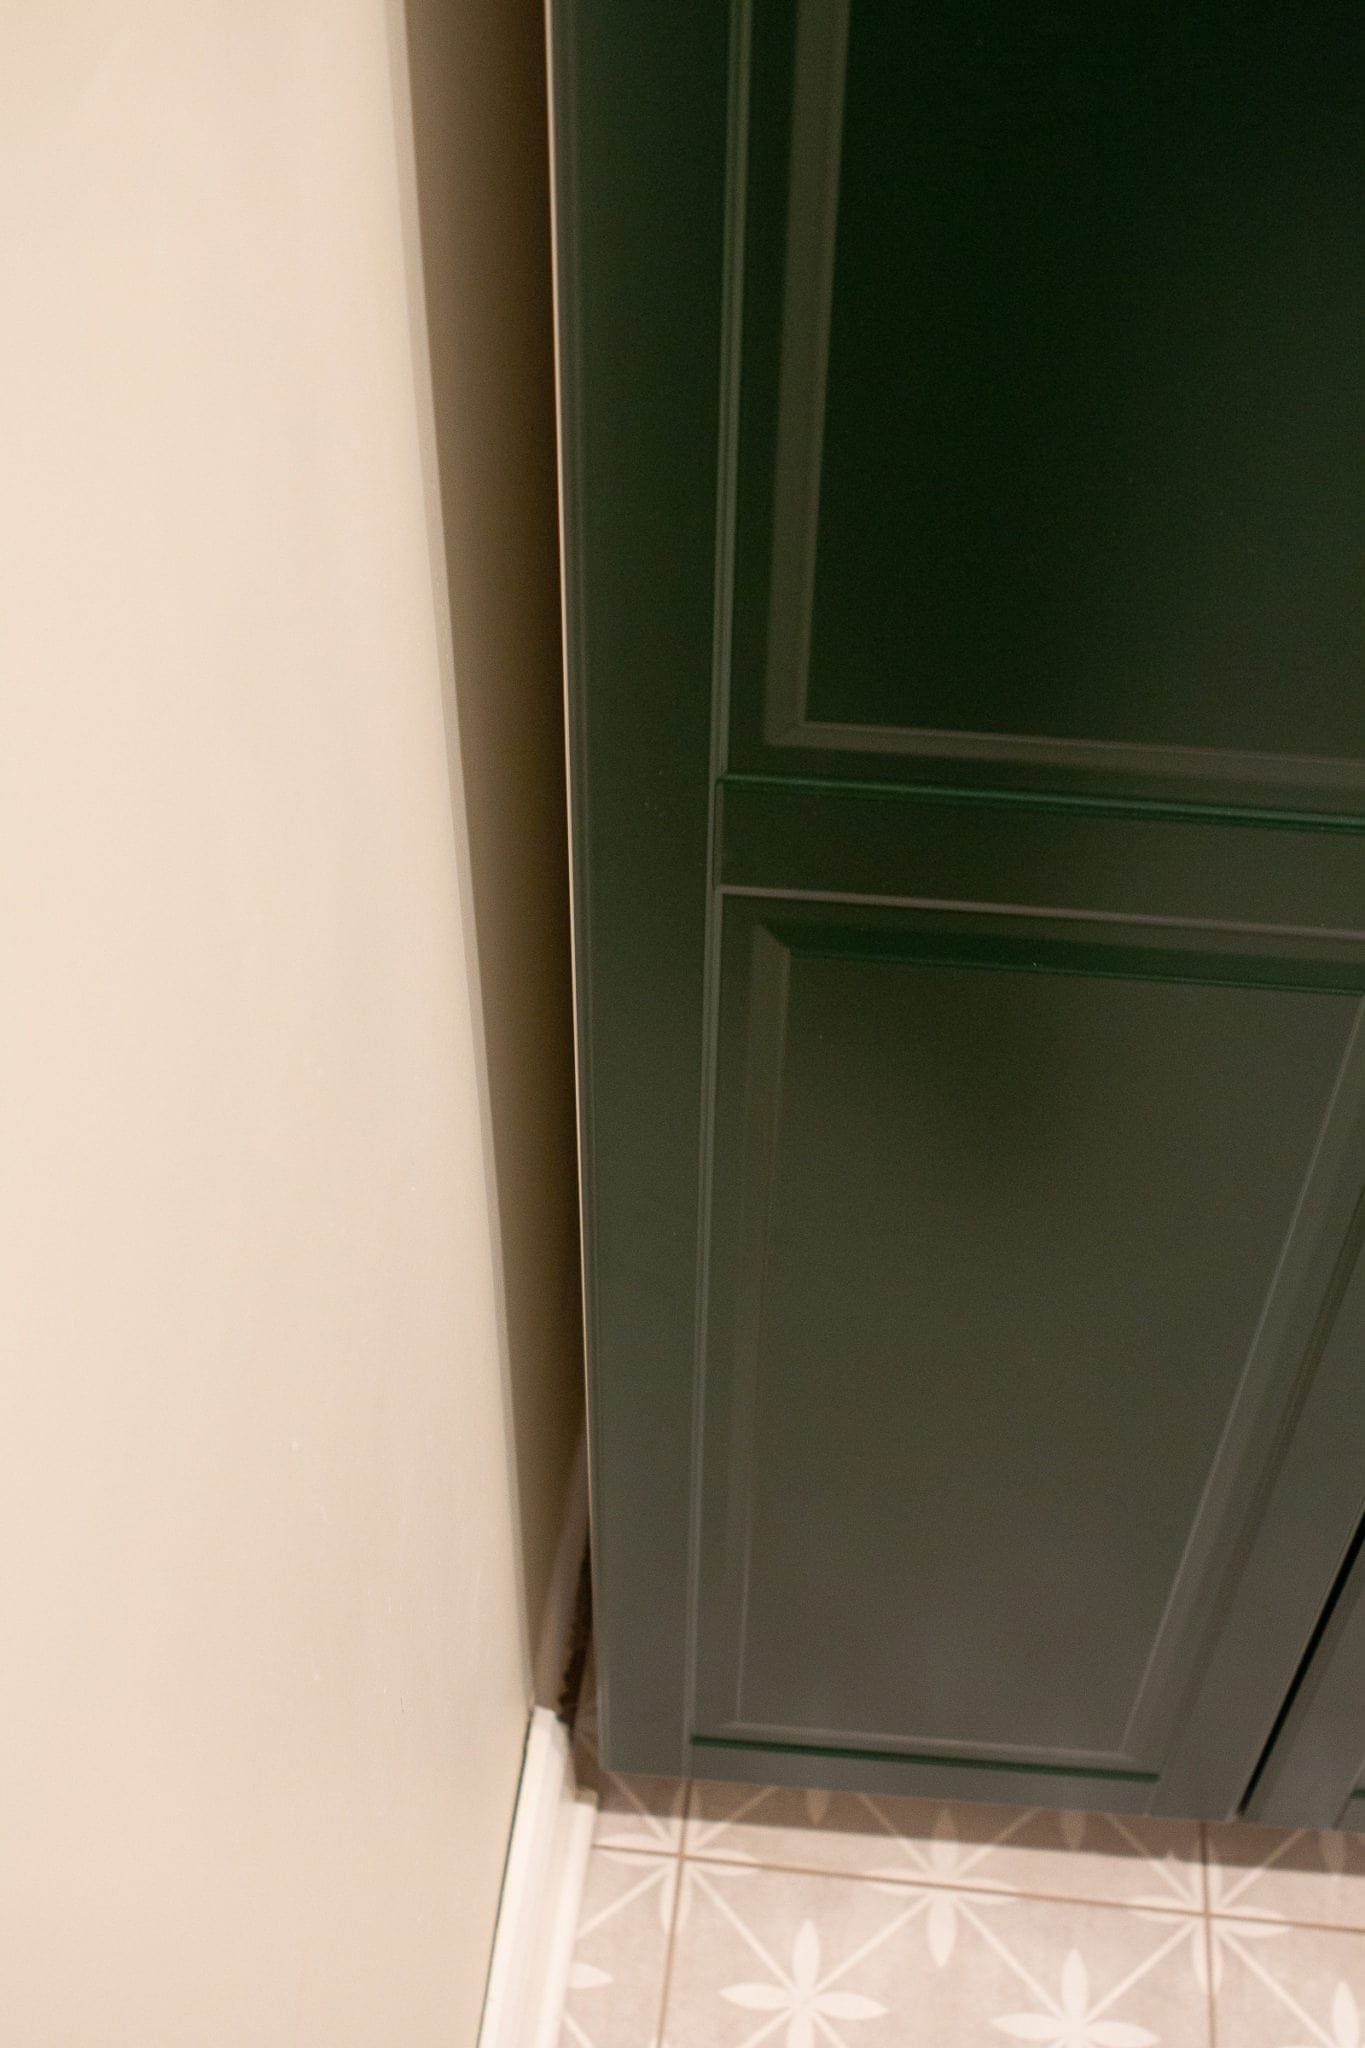
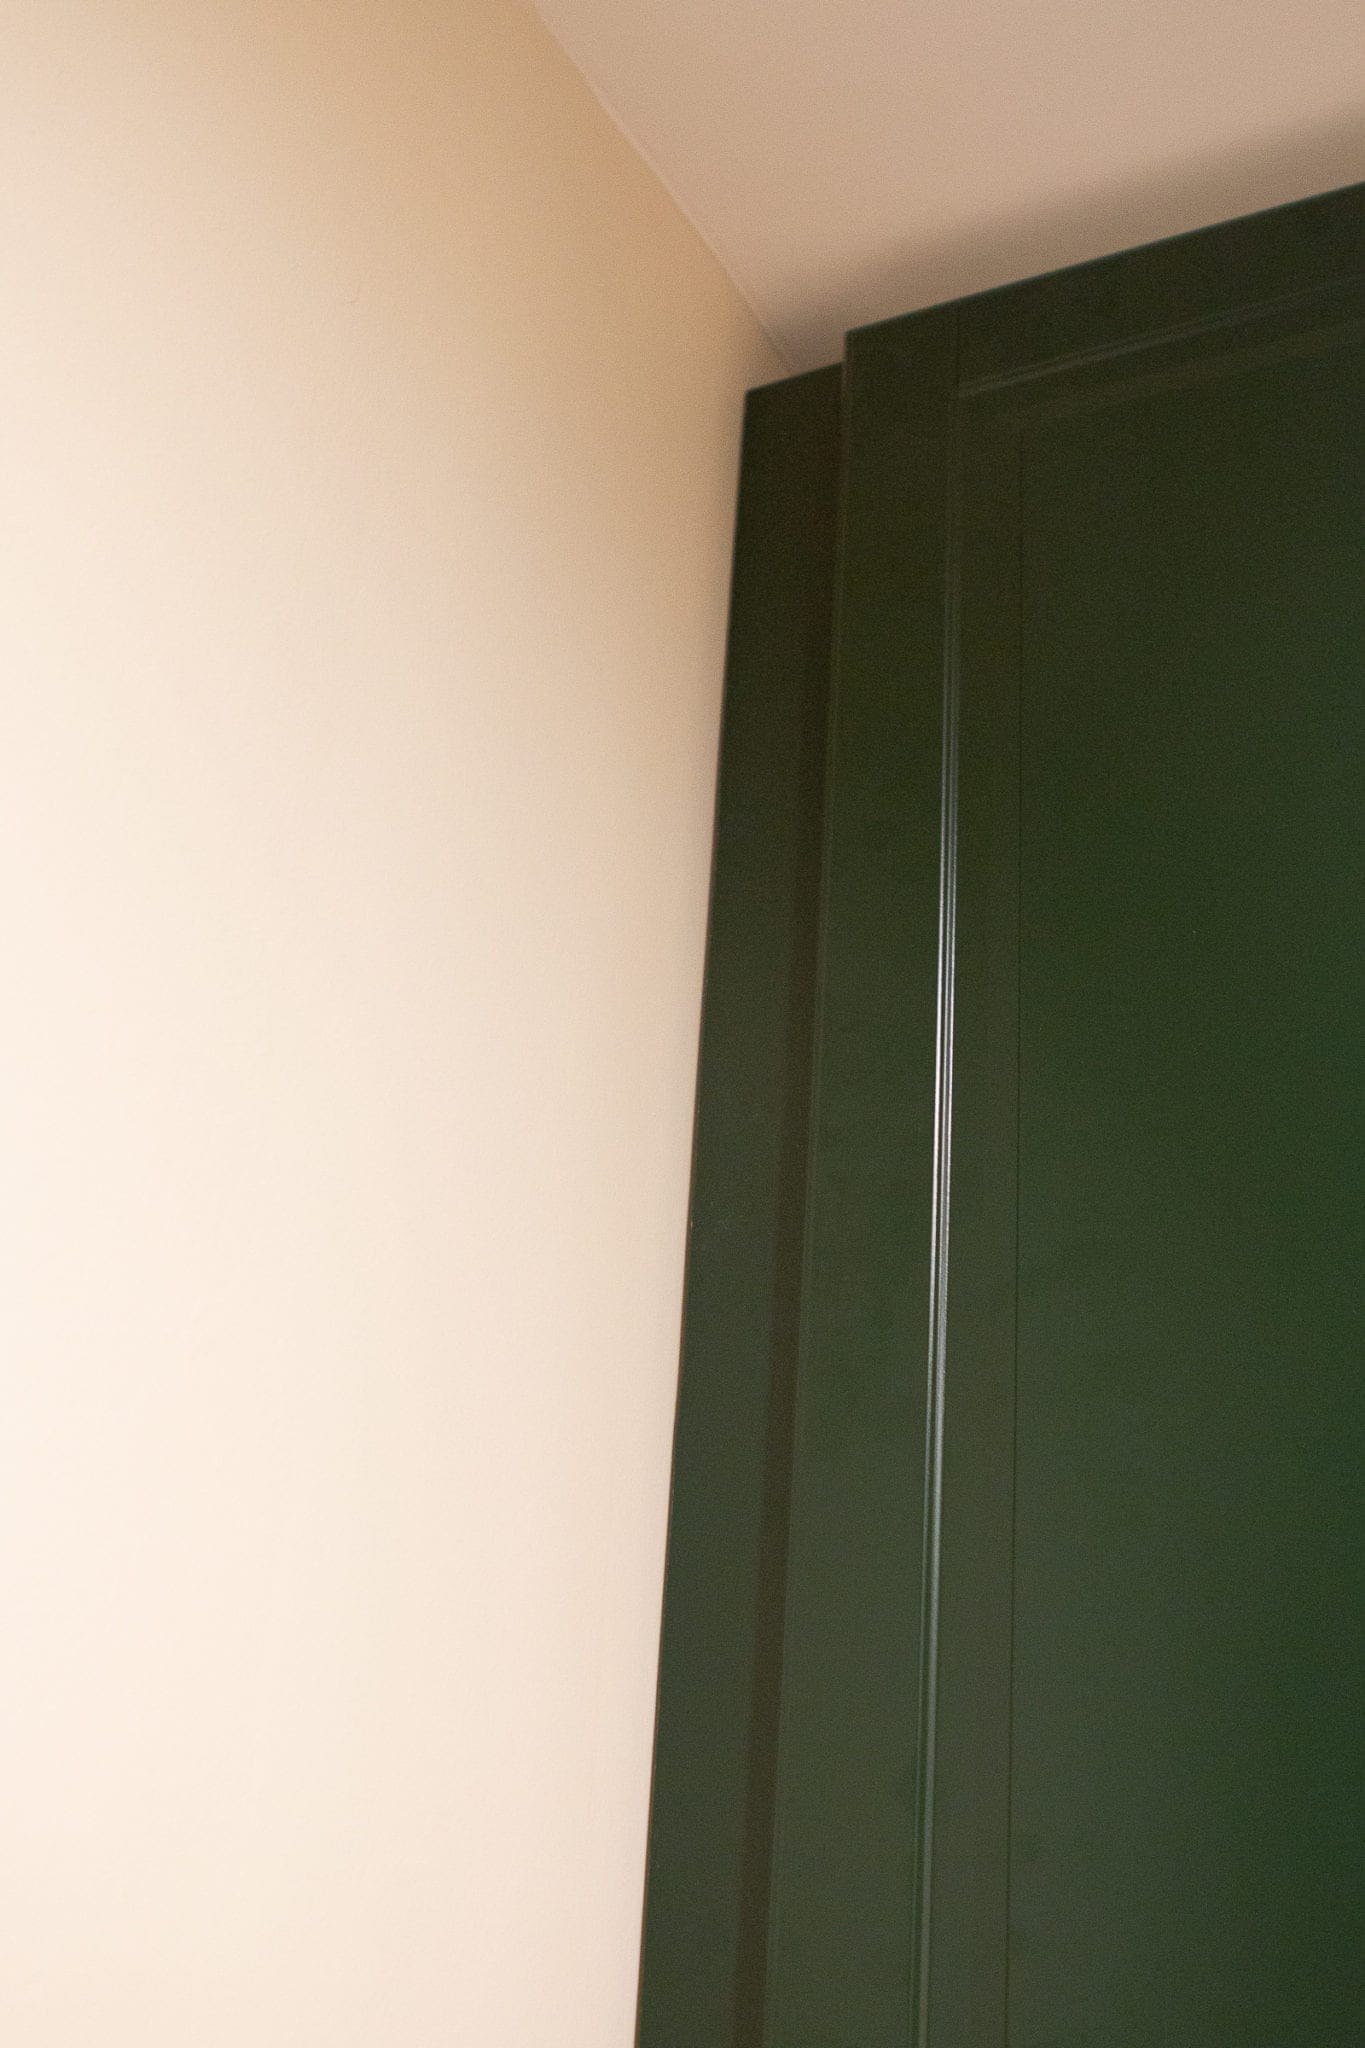
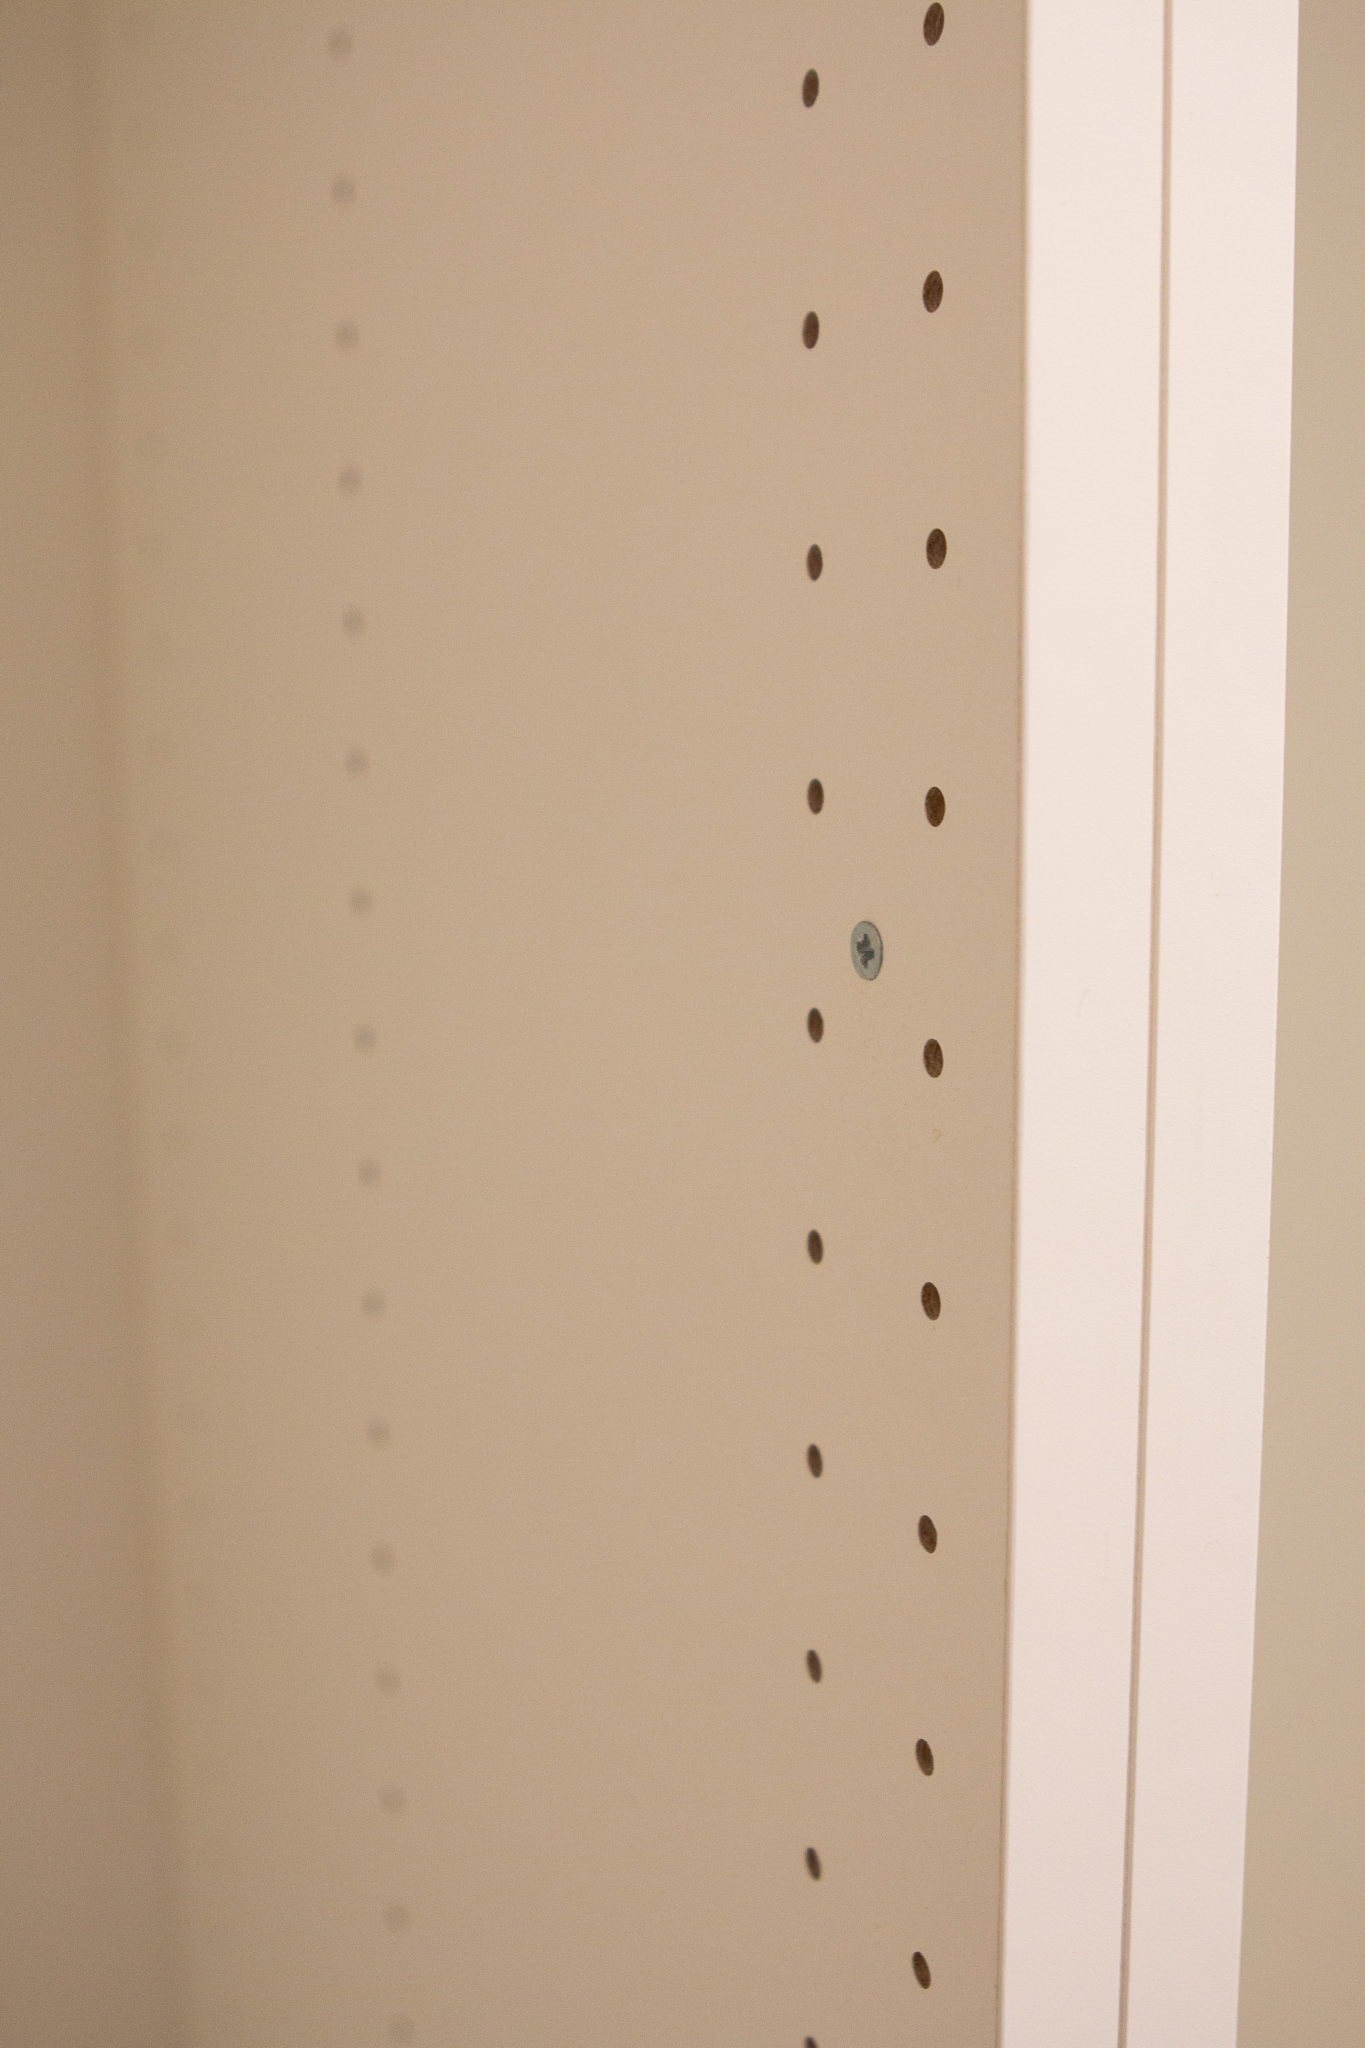
We wanted our cabinets to feel built-in, so we knew we would need a few filler pieces. With IKEA kitchen cabinets, it’s suggested that you leave a two-inch gap on the side of the cabinets so the door can open easily. Initially, we installed it that way, but we were left with the ugly-looking gap.
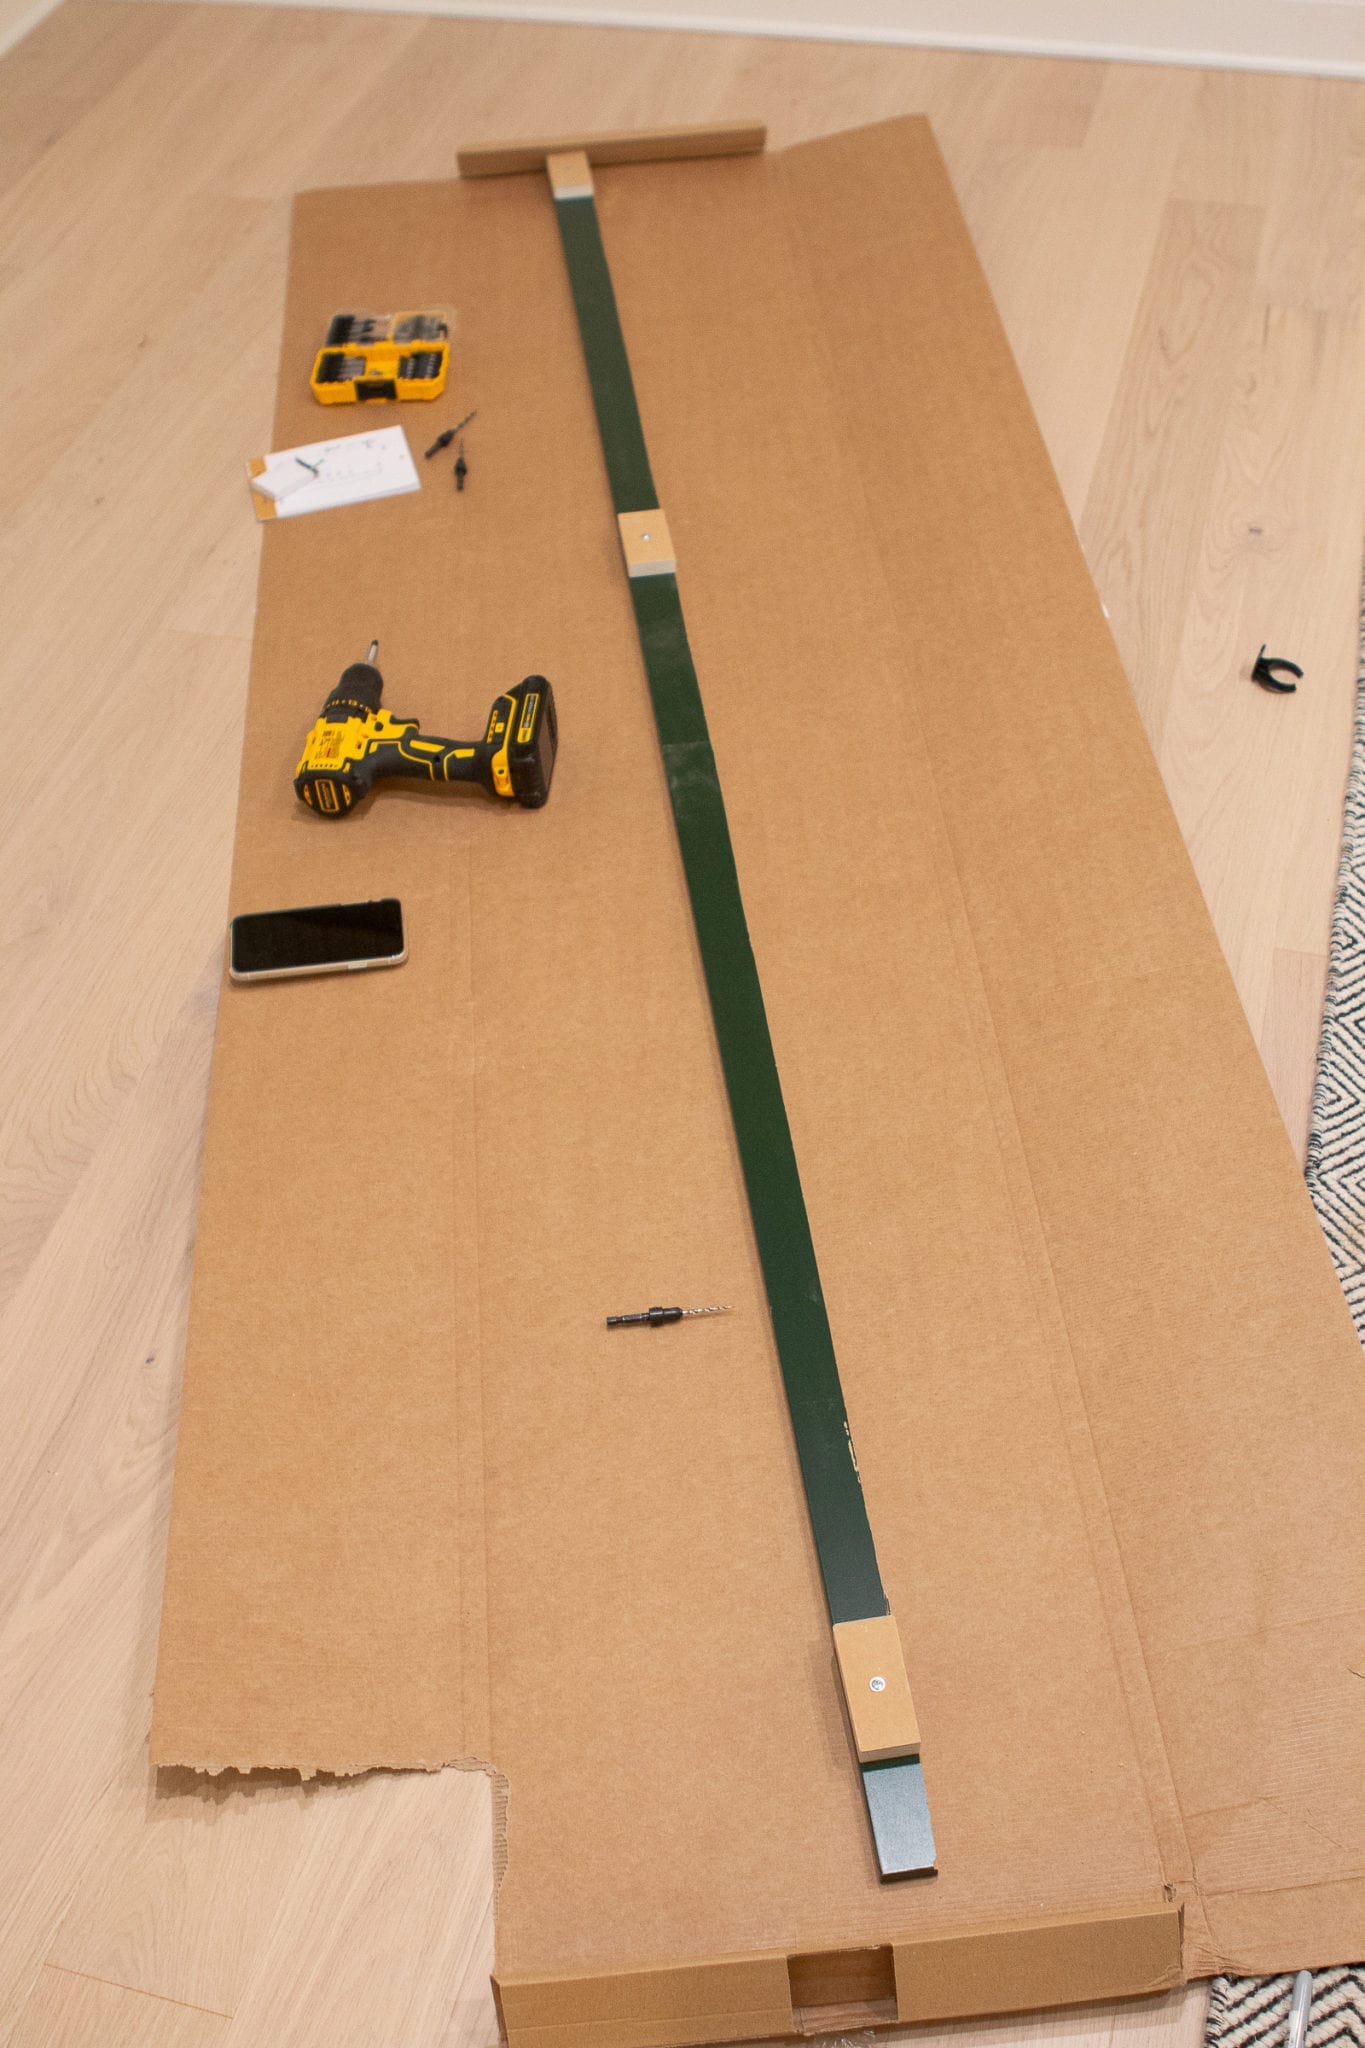
We bought an extra cover panel (in the same color, green) to cut to size to fill this gap. 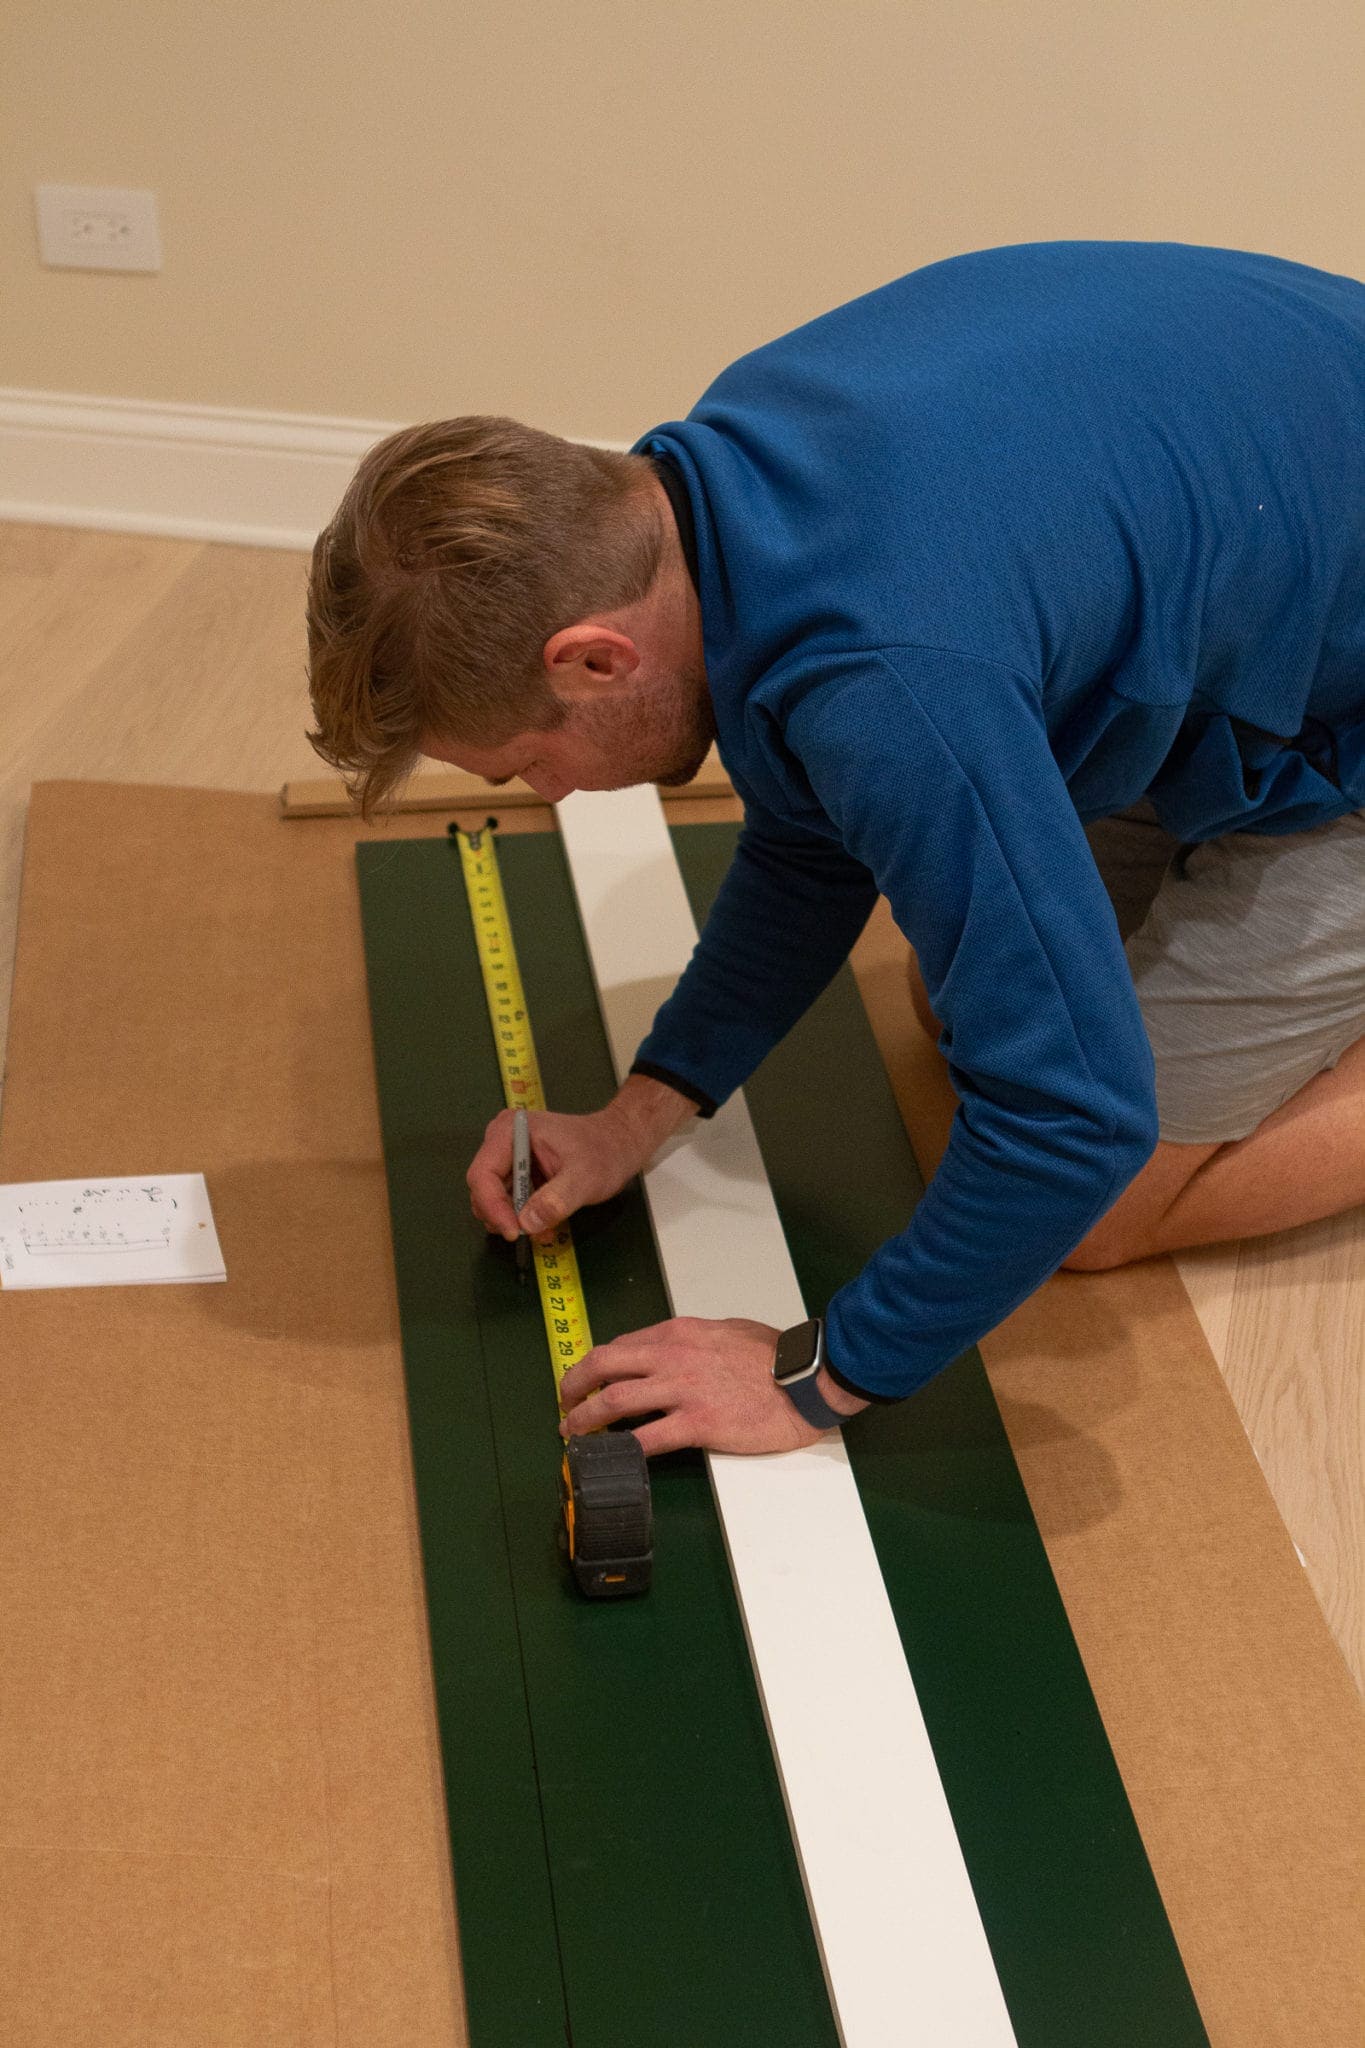 We took multiple measurements all the way down the opening on the side and then marked those directly onto the board. Most walls aren’t straight and level, so it’s best to take many measurements and make a straight line instead of just cutting a two-inch piece. With our line made, Finn cut the piece using our circular saw.
But then it was a little tricky. We wondered how the heck we would attach this piece. I browsed online while Finn made the cuts and came up with the following idea. 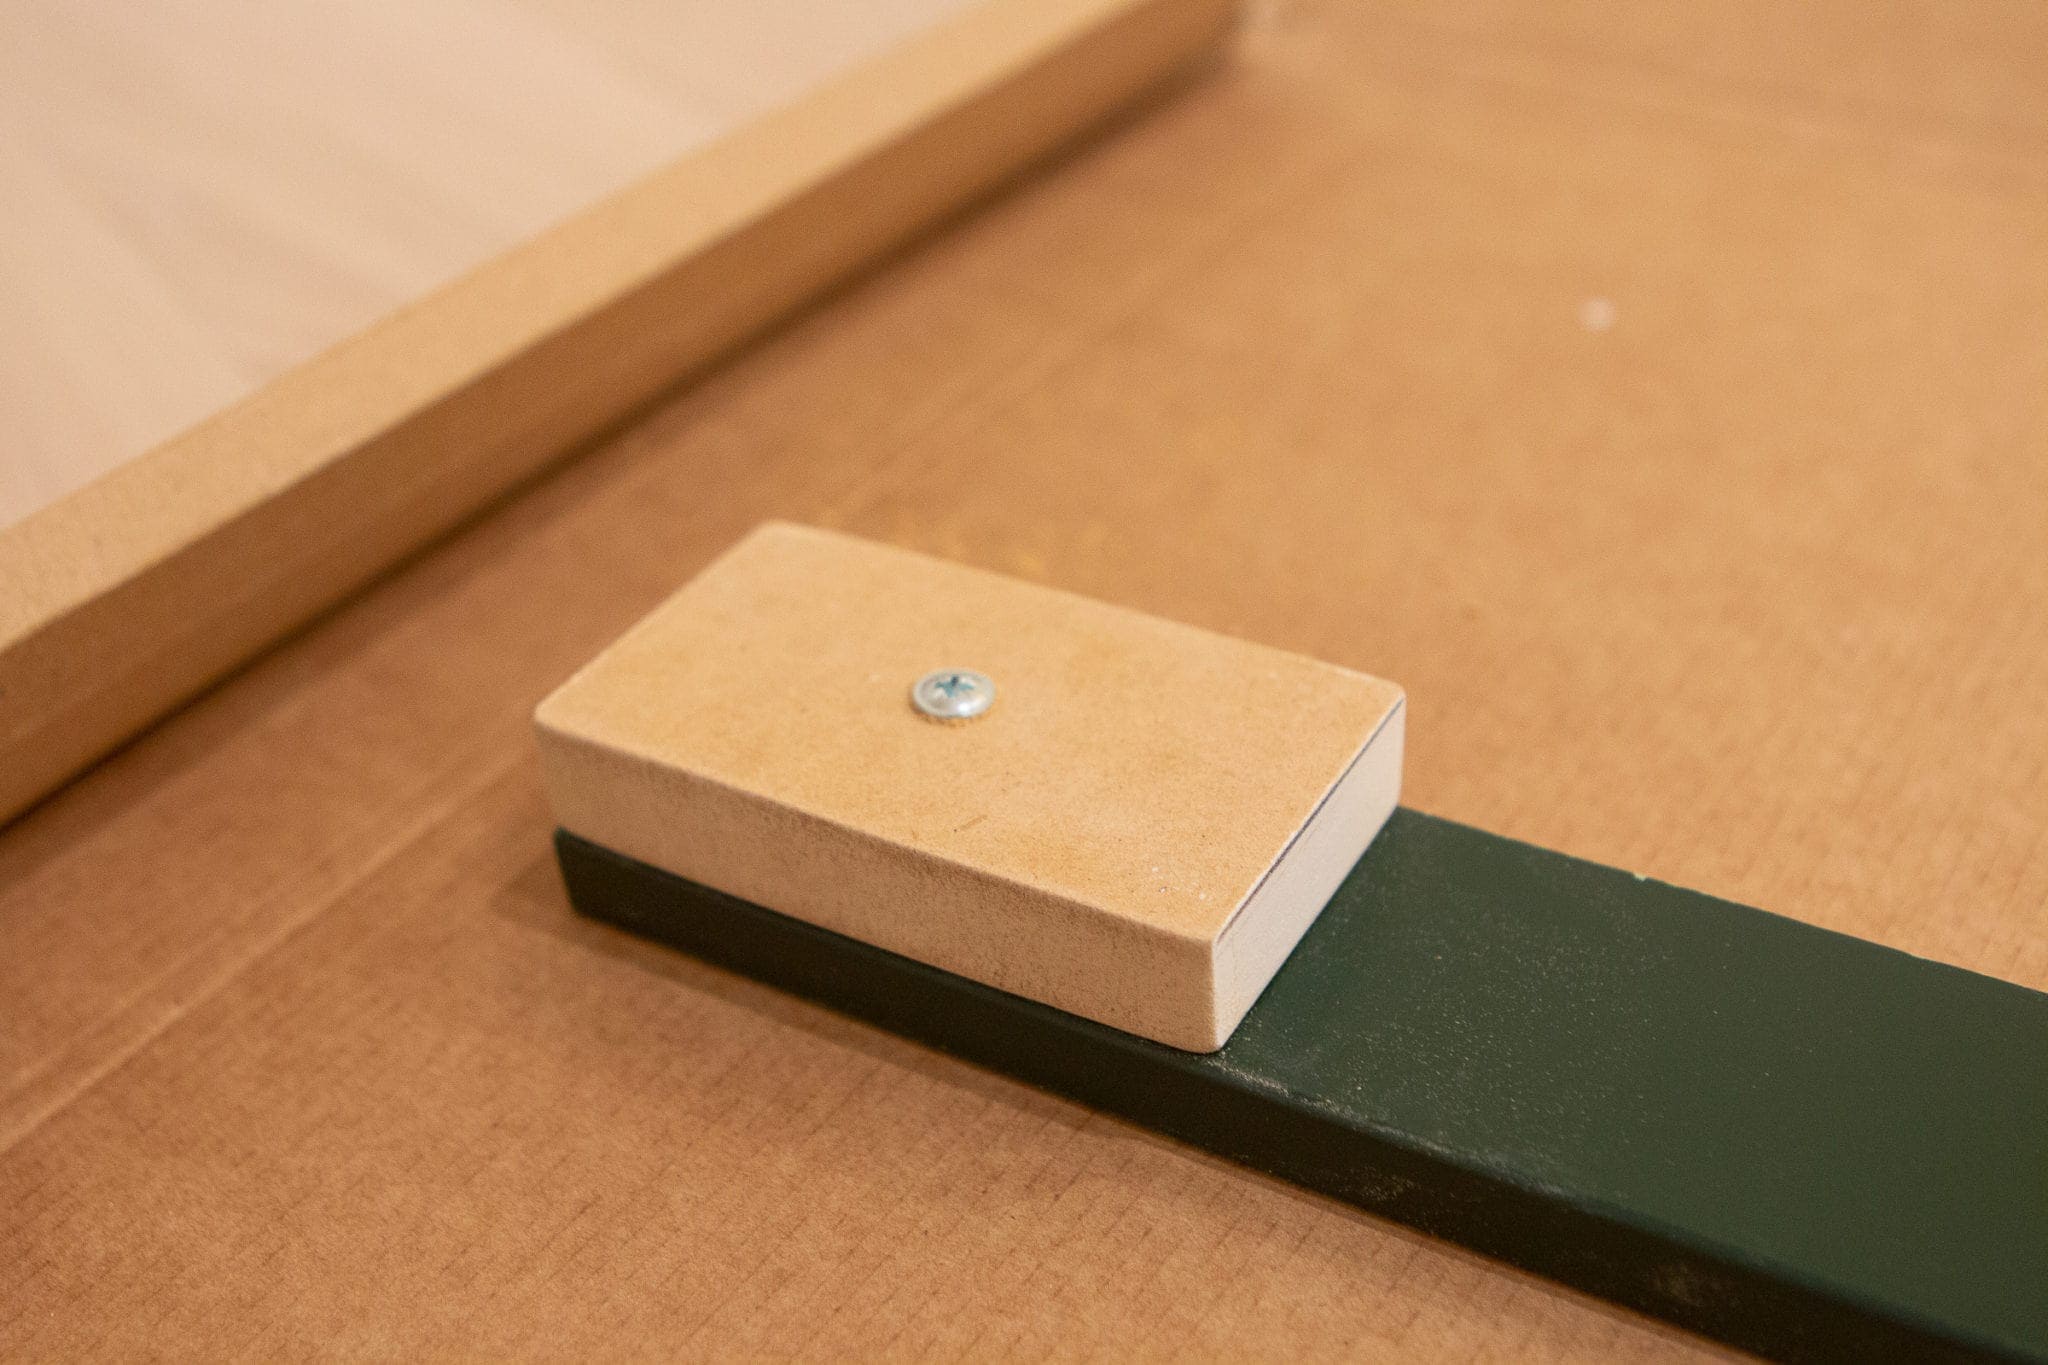 We had some leftover MDF from our bathroom wood wall, so Finn cut three two-inch blocks for me. I then screwed these into the back of the filler piece at the top, middle, and bottom.
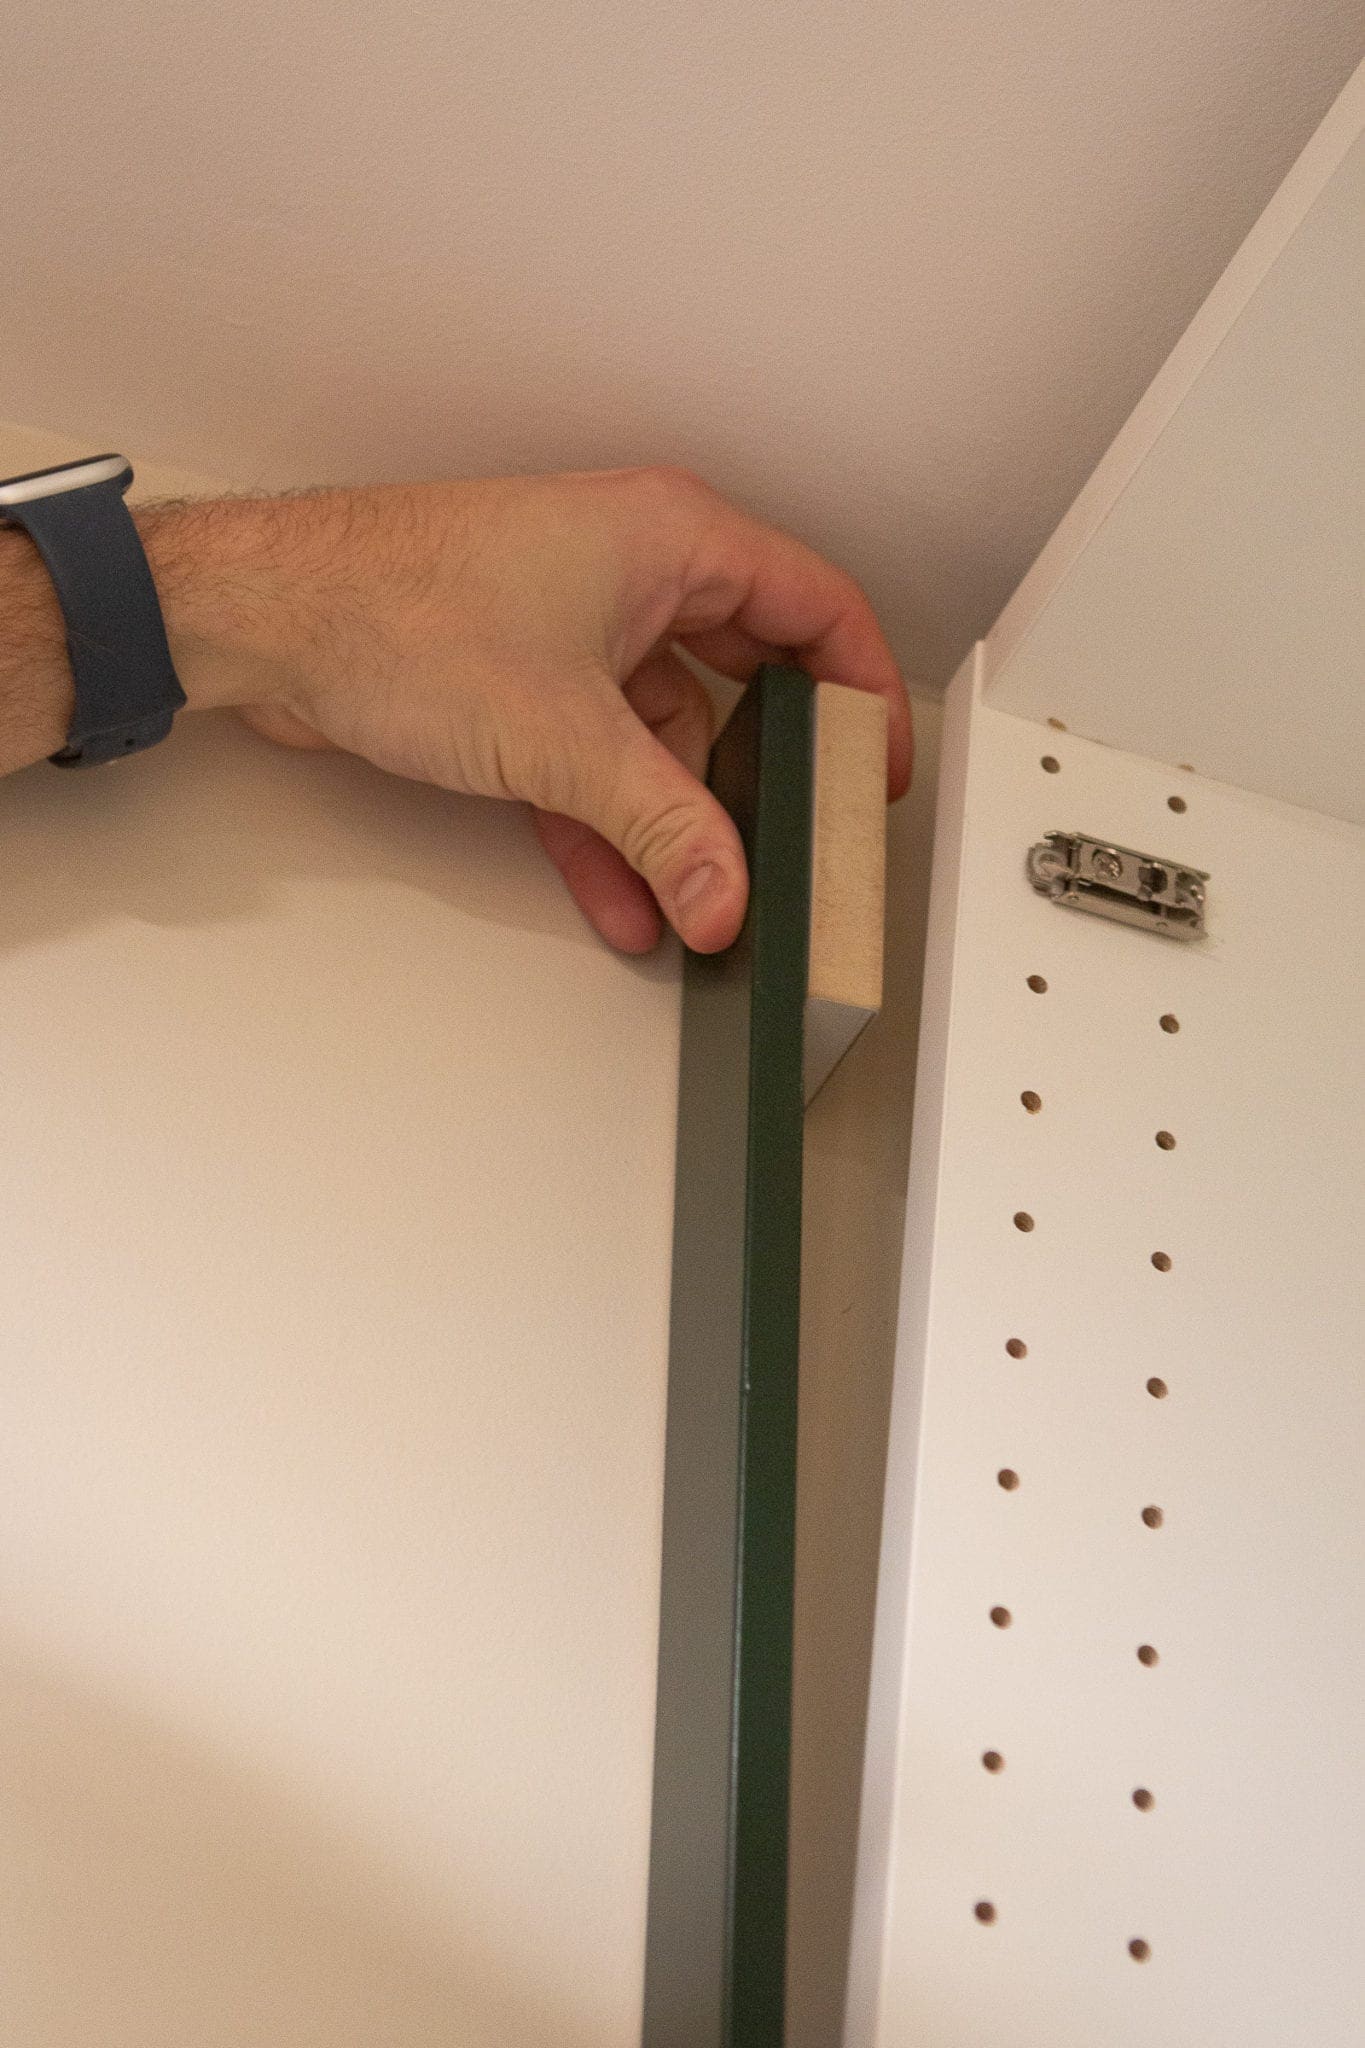
We put the filler piece in place, and while Finn held it, I secured screws through the side of the cabinet into the three wood blocks. 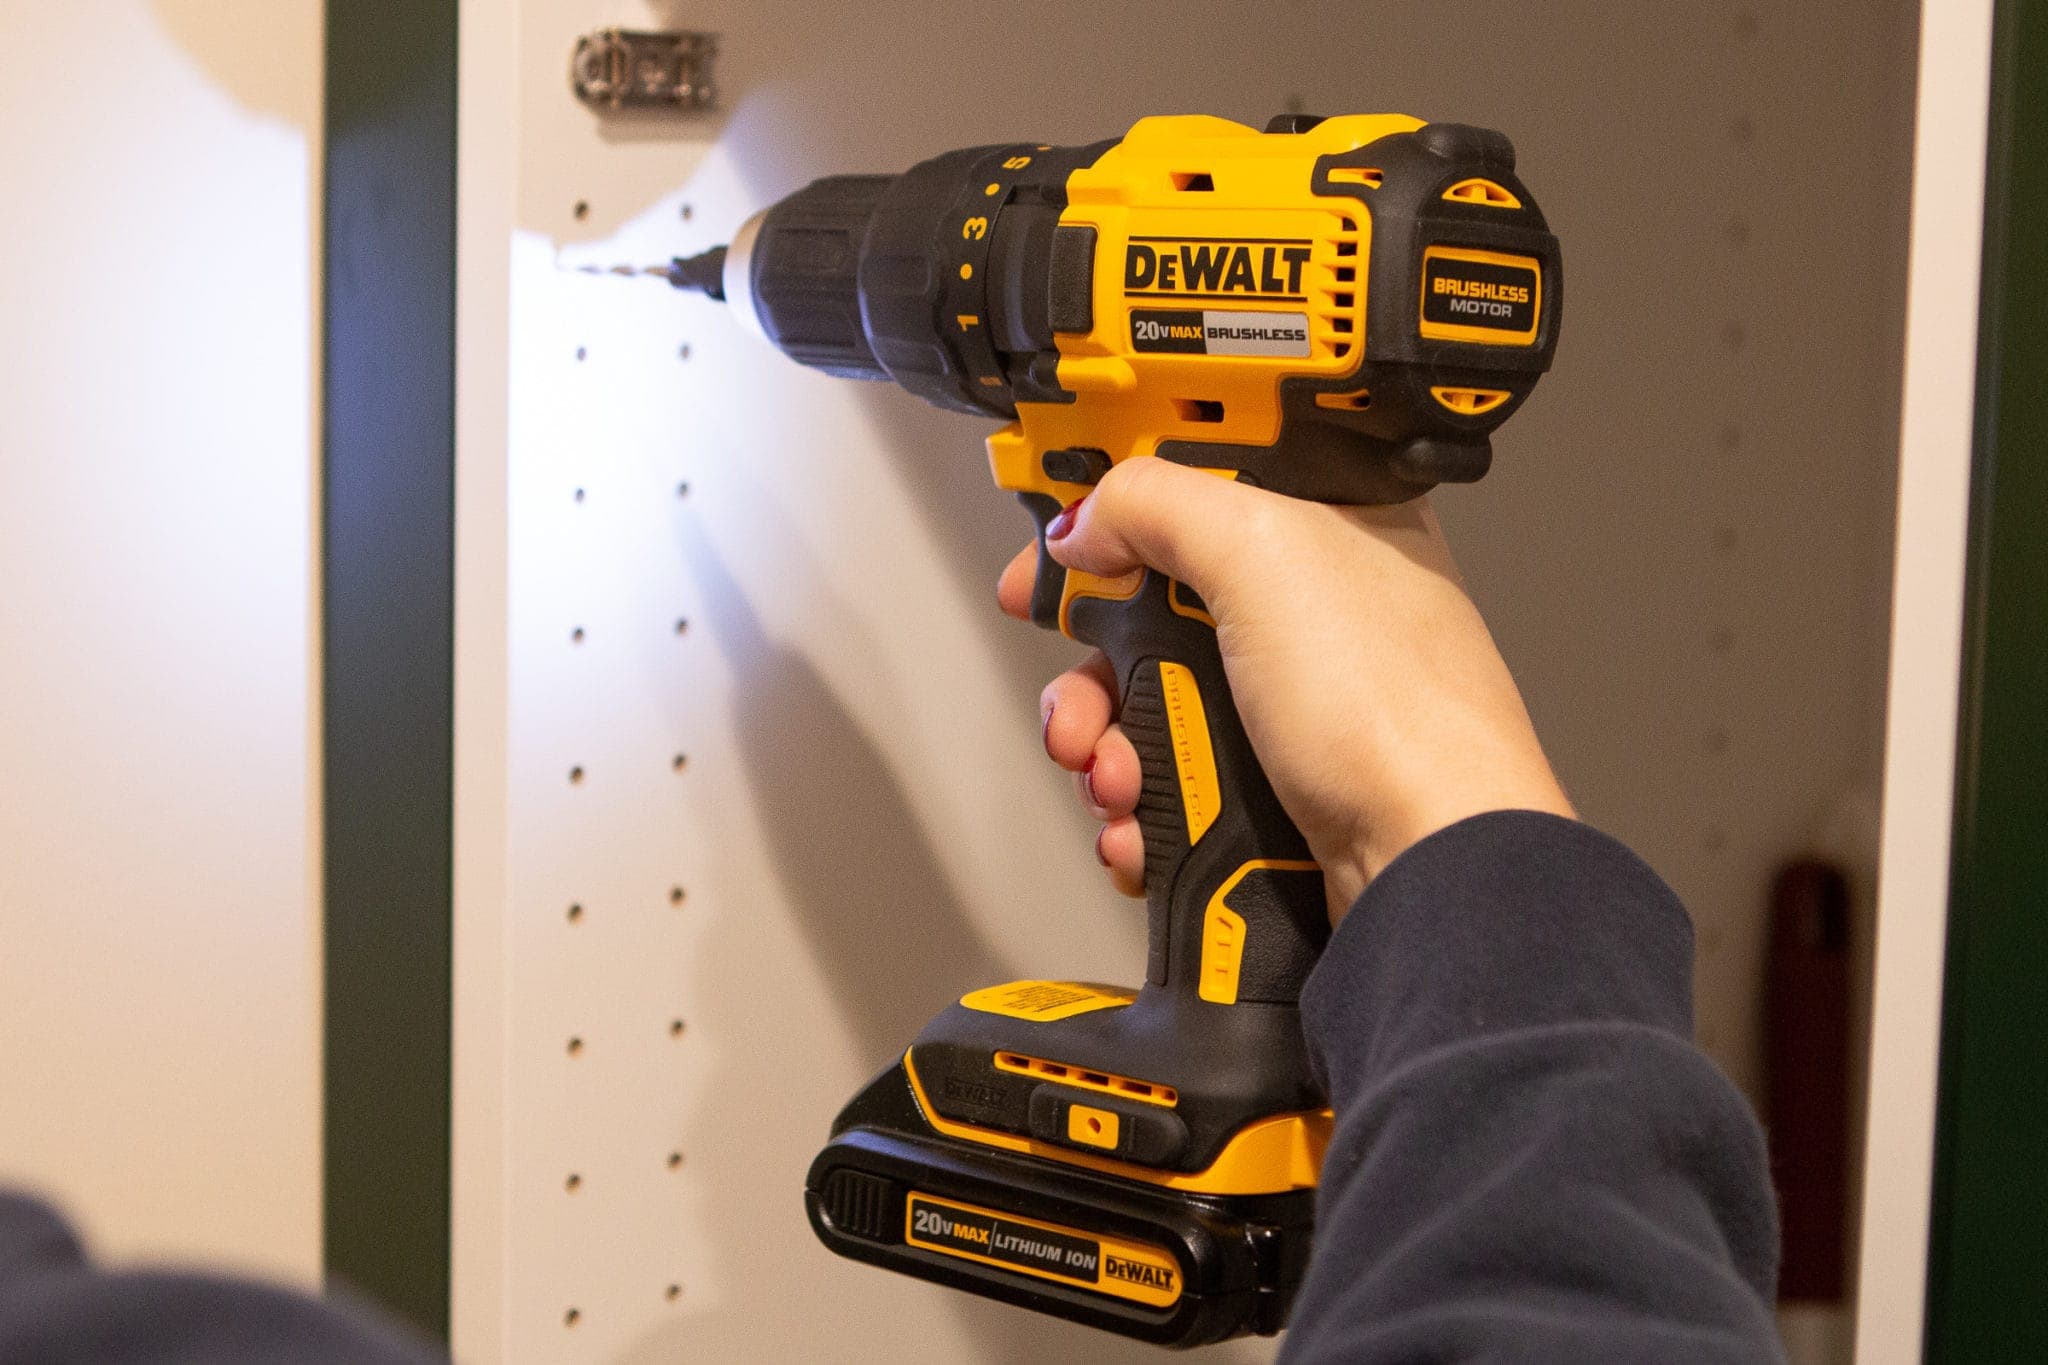 It worked like a charm, and we didn’t have any holes or screws on the front side of the filler strip. We were both surprised at how easy and efficient this worked. I highly recommend this technique if you want to further elevate the look of your laundry room cabinets! Seriously, this is an upgrade you won’t regret!
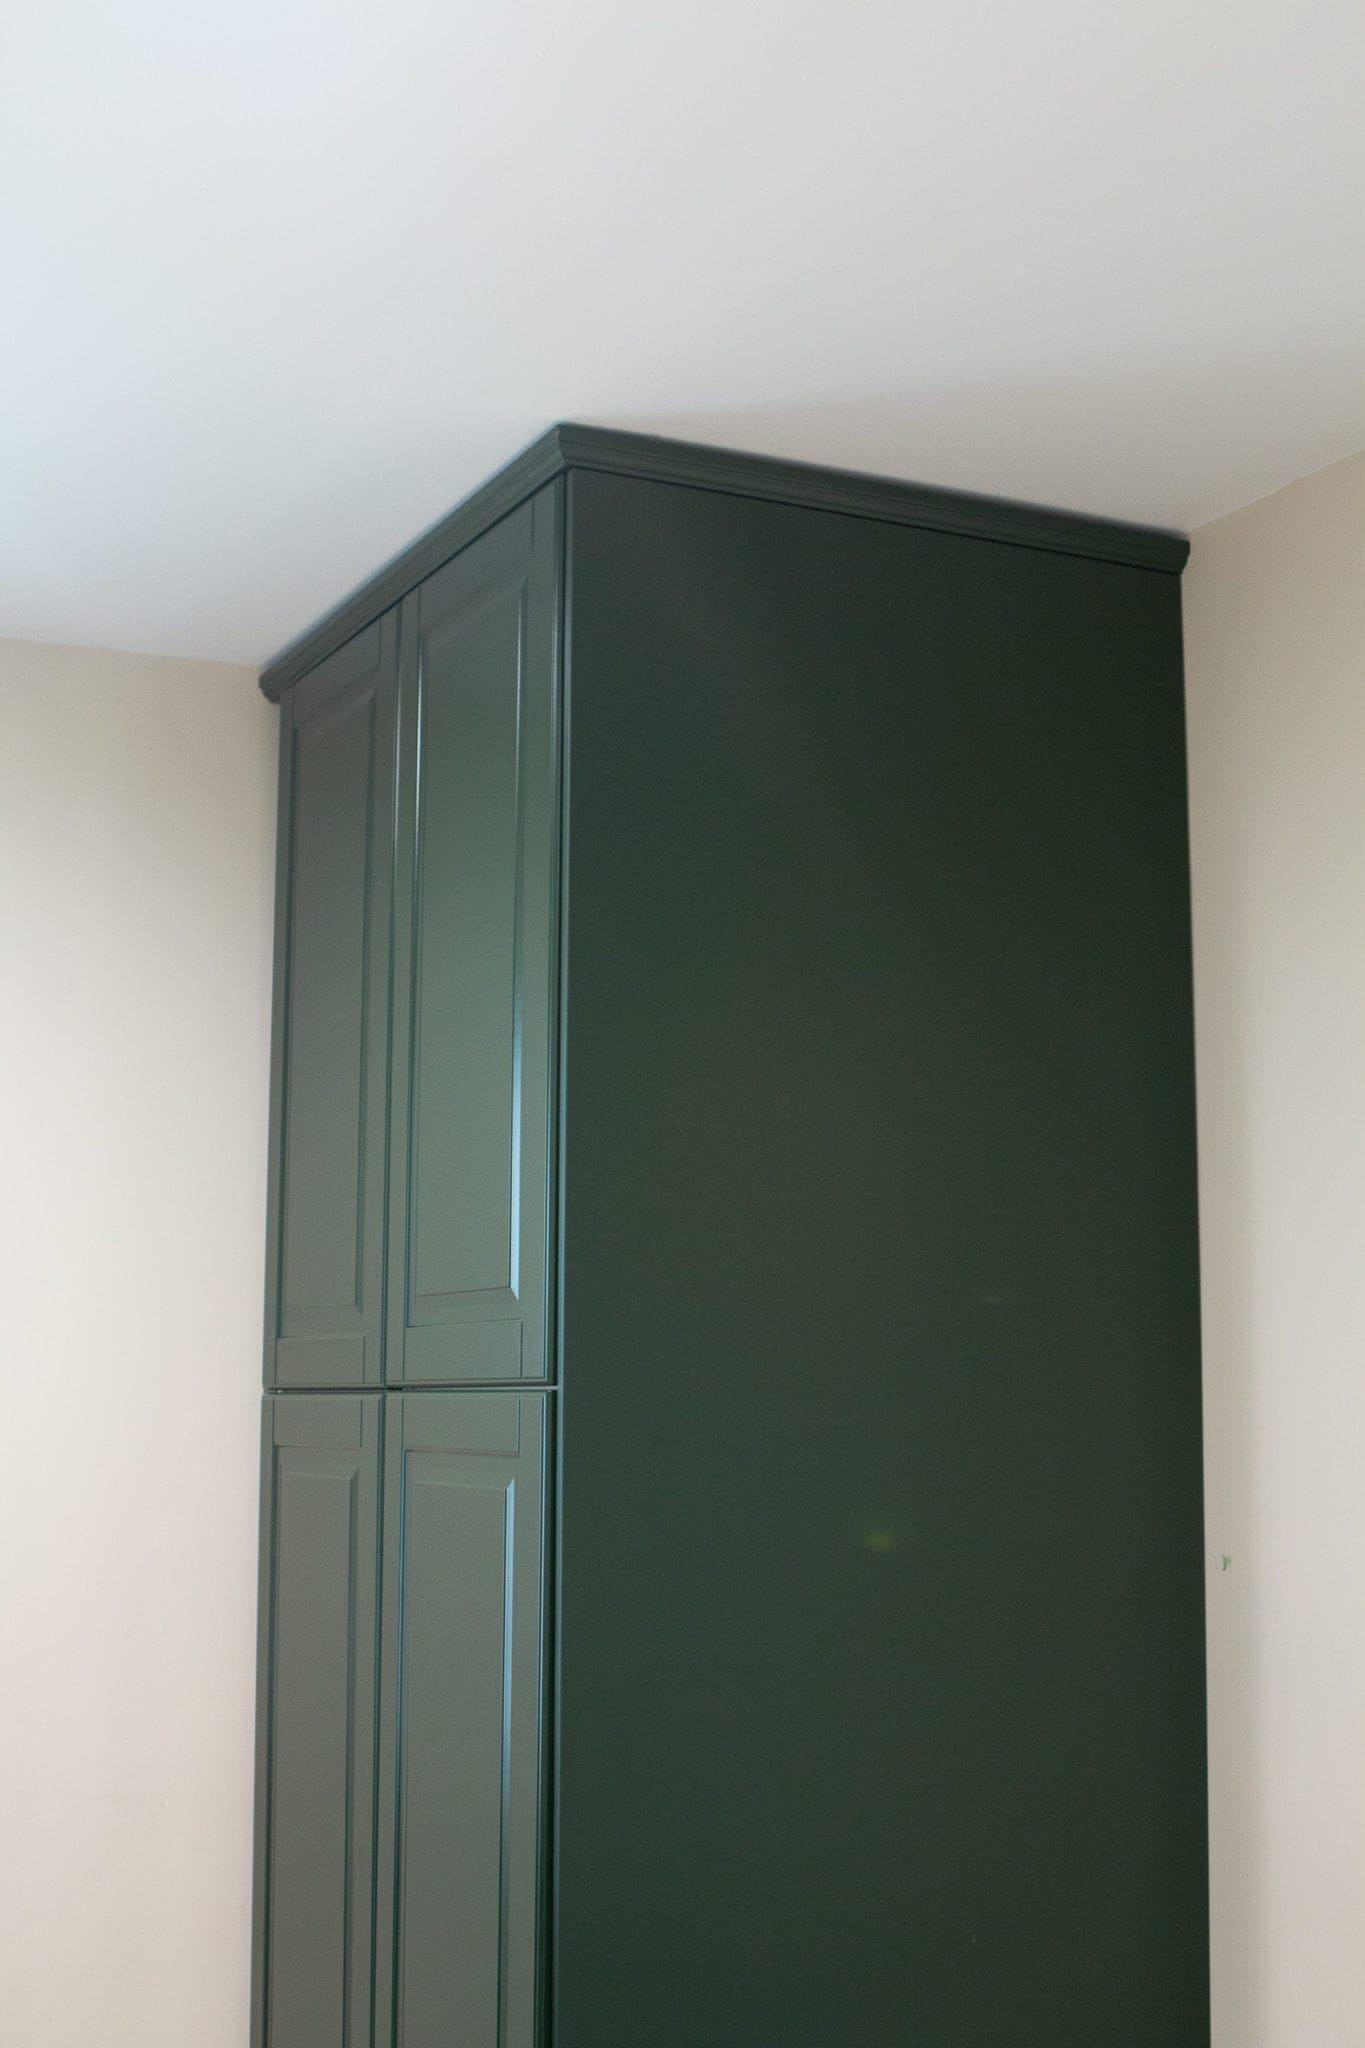
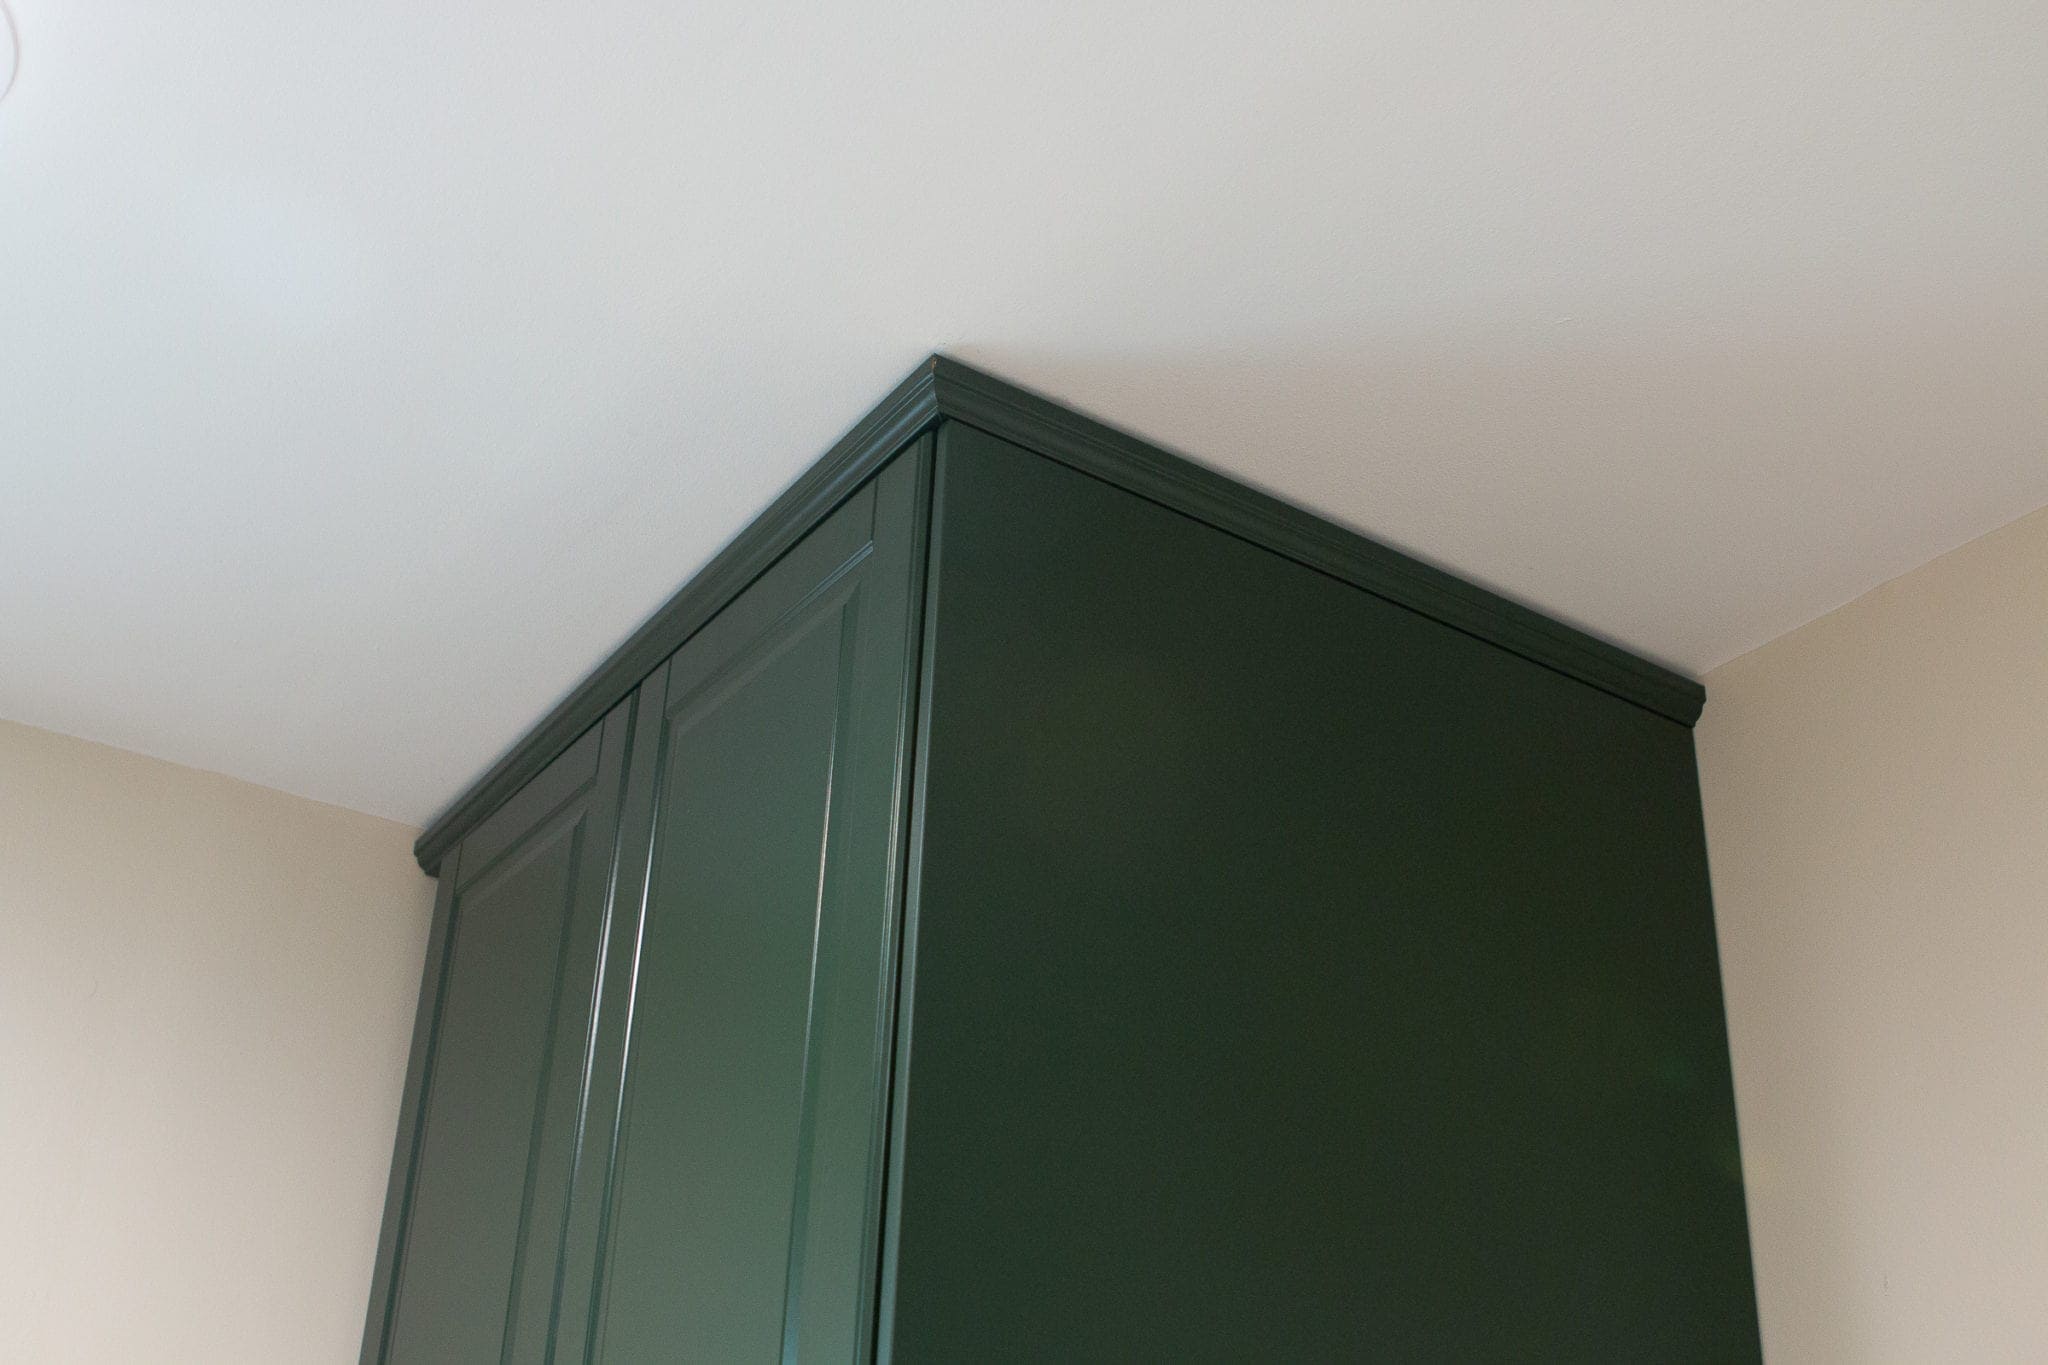
9. Don’t Forget the Crown Molding to Complete Your Custom Cabinets.

Adding crown molding at the top of our upper cabinets makes a huge difference in creating a custom, high-end look.
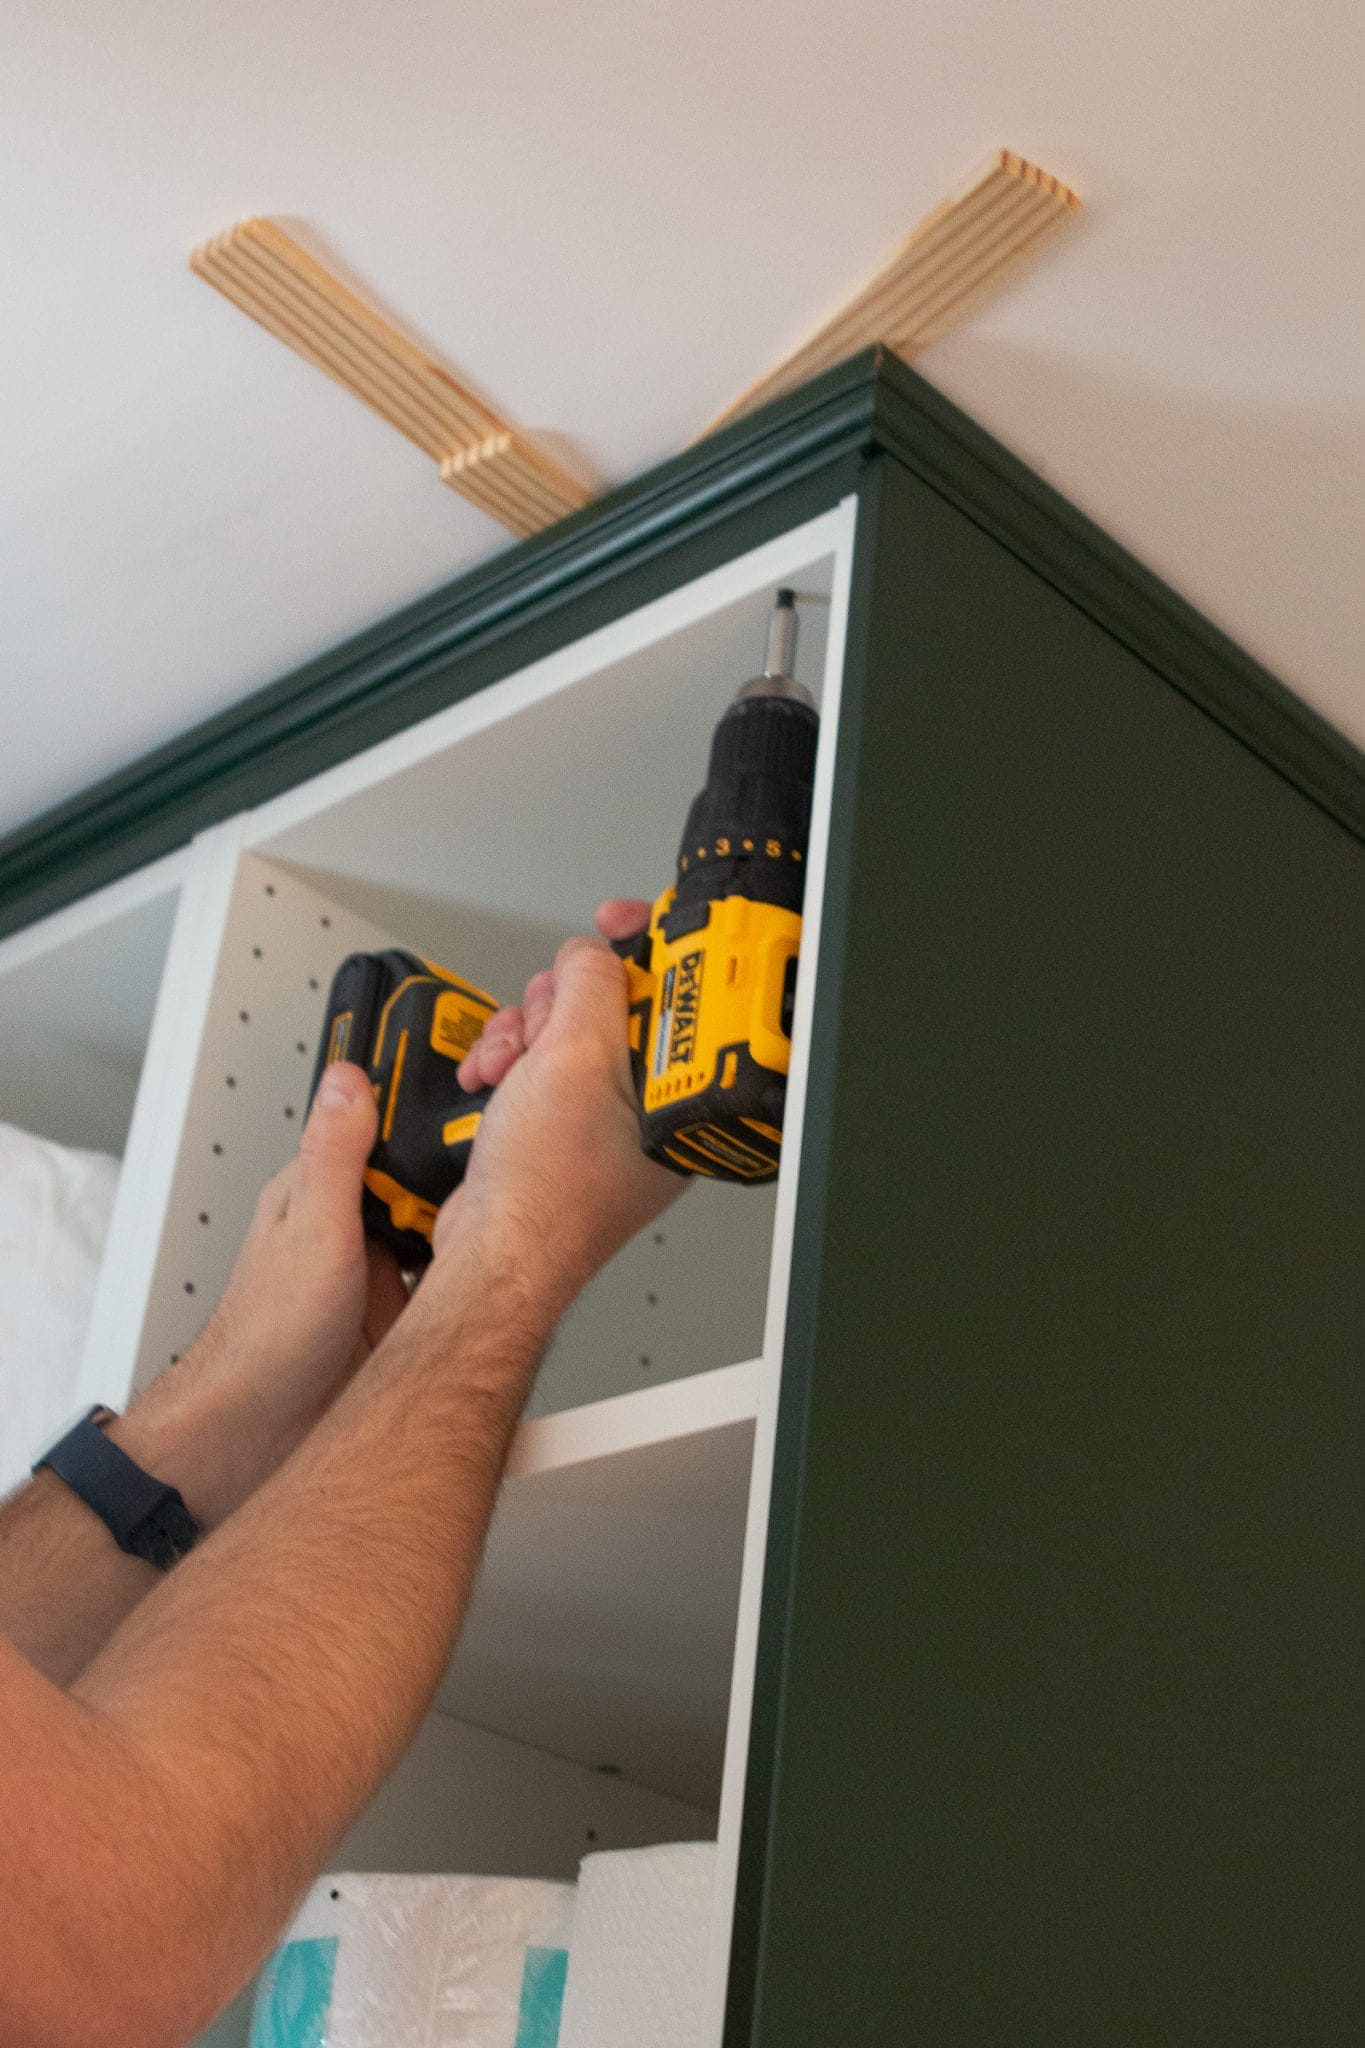
Our finishing touch on installing kitchen cabinets in our laundry room was to add the crown molding at the top of the tall cabinets. We had about two inches at the top and really wanted a completed look. IKEA sells this to match your cabinet color, so be sure to order it if you decide to get your cabinets at IKEA, too!
 Cutting crown molding can be tricky! You must use a miter saw to make 45-degree angle cuts and properly fit the corners. It takes some trial and error, but the effort is worth it. It messes with your head to get the right angles, so go slow and don’t overcut your pieces.
Finn screwed through the top of the cabinets to secure them in place. Since ours weren’t flush with the ceiling, we used wood shims for support while screwing them in.
Ultimately, it was worth it to take the time to add all of the finishing touches to this space. These good-quality kitchen cabinets will be great in a hard-working laundry room. However, the best part is their elevated look (all within a reasonable total cost!).
What do you think: will adding cabinets to the laundry room make doing laundry more exciting?

If you enjoyed this post on how we installed kitchen cabinets in our laundry room, don’t miss the post where we detail the next step in this laundry room project–adding the butcher block countertop. It really makes this cabinet wall look complete, and you’ll love seeing how we did that!
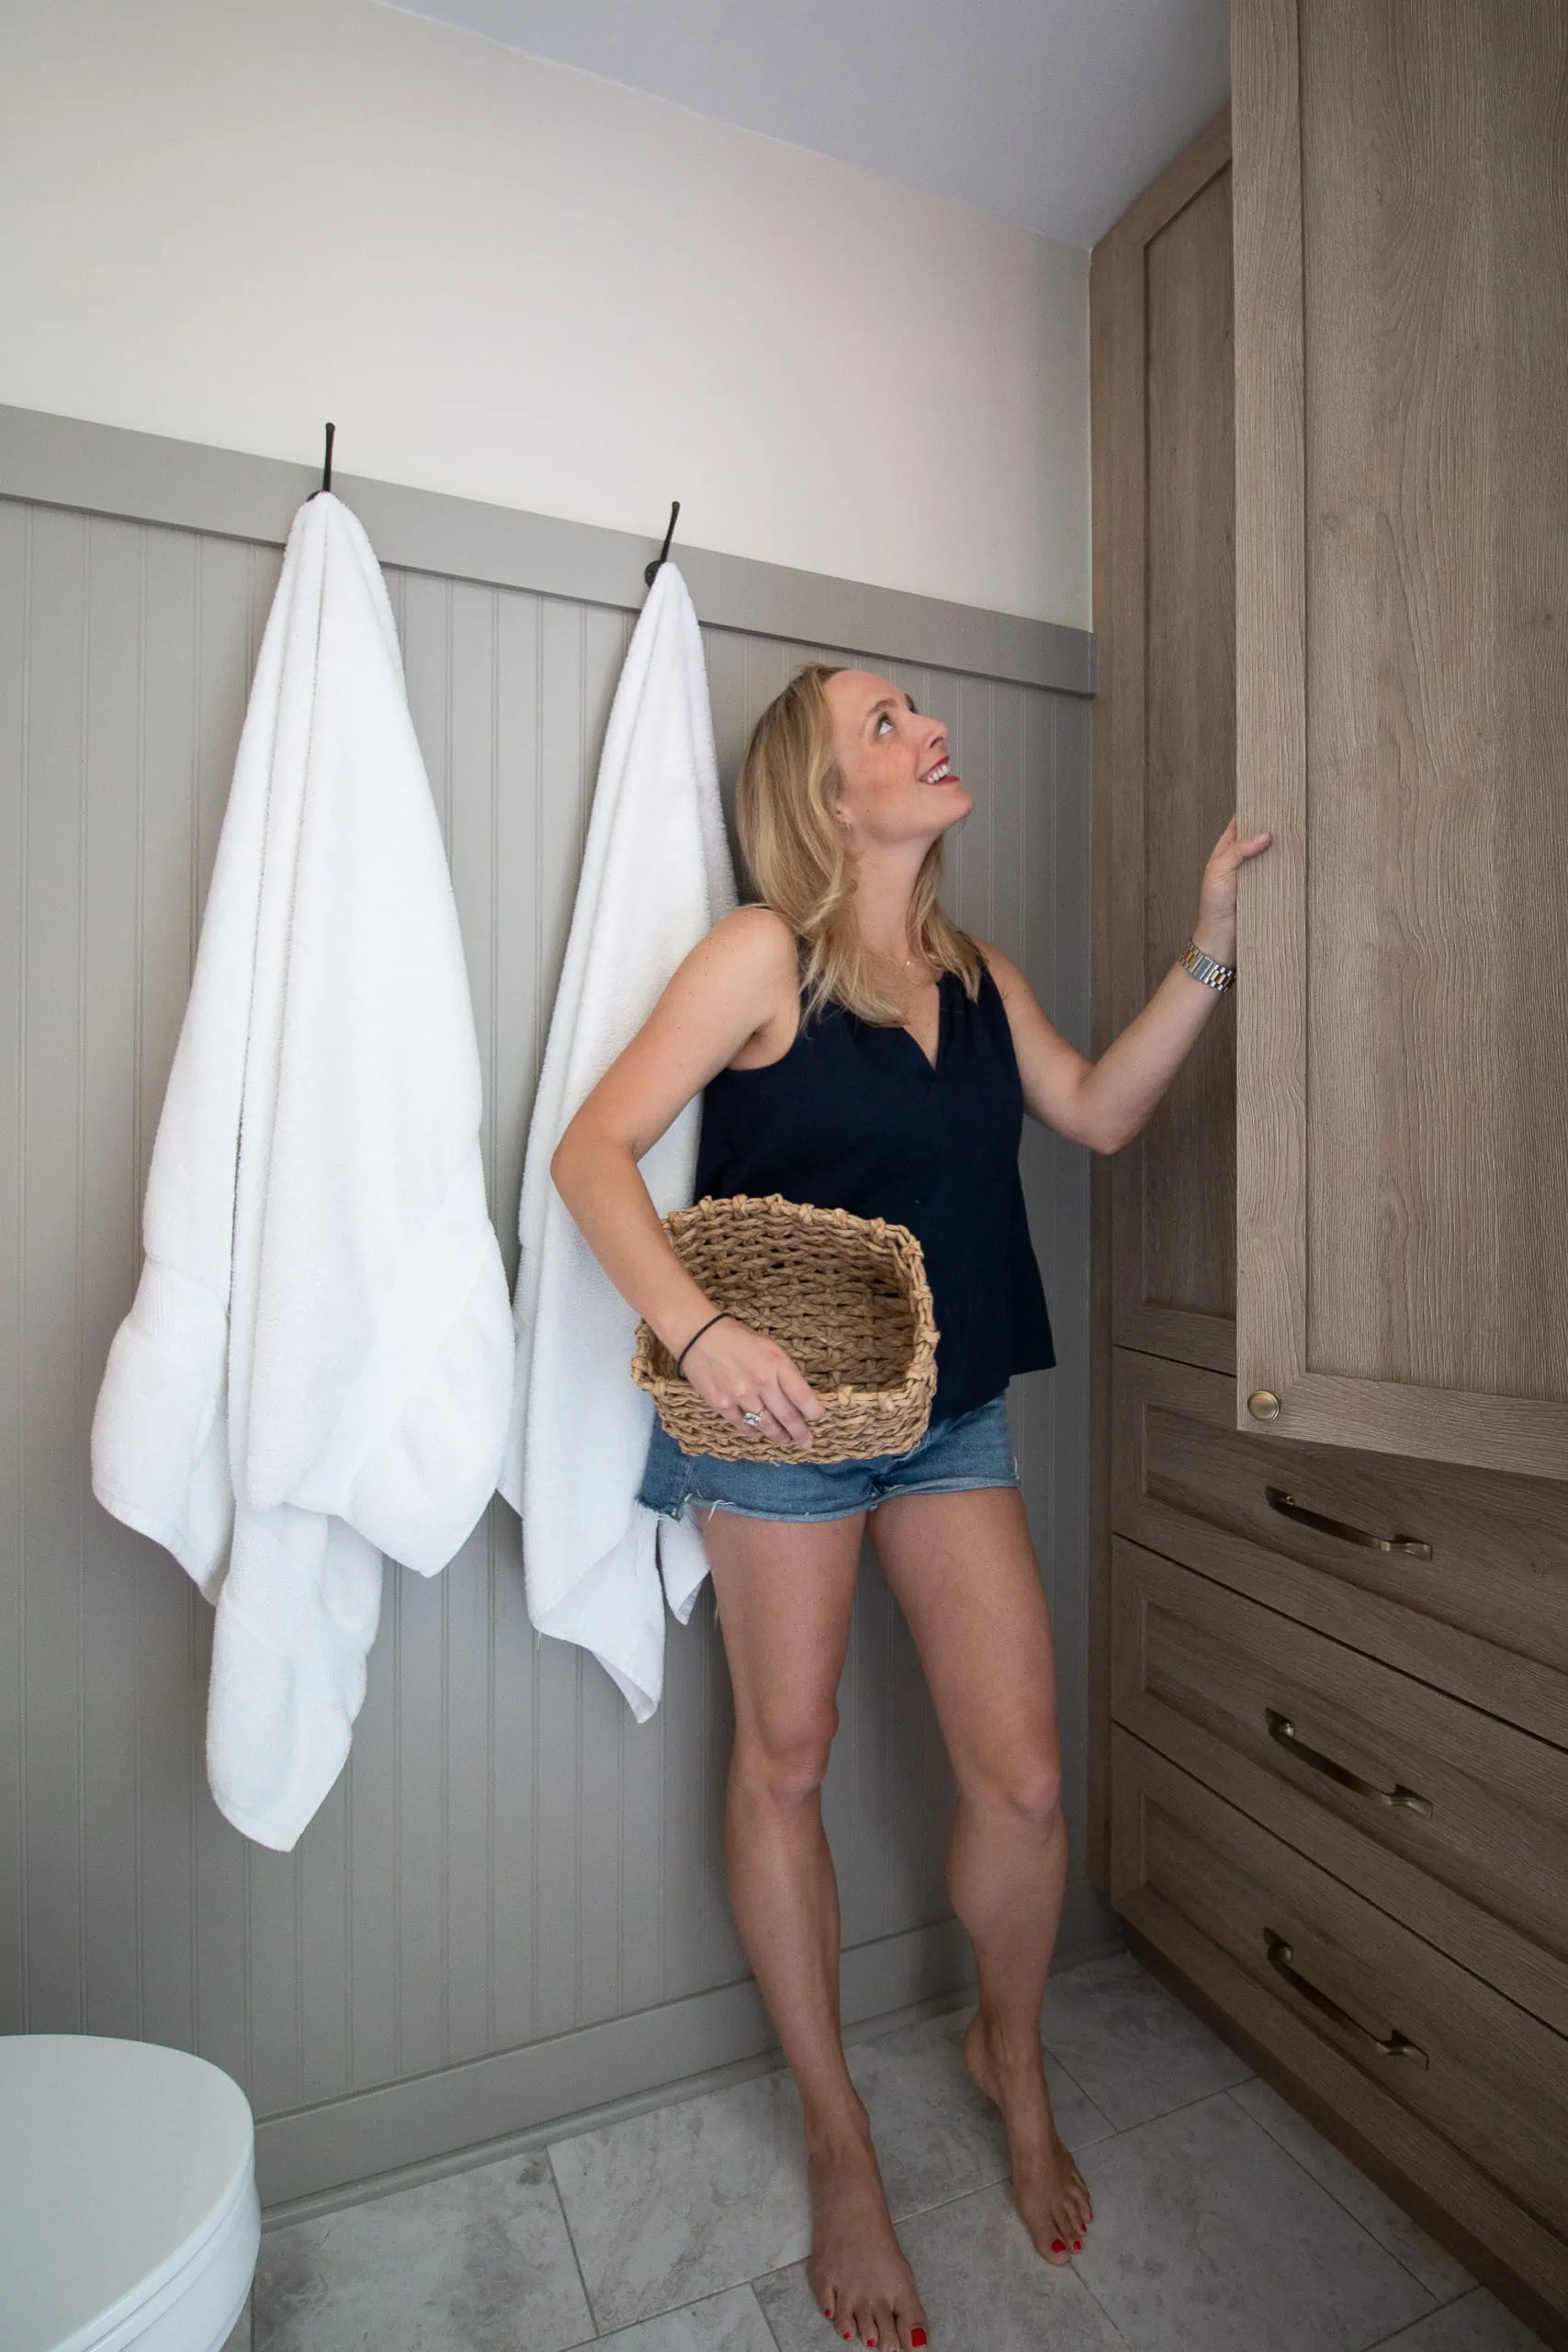
There are endless possibilities when it comes to using this IKEA cabinetry. And, you can customize IKEA’s cabinet system in so many ways to reflect your personal style. In fact, I’ll be using them in a totally different space. Come see my built-in linen cabinet in our bathroom right here.
Casey