The Final Reveal of Our Office Built-Ins
Our office built-ins are finally complete! Here’s a look at the process from start to finish, along with a budget breakdown.
I can hardly believe this day has come. I can officially cross office built-ins off my to-do list because these babies are done! This was by far the most ambitious project we’ve ever tackled and every time I walk into the room I feel an enormous sense of pride. I want to shout from the rooftops, “We built these custom built ins. By ourselves. Out of wood. Can you believe it?!”
I’m pretty sure anyone who comes over to my house in the next month will immediately be dragged upstairs so I can show them off. What can I say? I’m proud!
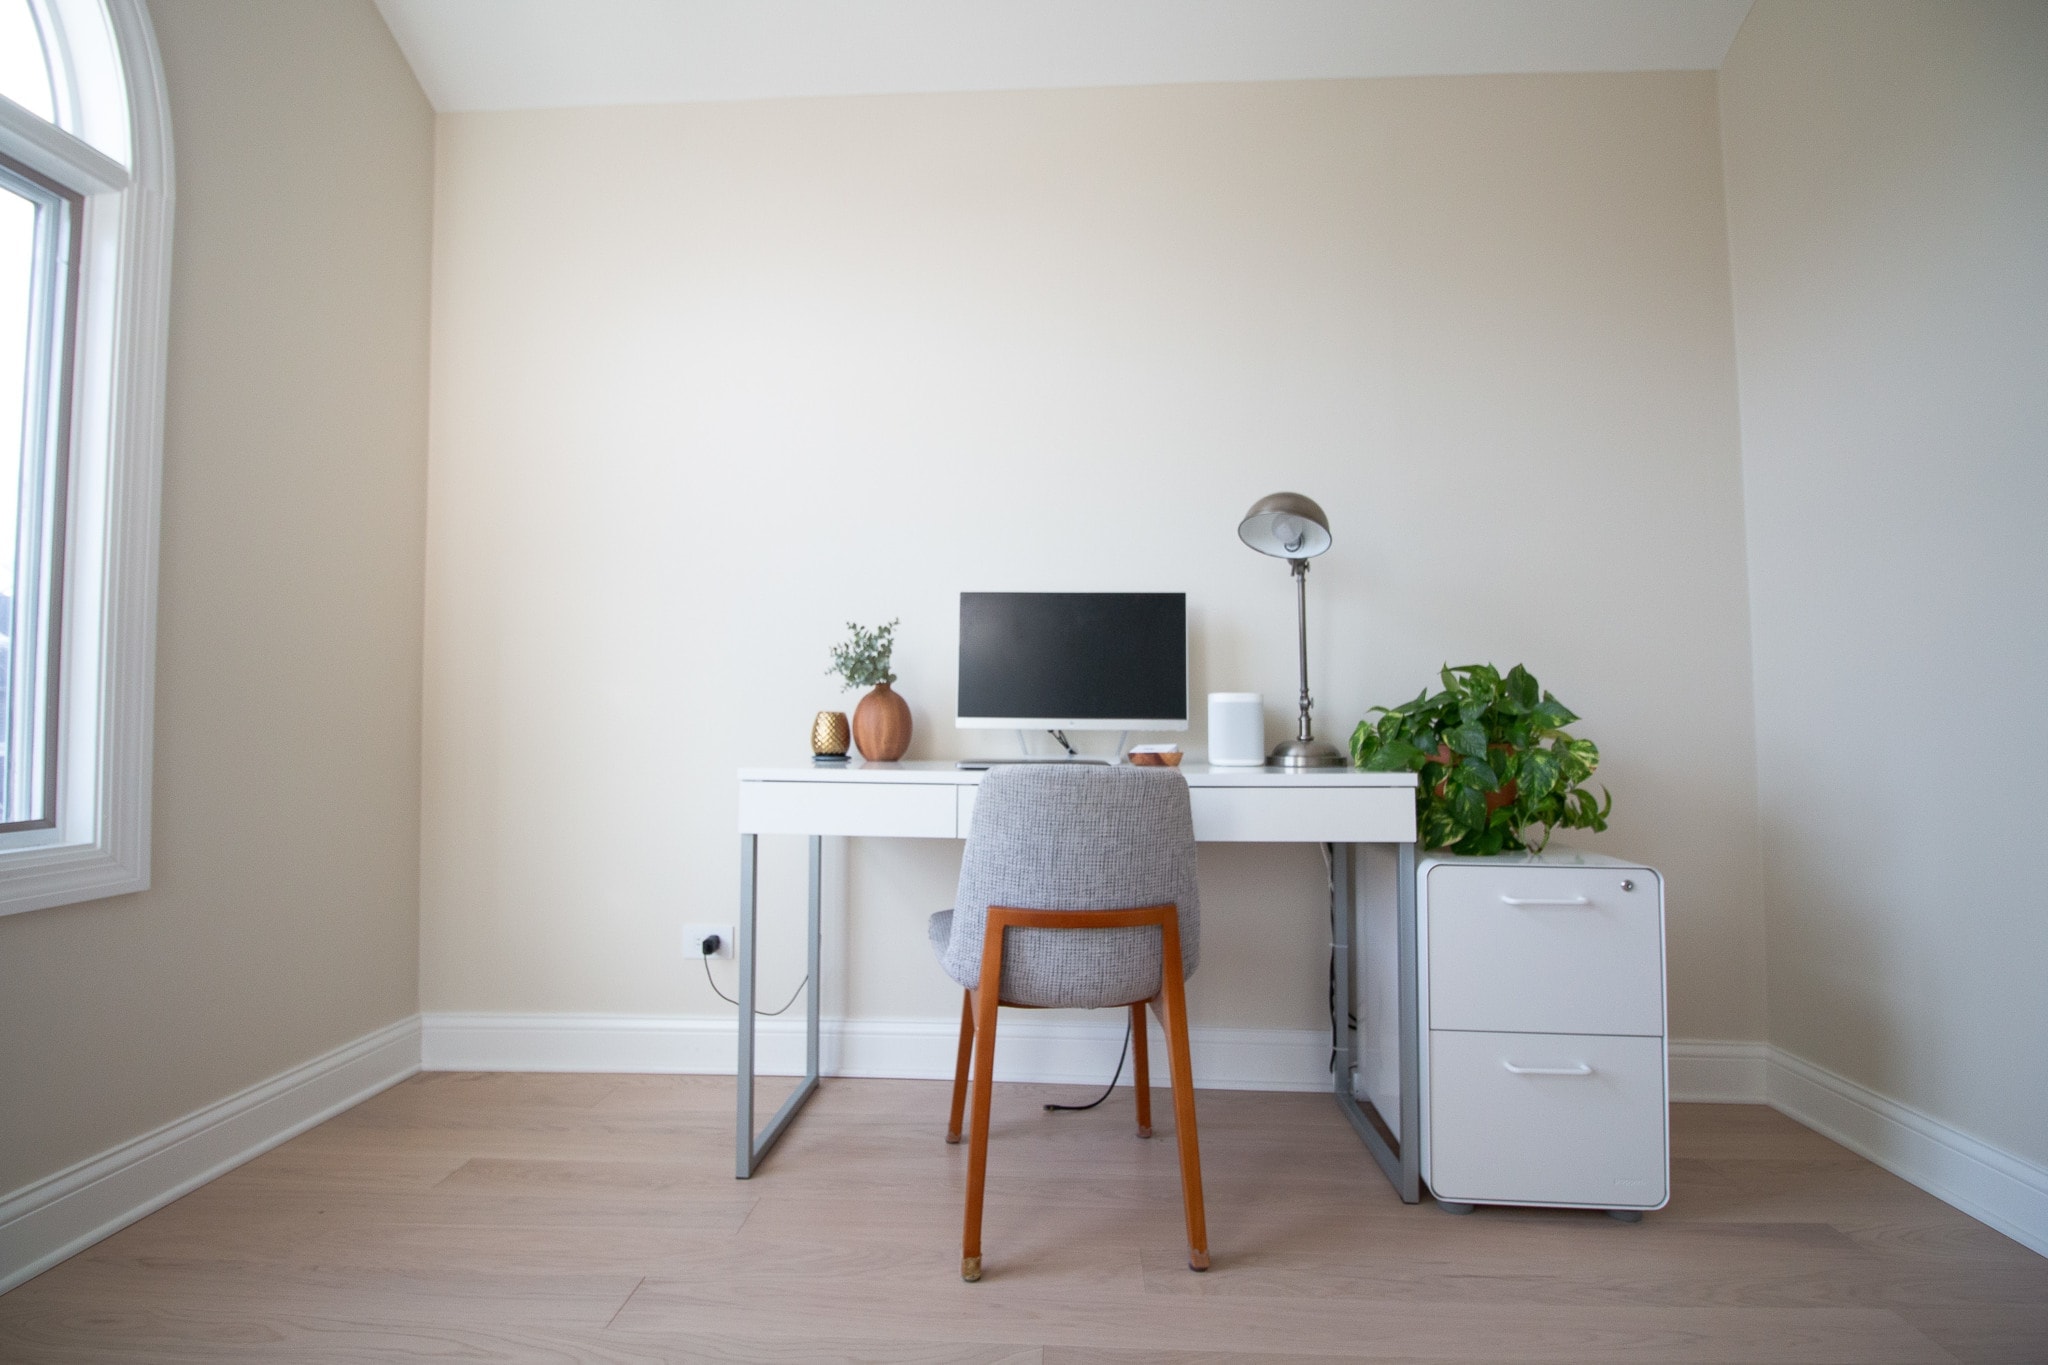
The Office – Before
I’ve taken you through every step in this process. Let’s review them all…
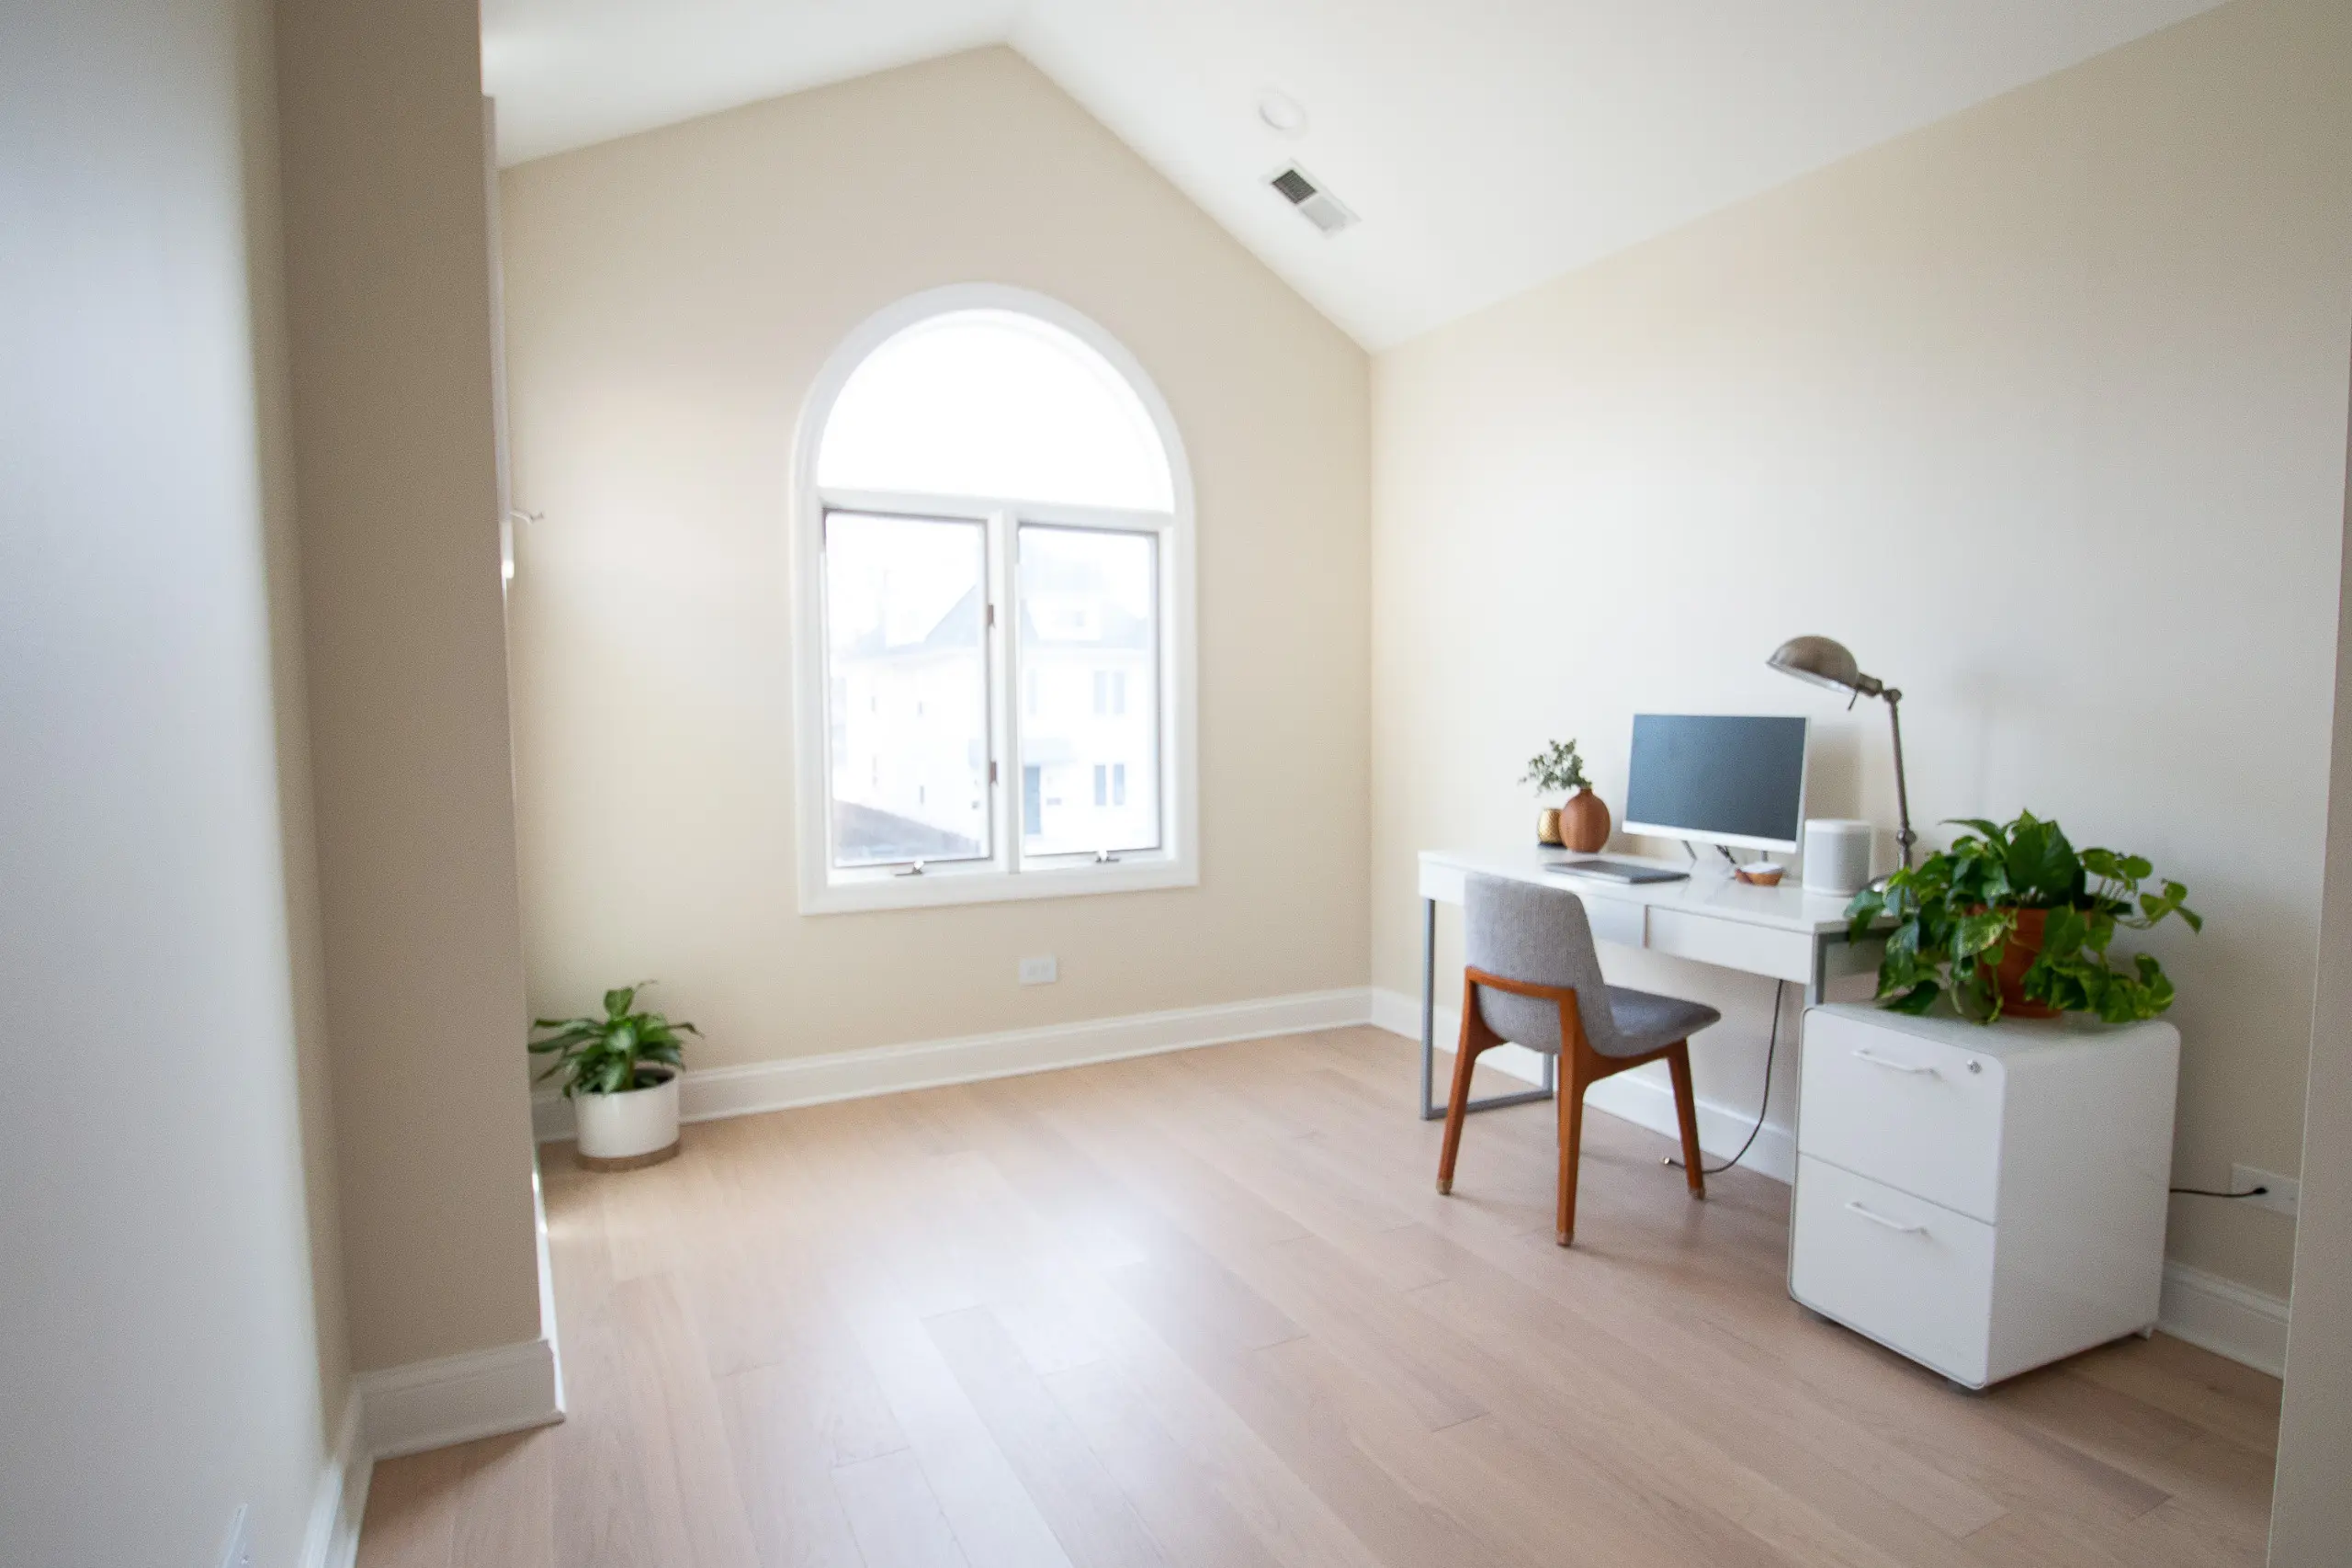
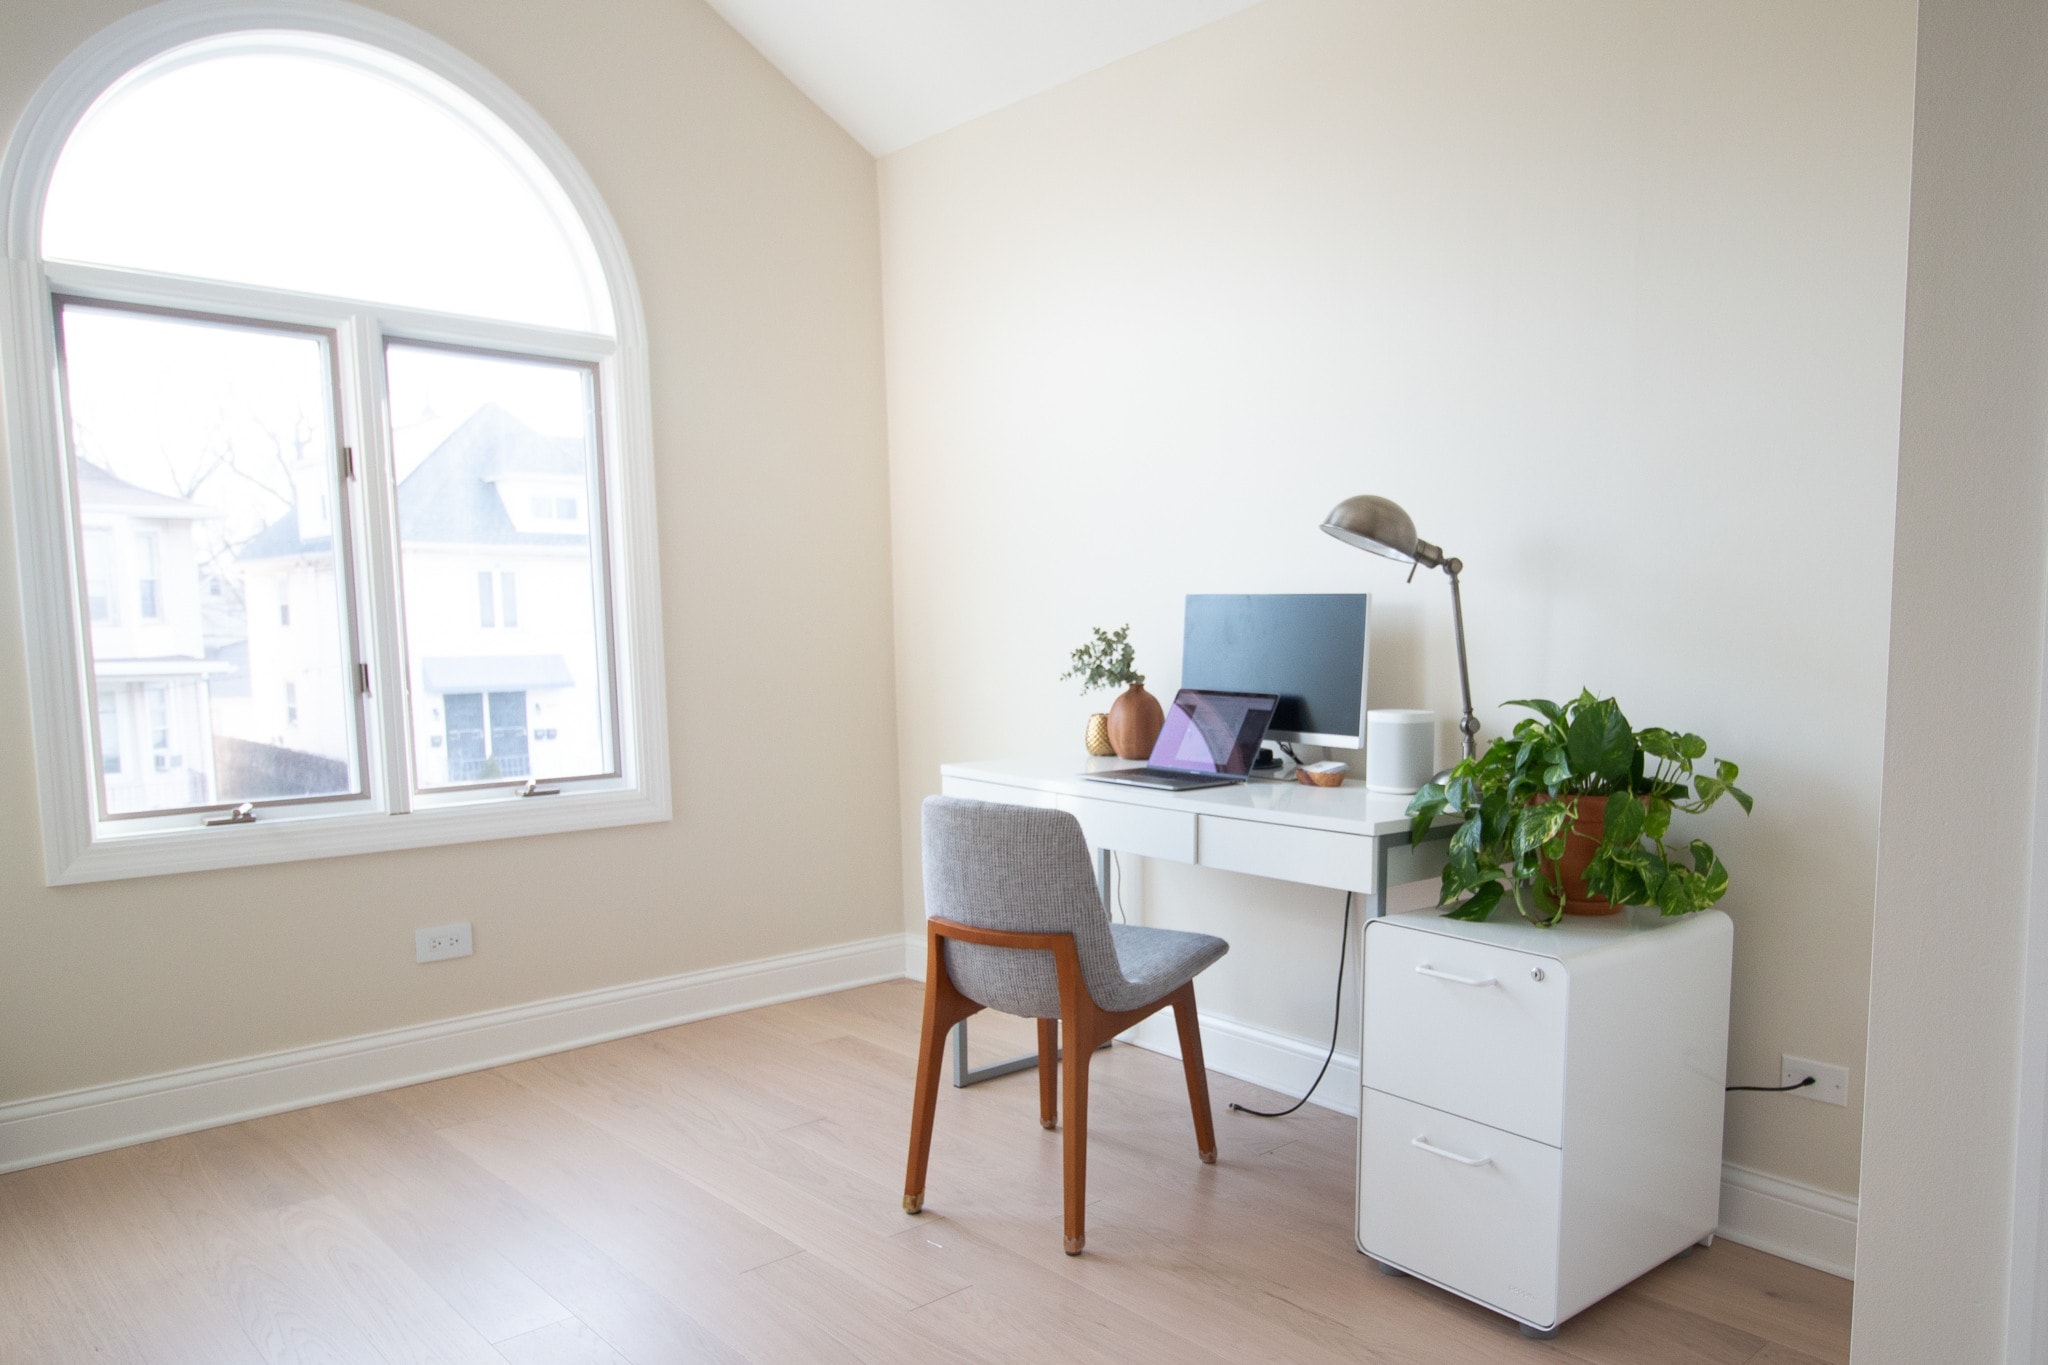
Here’s where we started in our office. I had my old desk and file cabinet in here, but not much else. I rarely ever worked in this small room because it was so cold, echoey, and sad!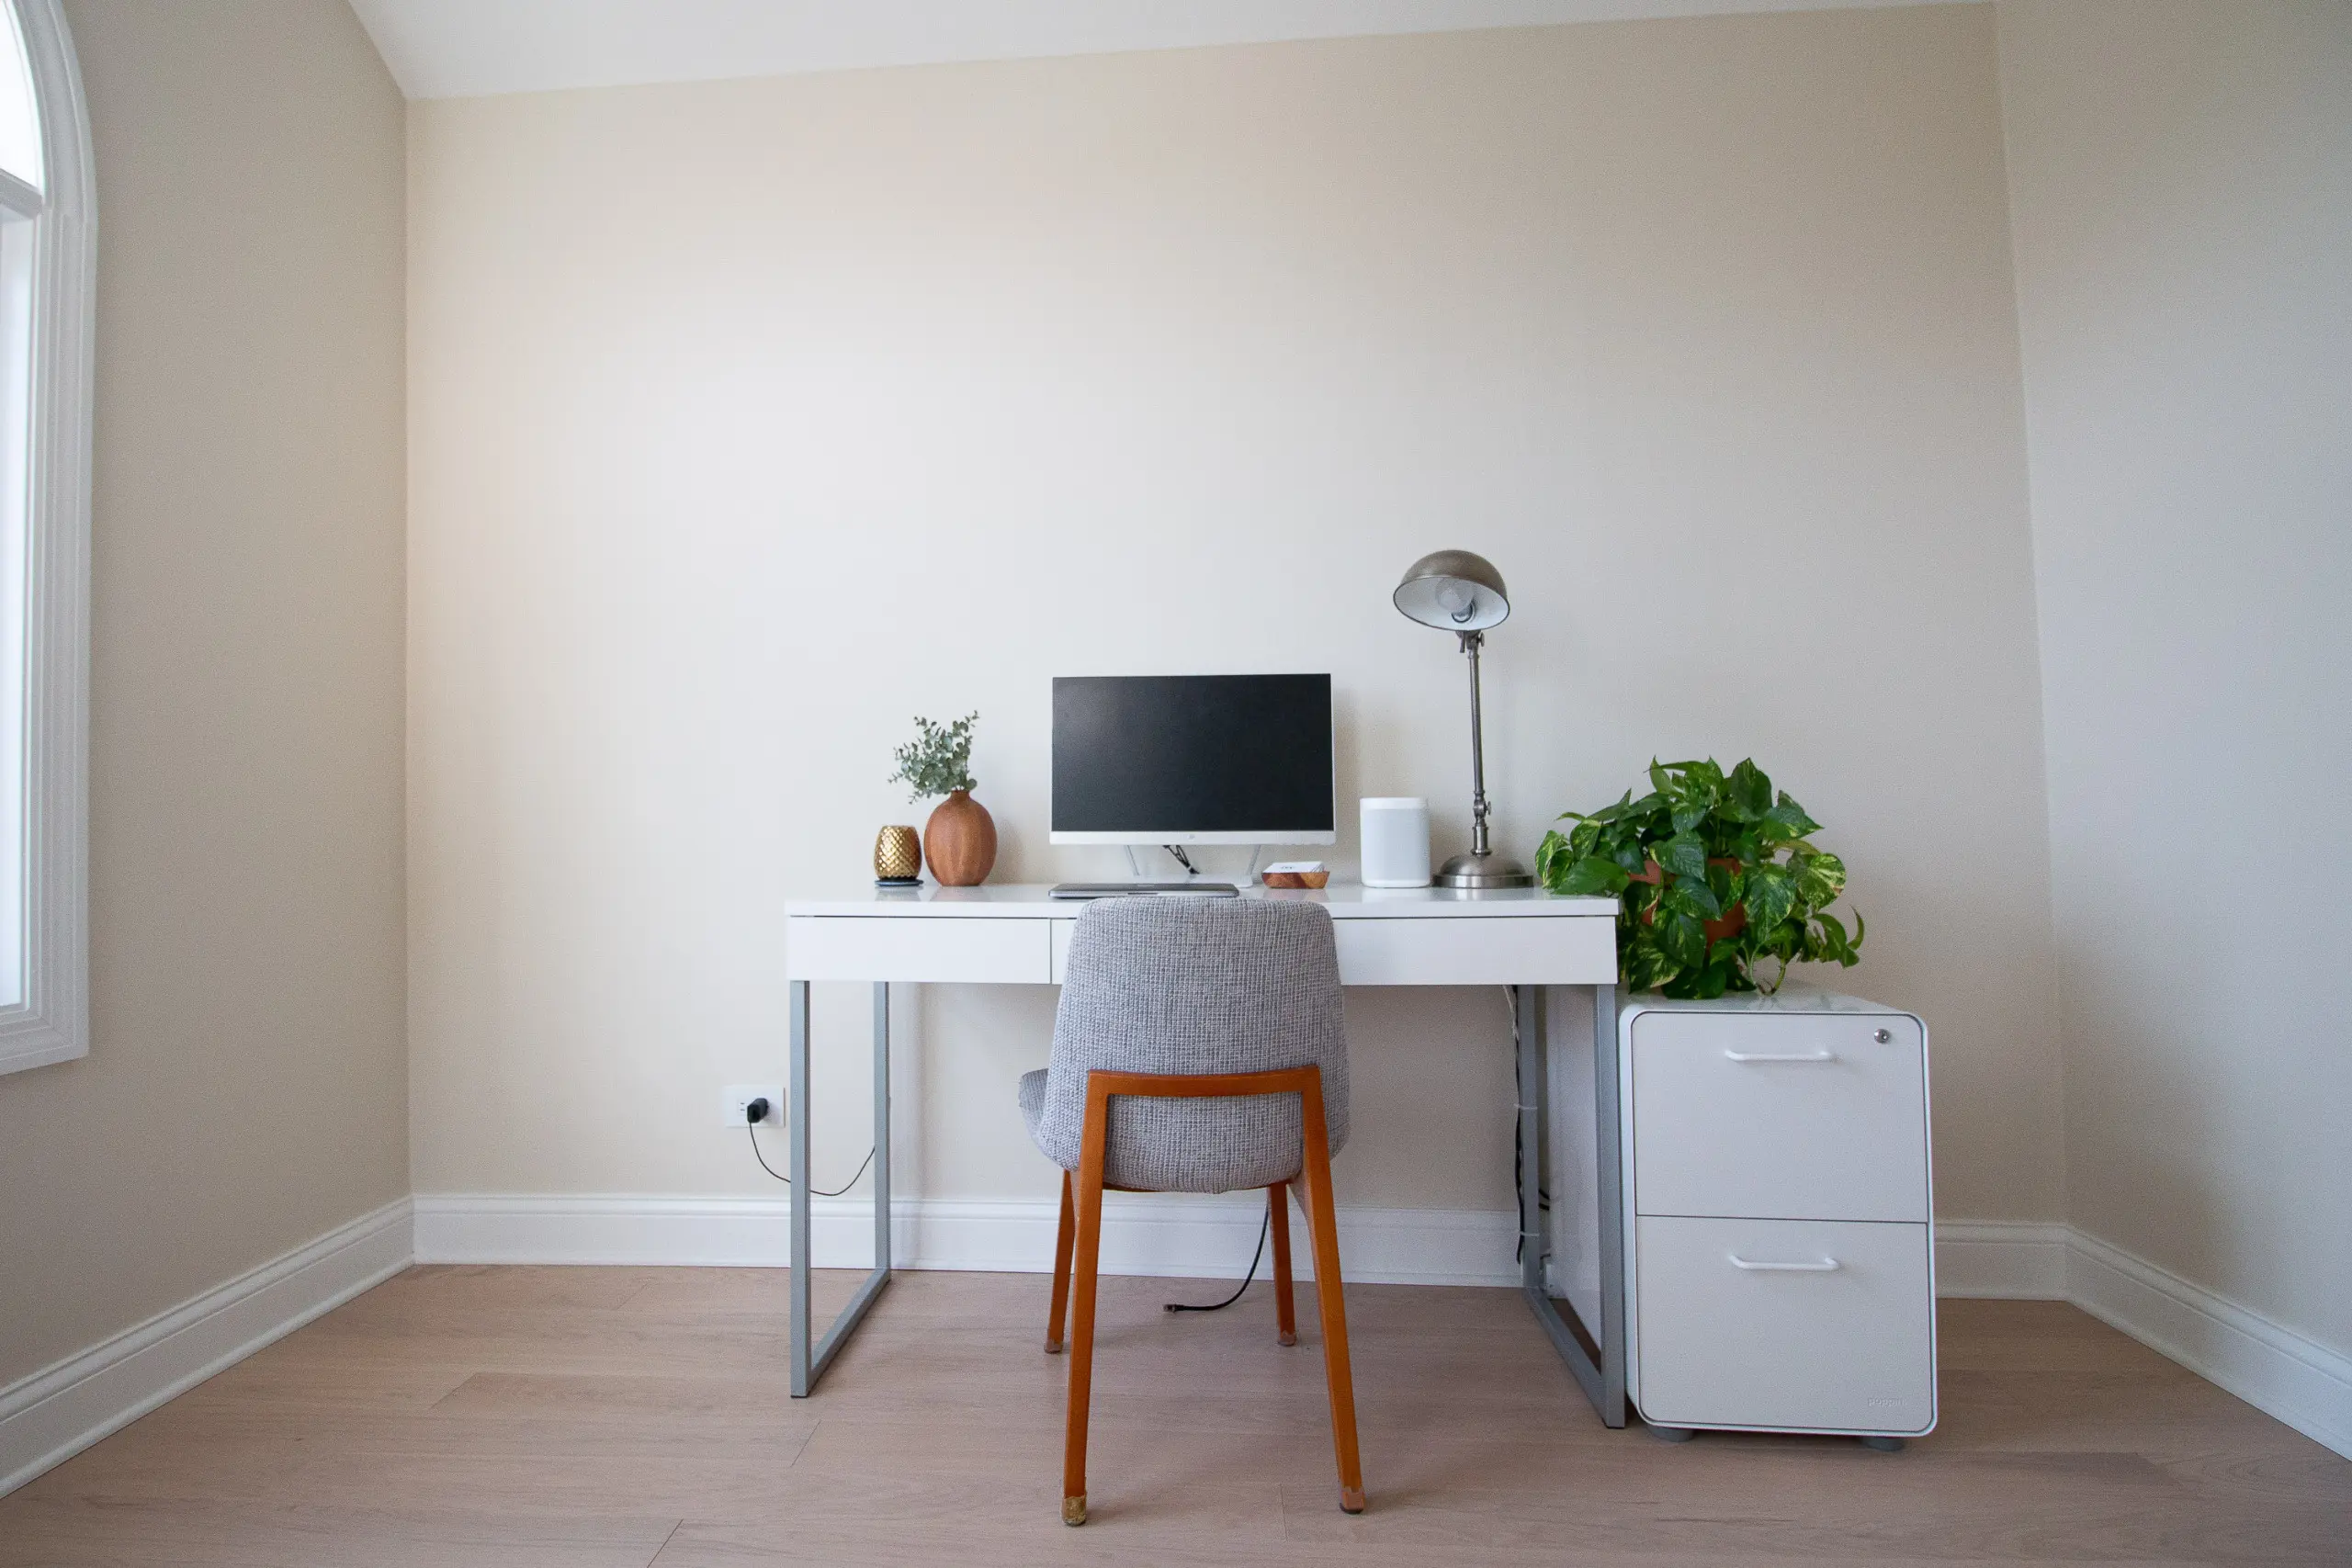
Creating A Design Plan
The first thing we did was make a gameplan and a shopping list. I shared my vision for this wall over in this blog post and I’m happy that we were able to stick to my original design for these. You can find the built-in plan right here.
Installing The Bottom Cabinets
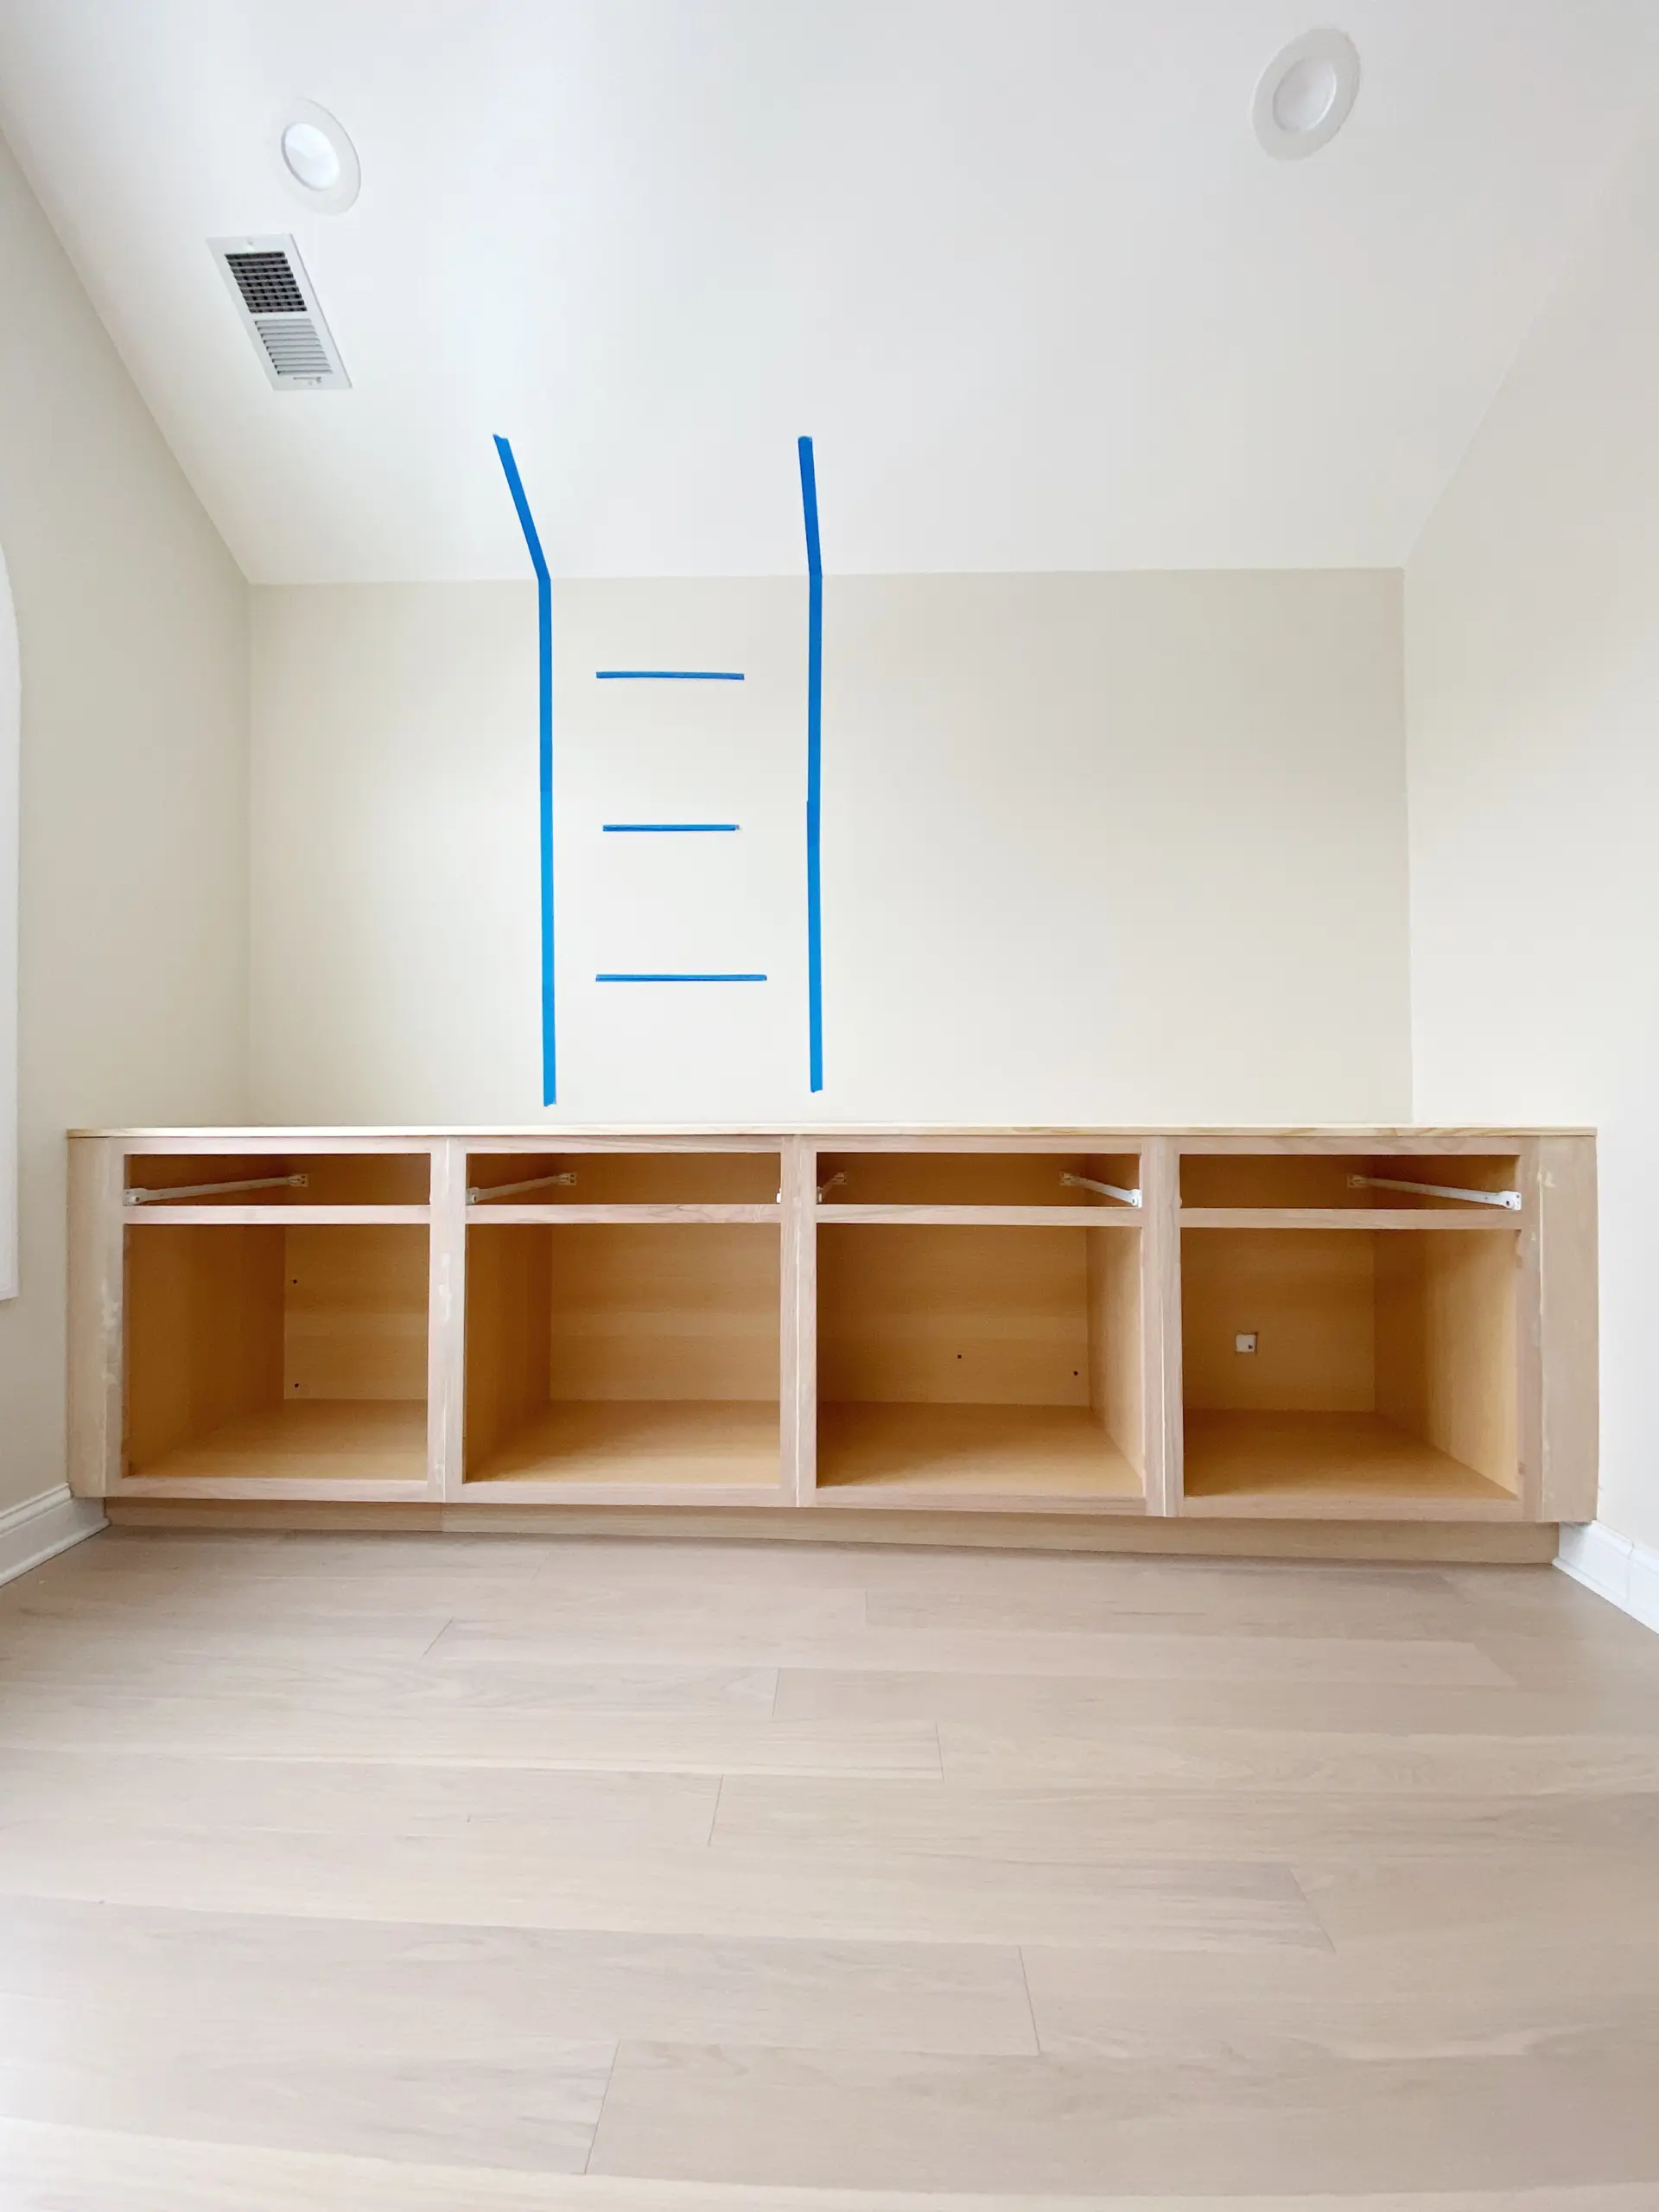
Finn and I then got to work building the base for our office built-ins. We used inexpensive unfinished cabinets to build the base and provide us with tons of secret storage. We added a budget-friendly countertop, filler pieces on the side, and a toe kick to really give it that built-in and custom look. The entire room was already looking so much better after this first step.
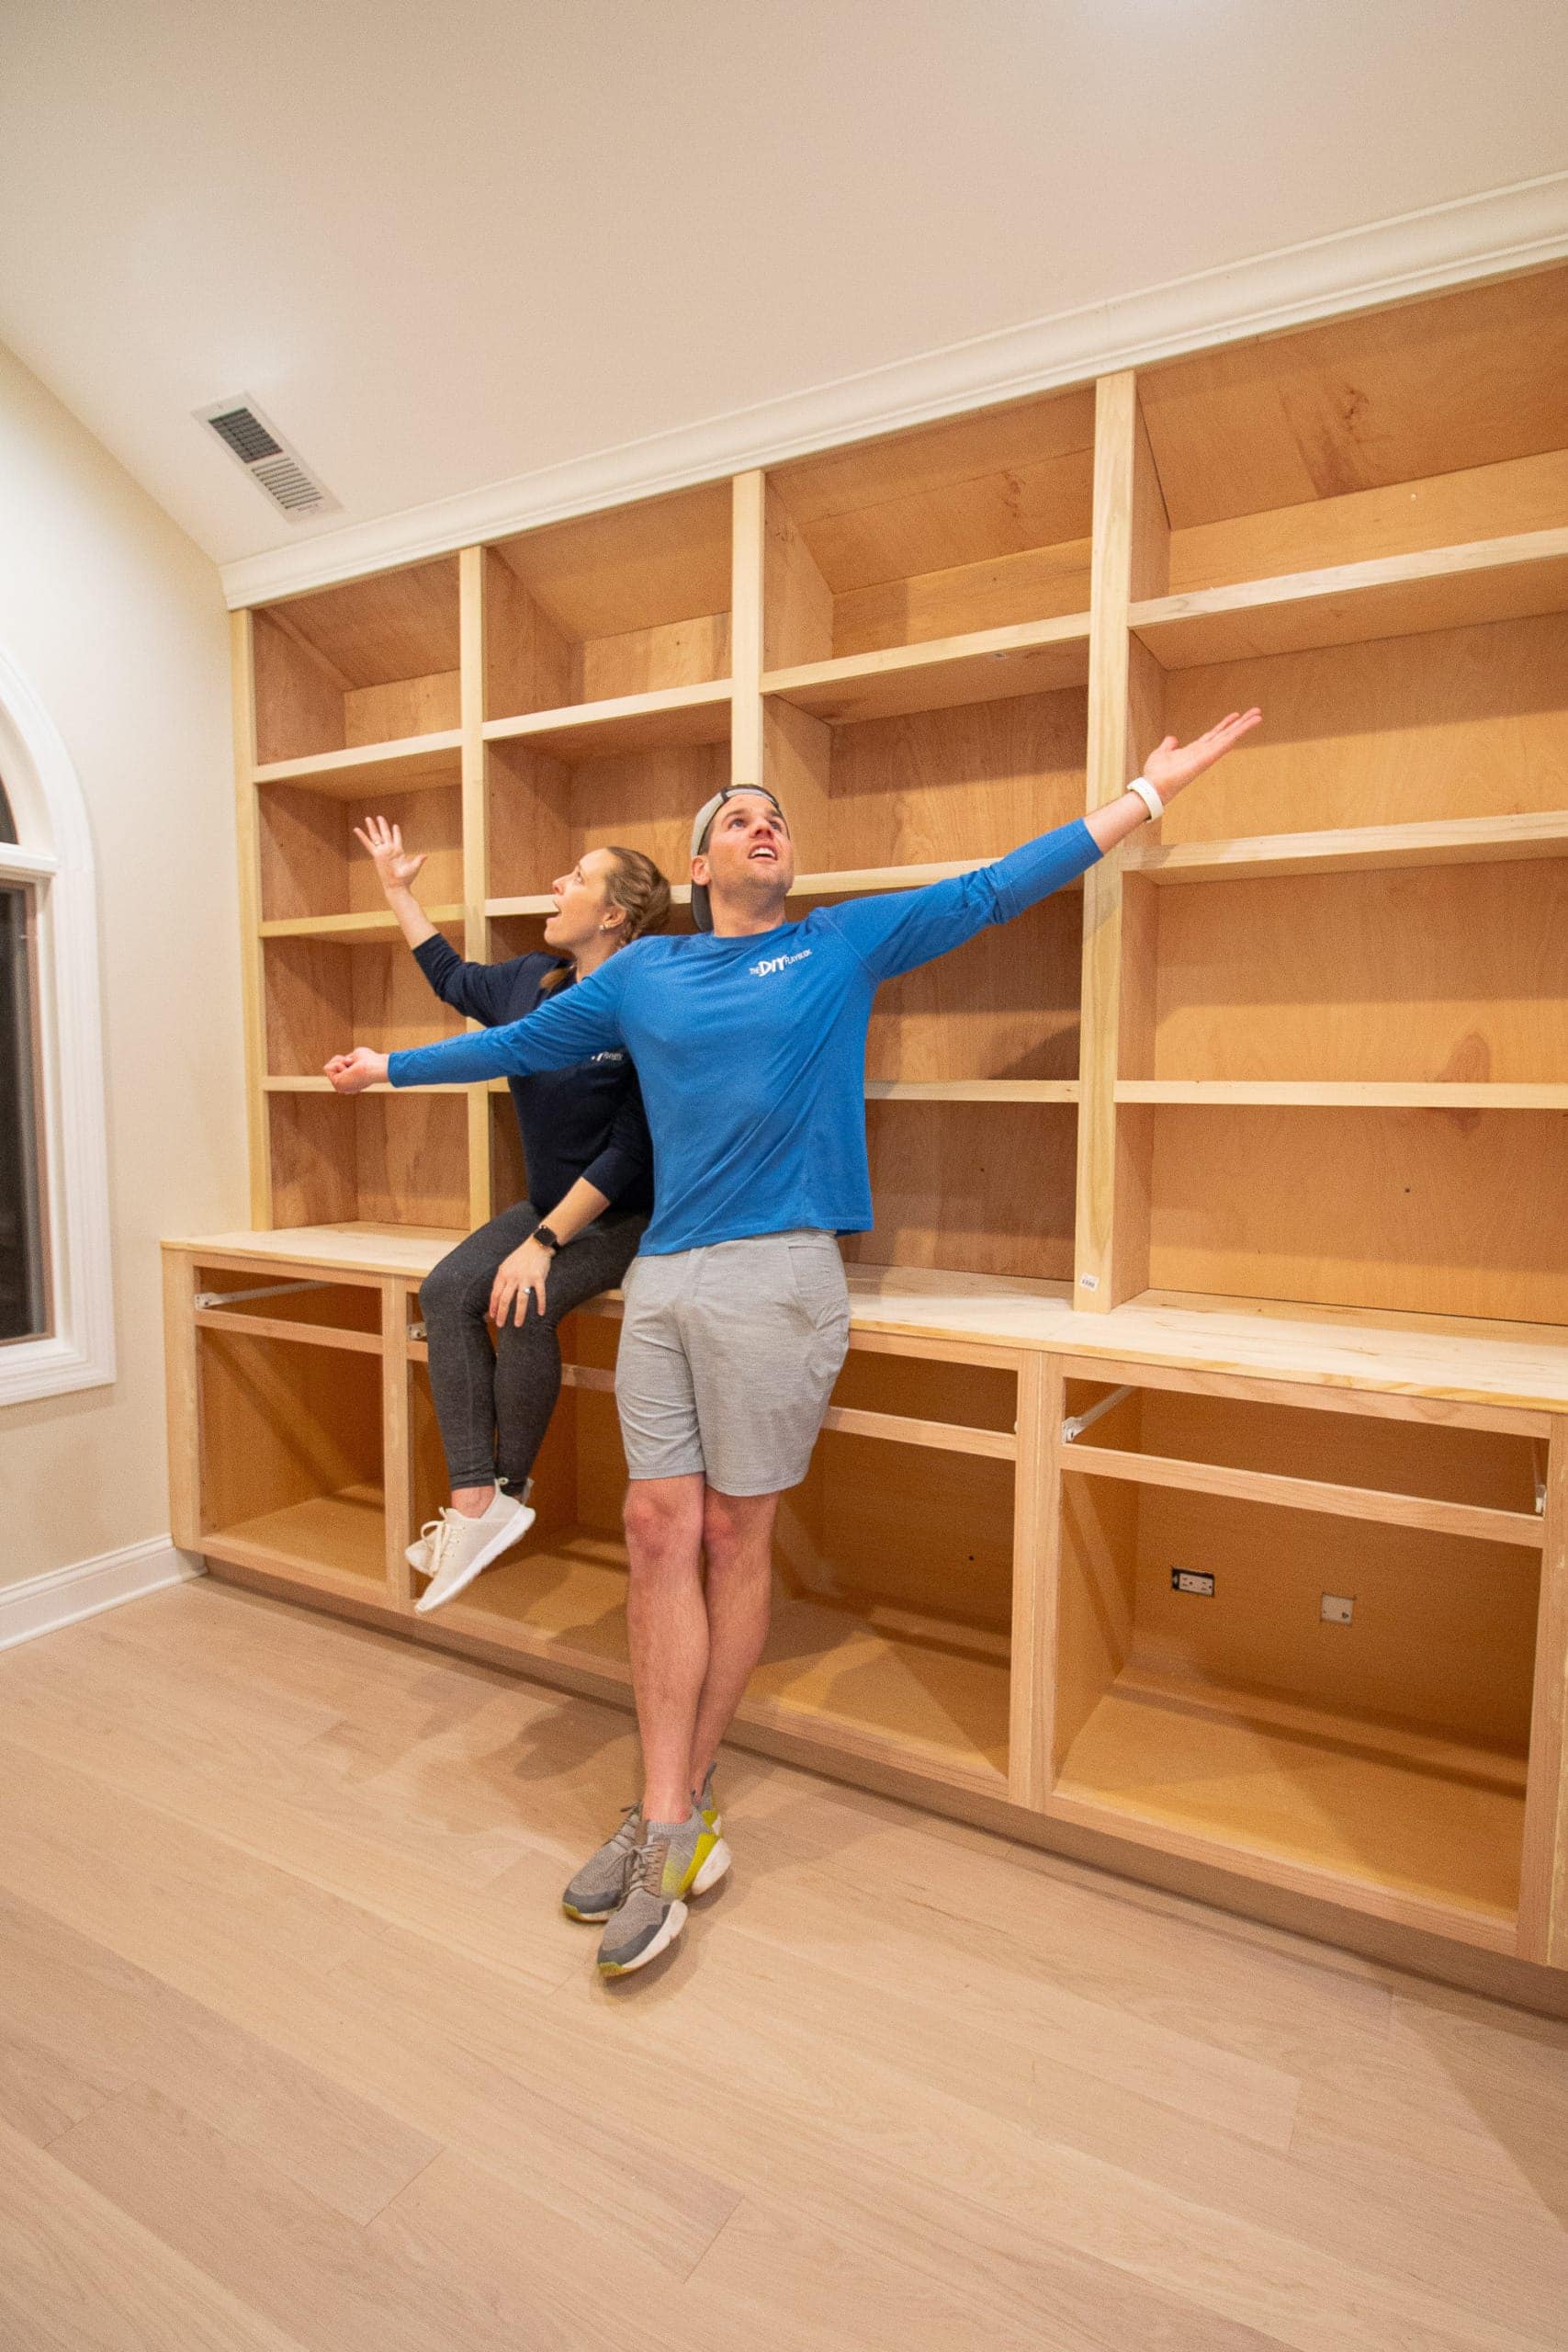
Building The Upper Cabinets

Then, it was time for the most intimidating part of this project…building the custom bookshelves. We were a bit nervous with the angled ceiling, but we were able to figure it out in the end.
This was by far the most time-consuming part of the entire project, but we learned so much along the way (and made plenty of mistakes). We finished off the plywood shelves with poplar trim and crown molding to give it a high-end look.
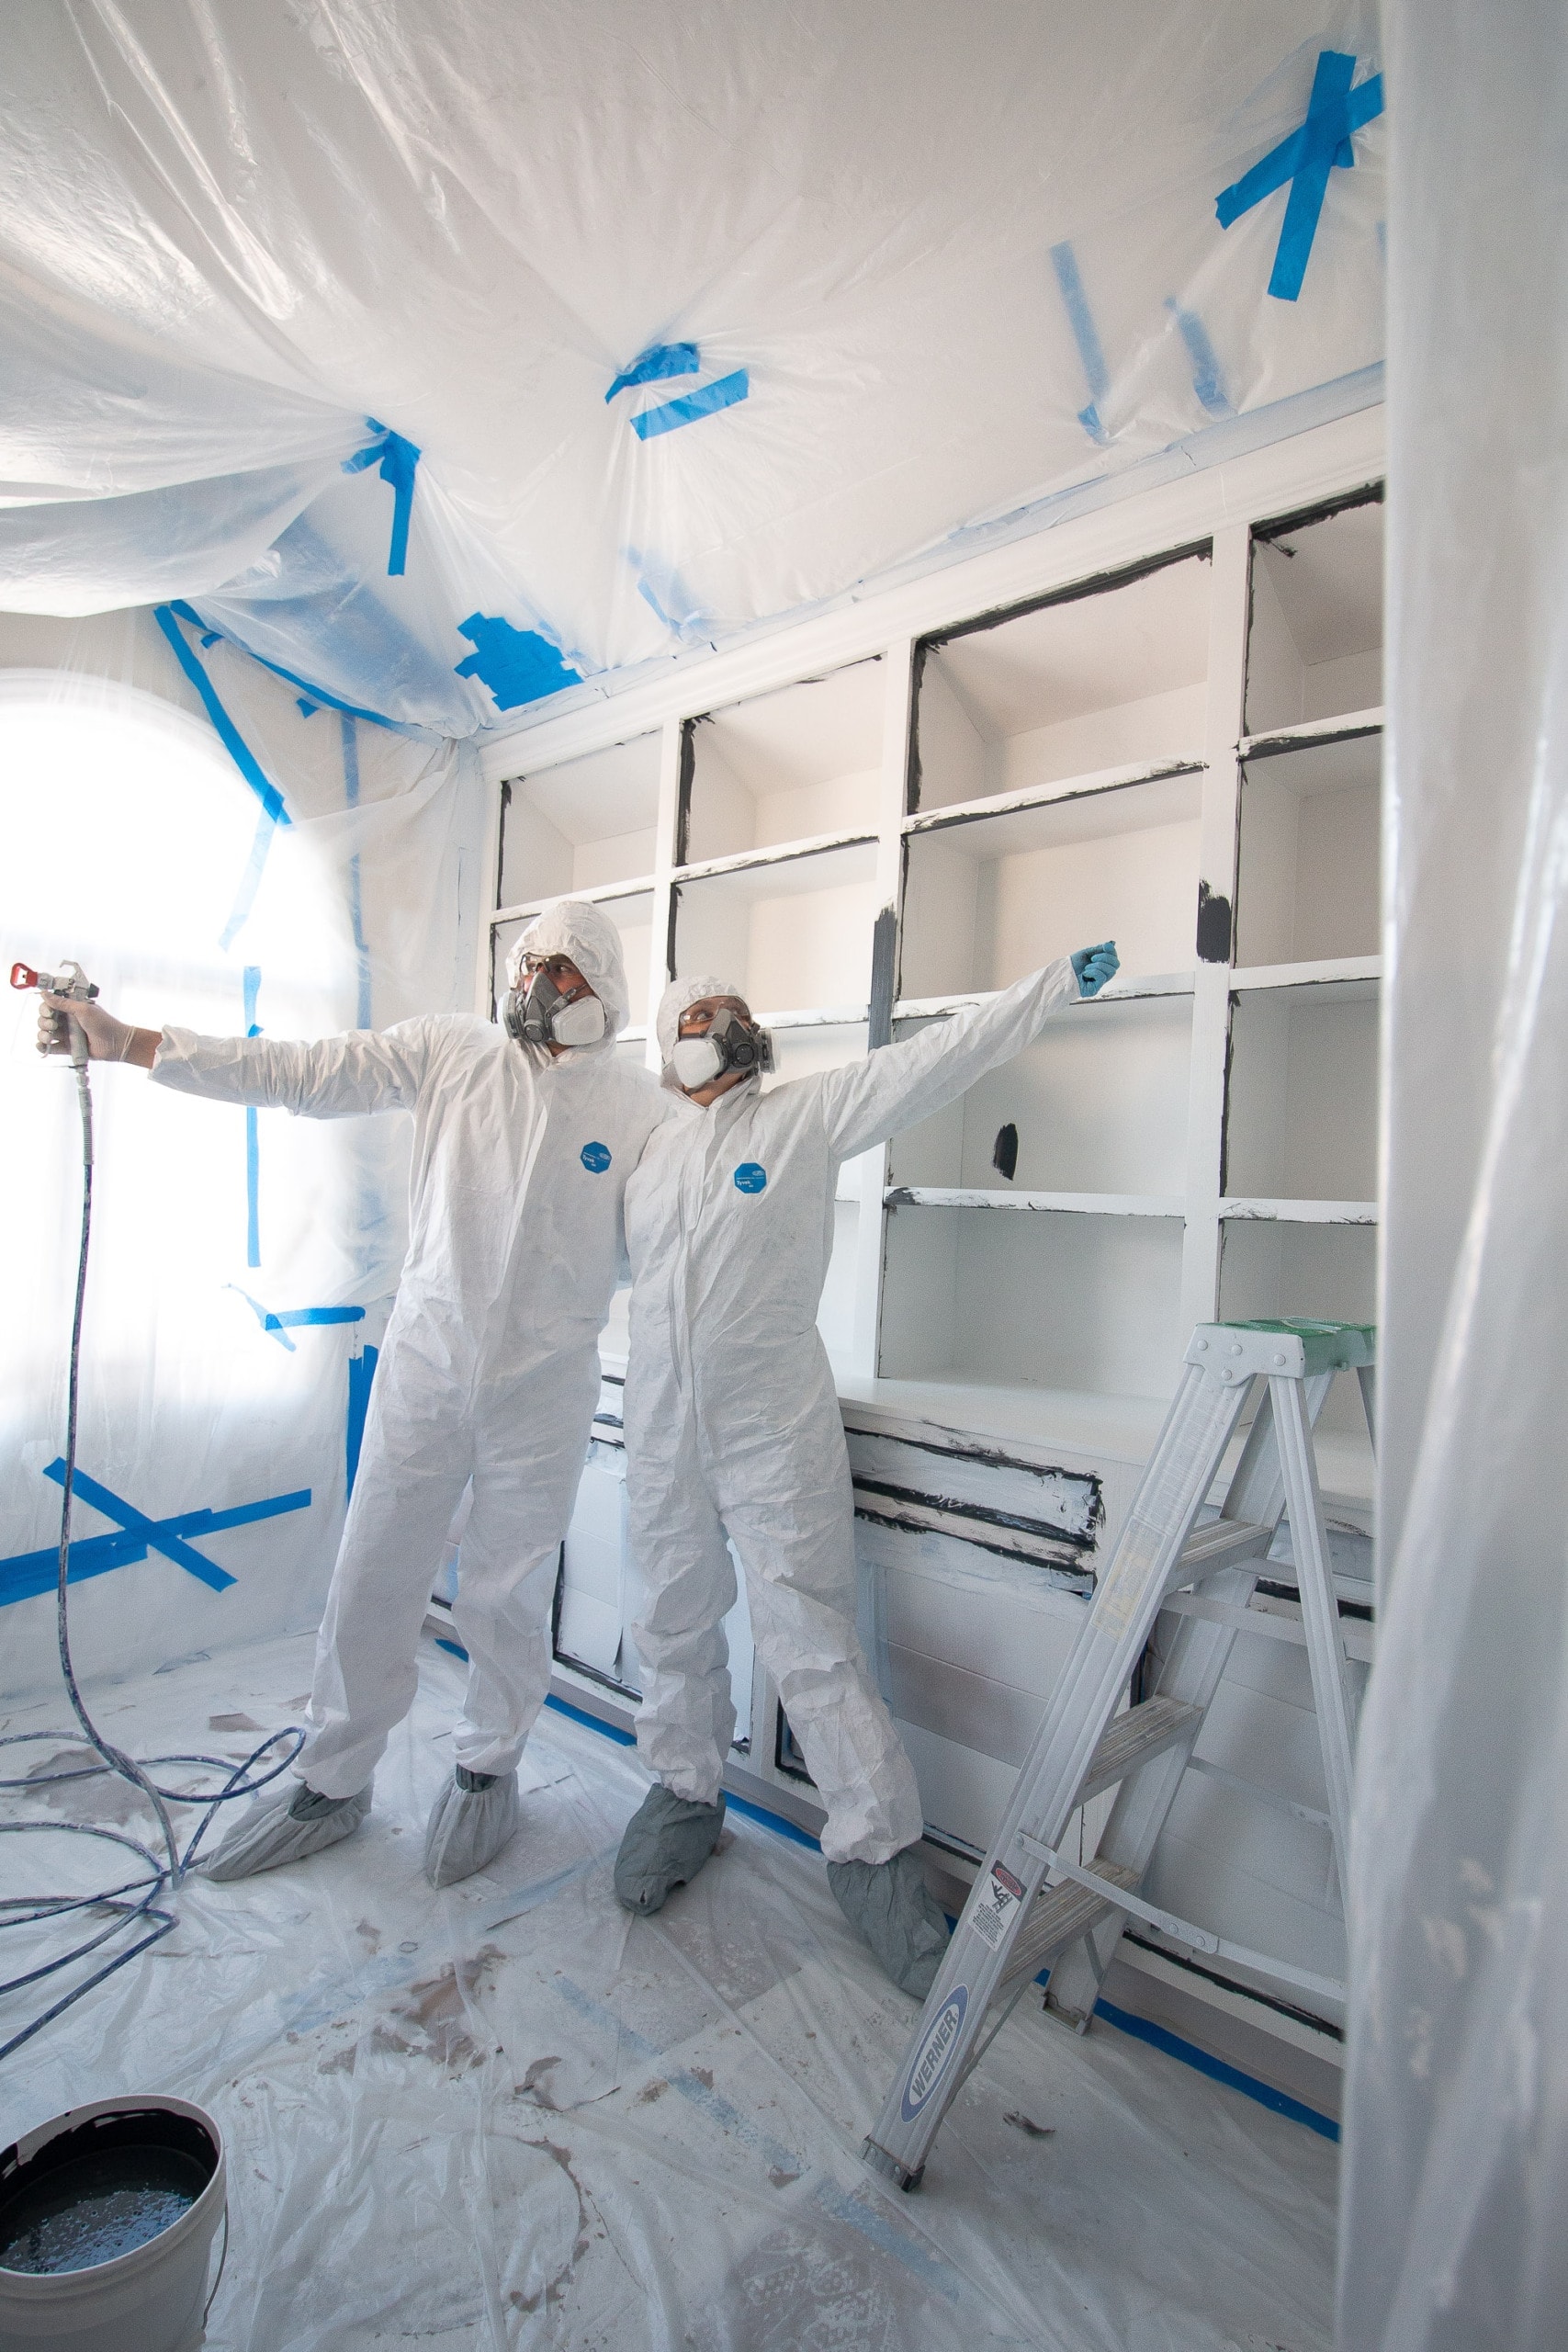
Spray Painting Our Custom Built-Ins “Chimney Smoke”
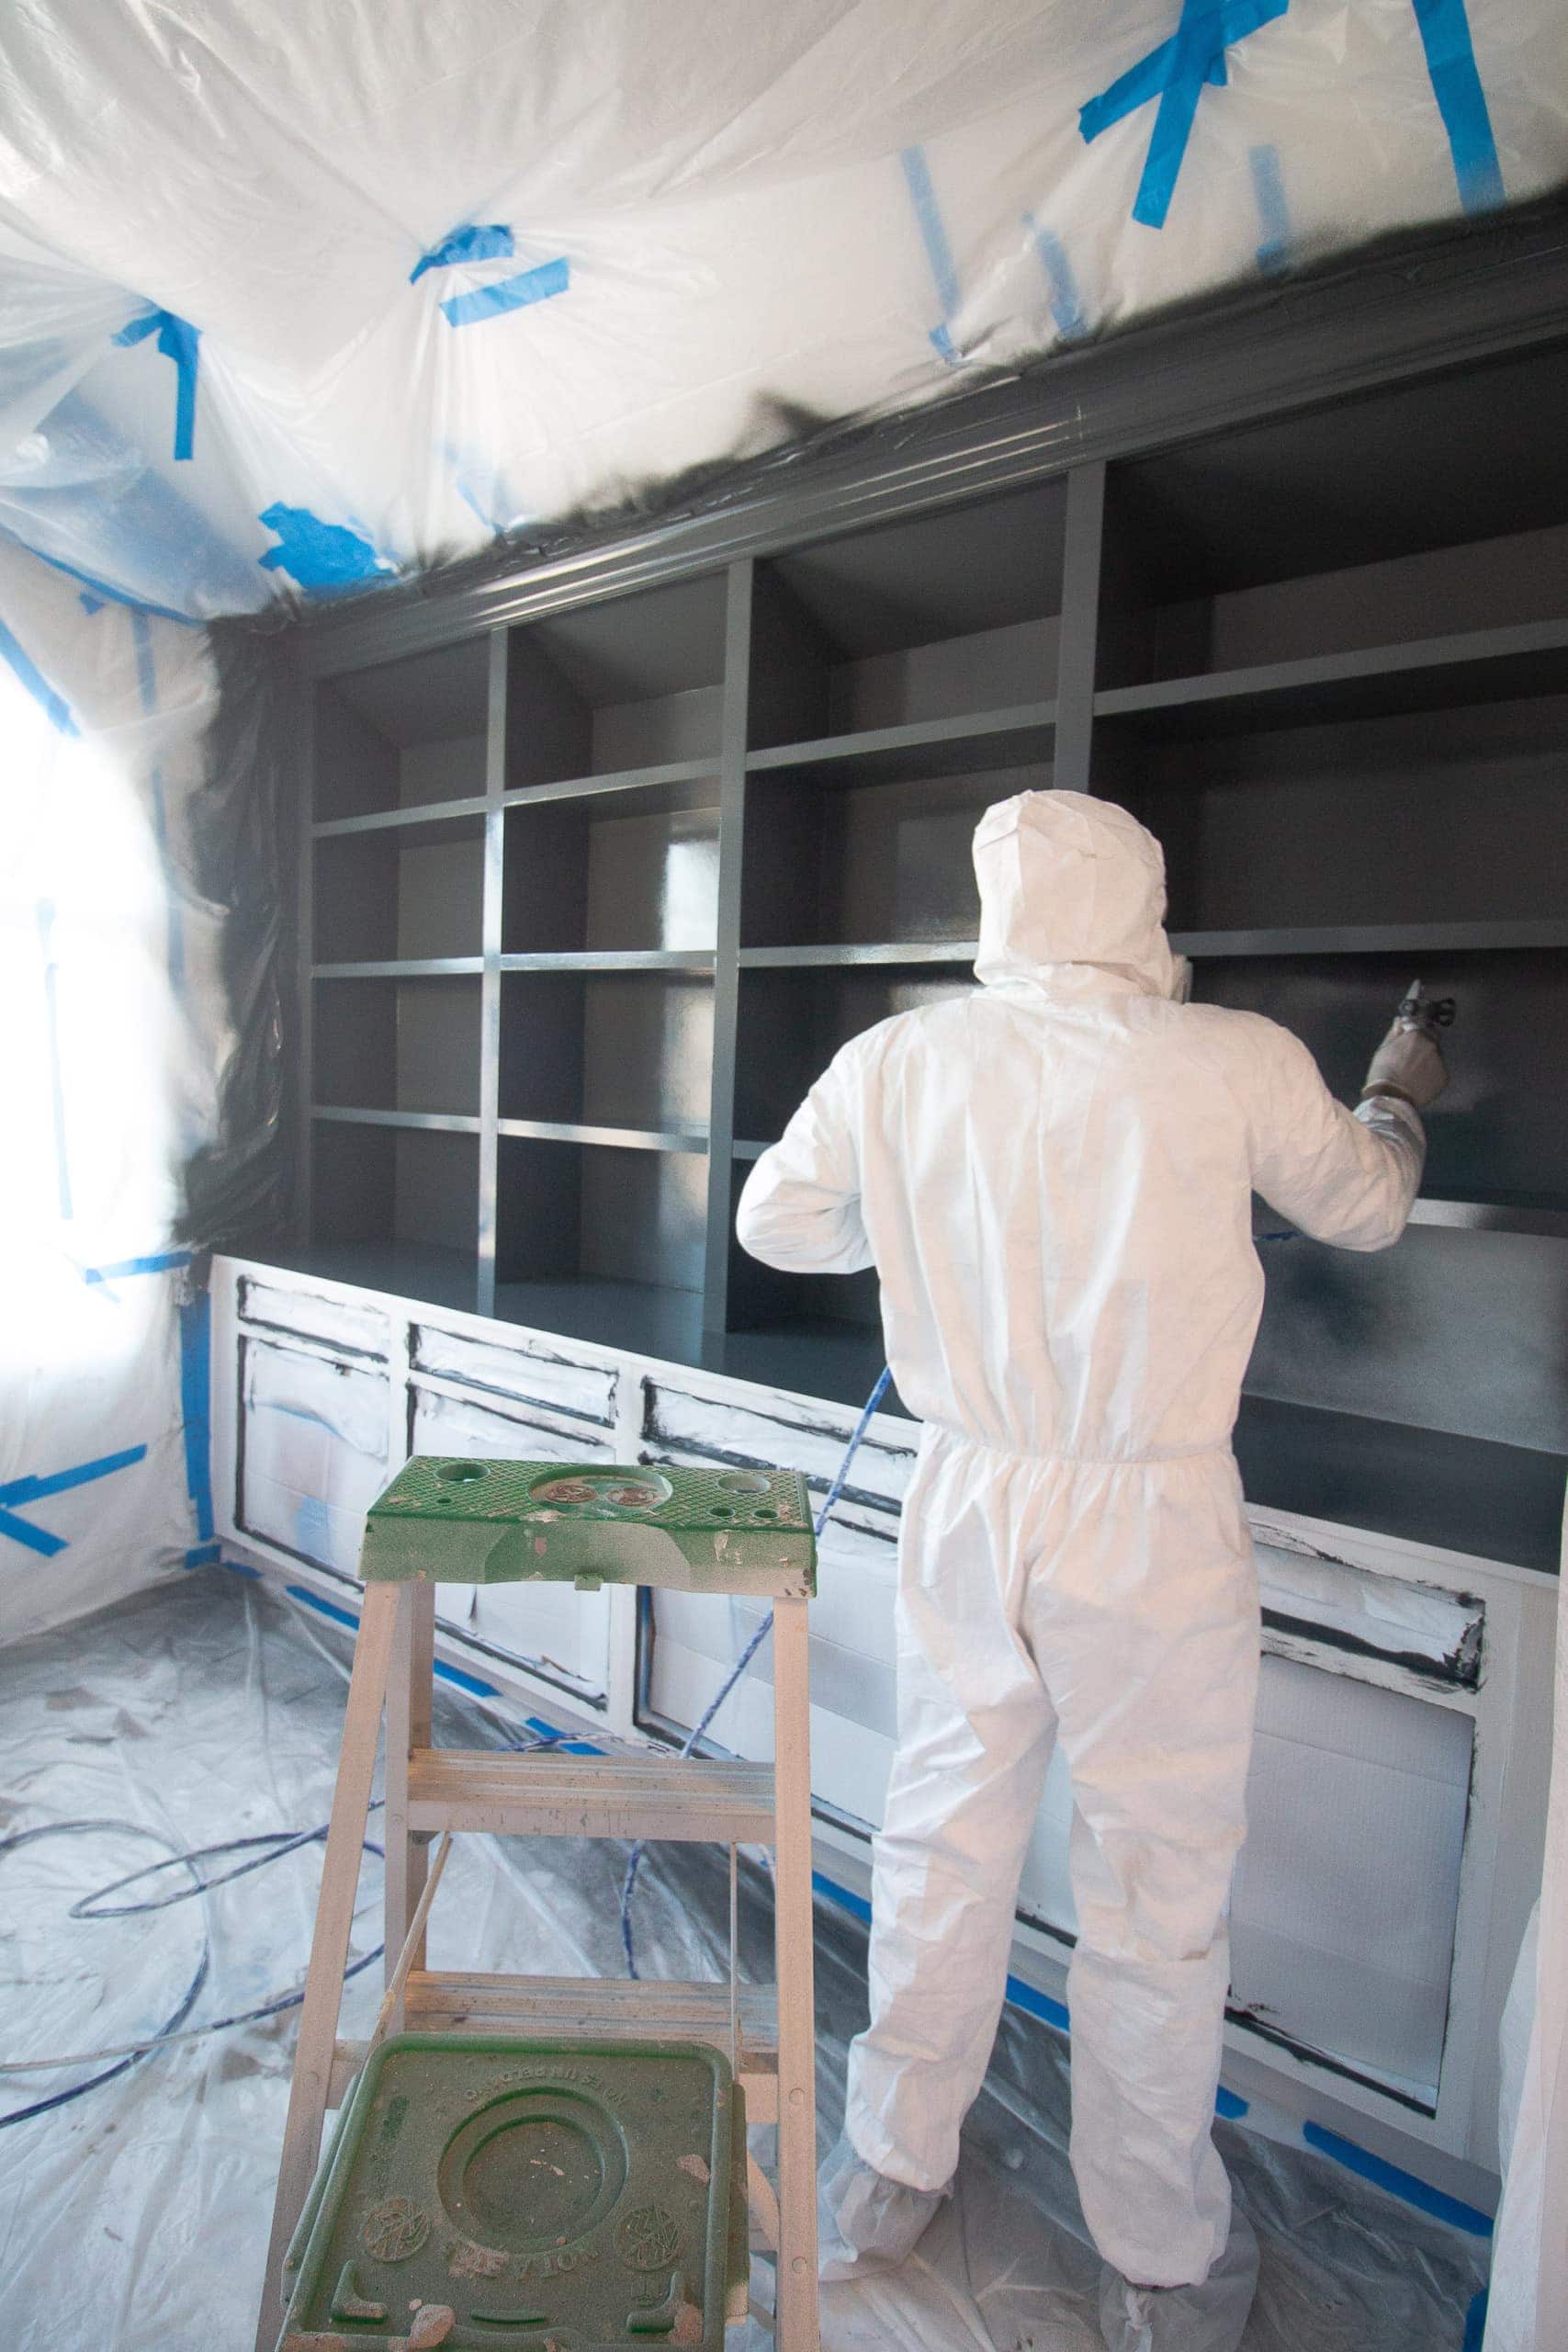
Once everything was built, I spent a good chunk of time prepping the wood for paint. I filled nail holes, caulked every seam, sanded every surface and got it all ready for our paint sprayer. We then did one coat of primer and two light coats of paint. 
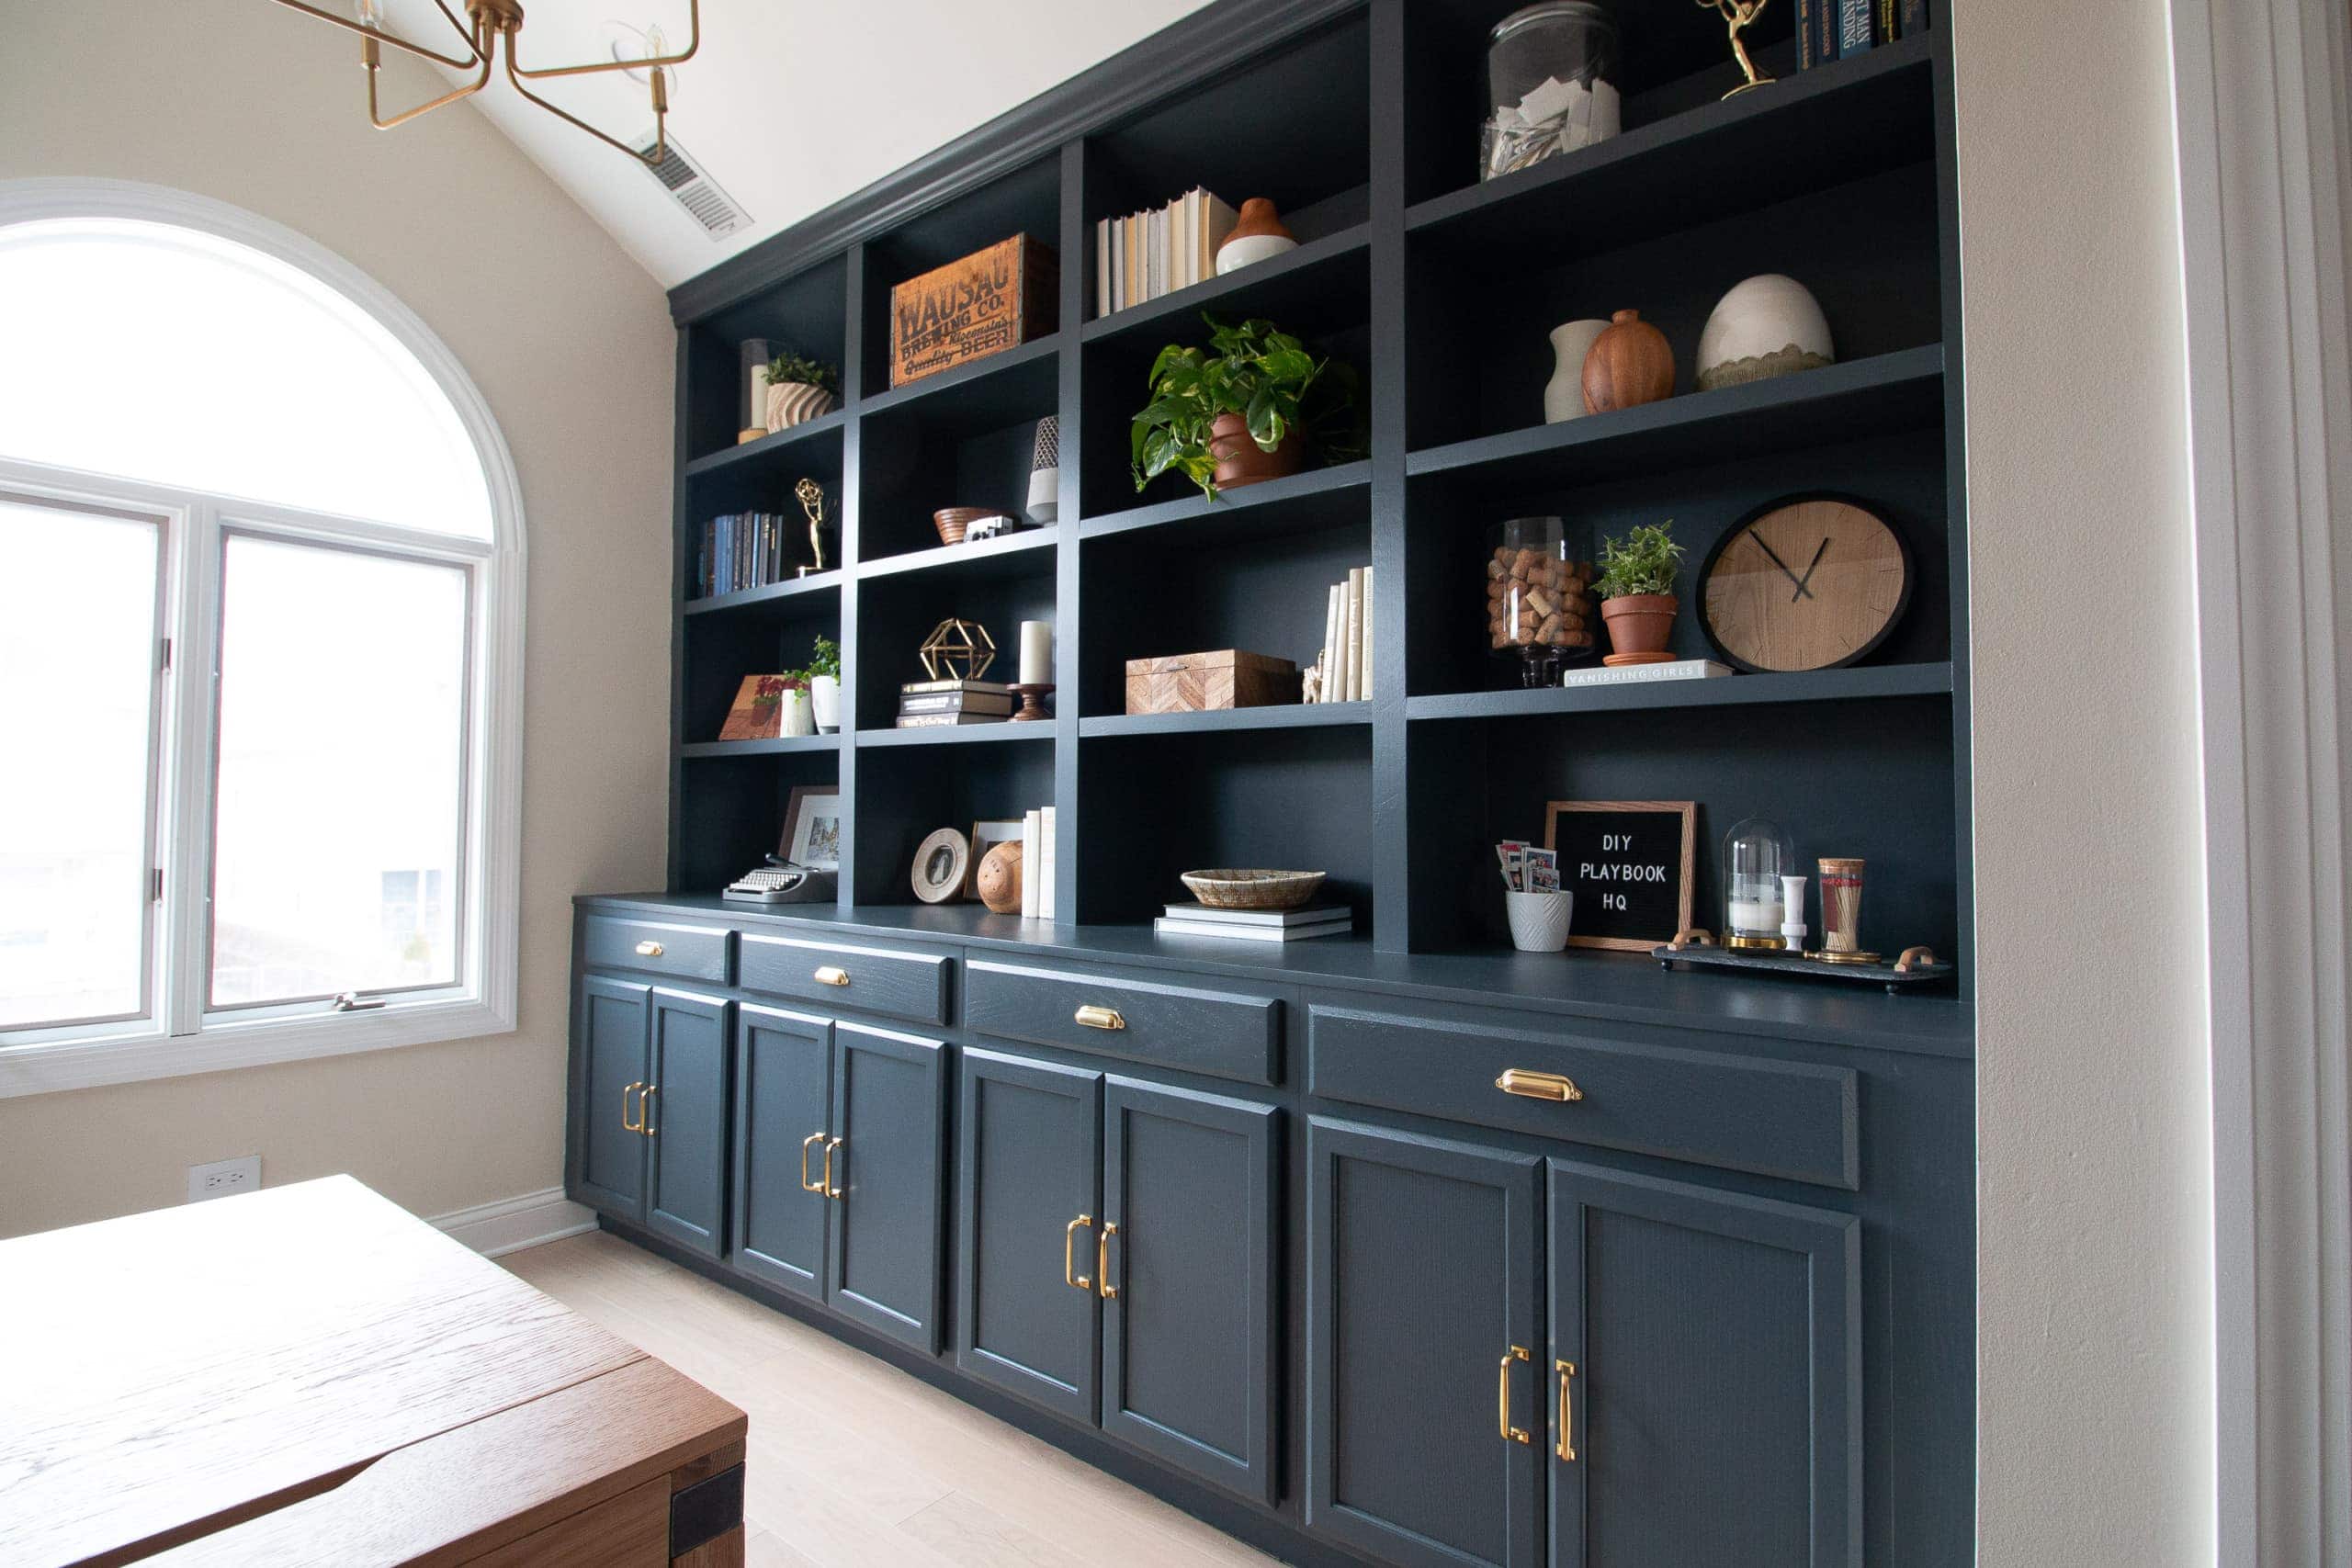
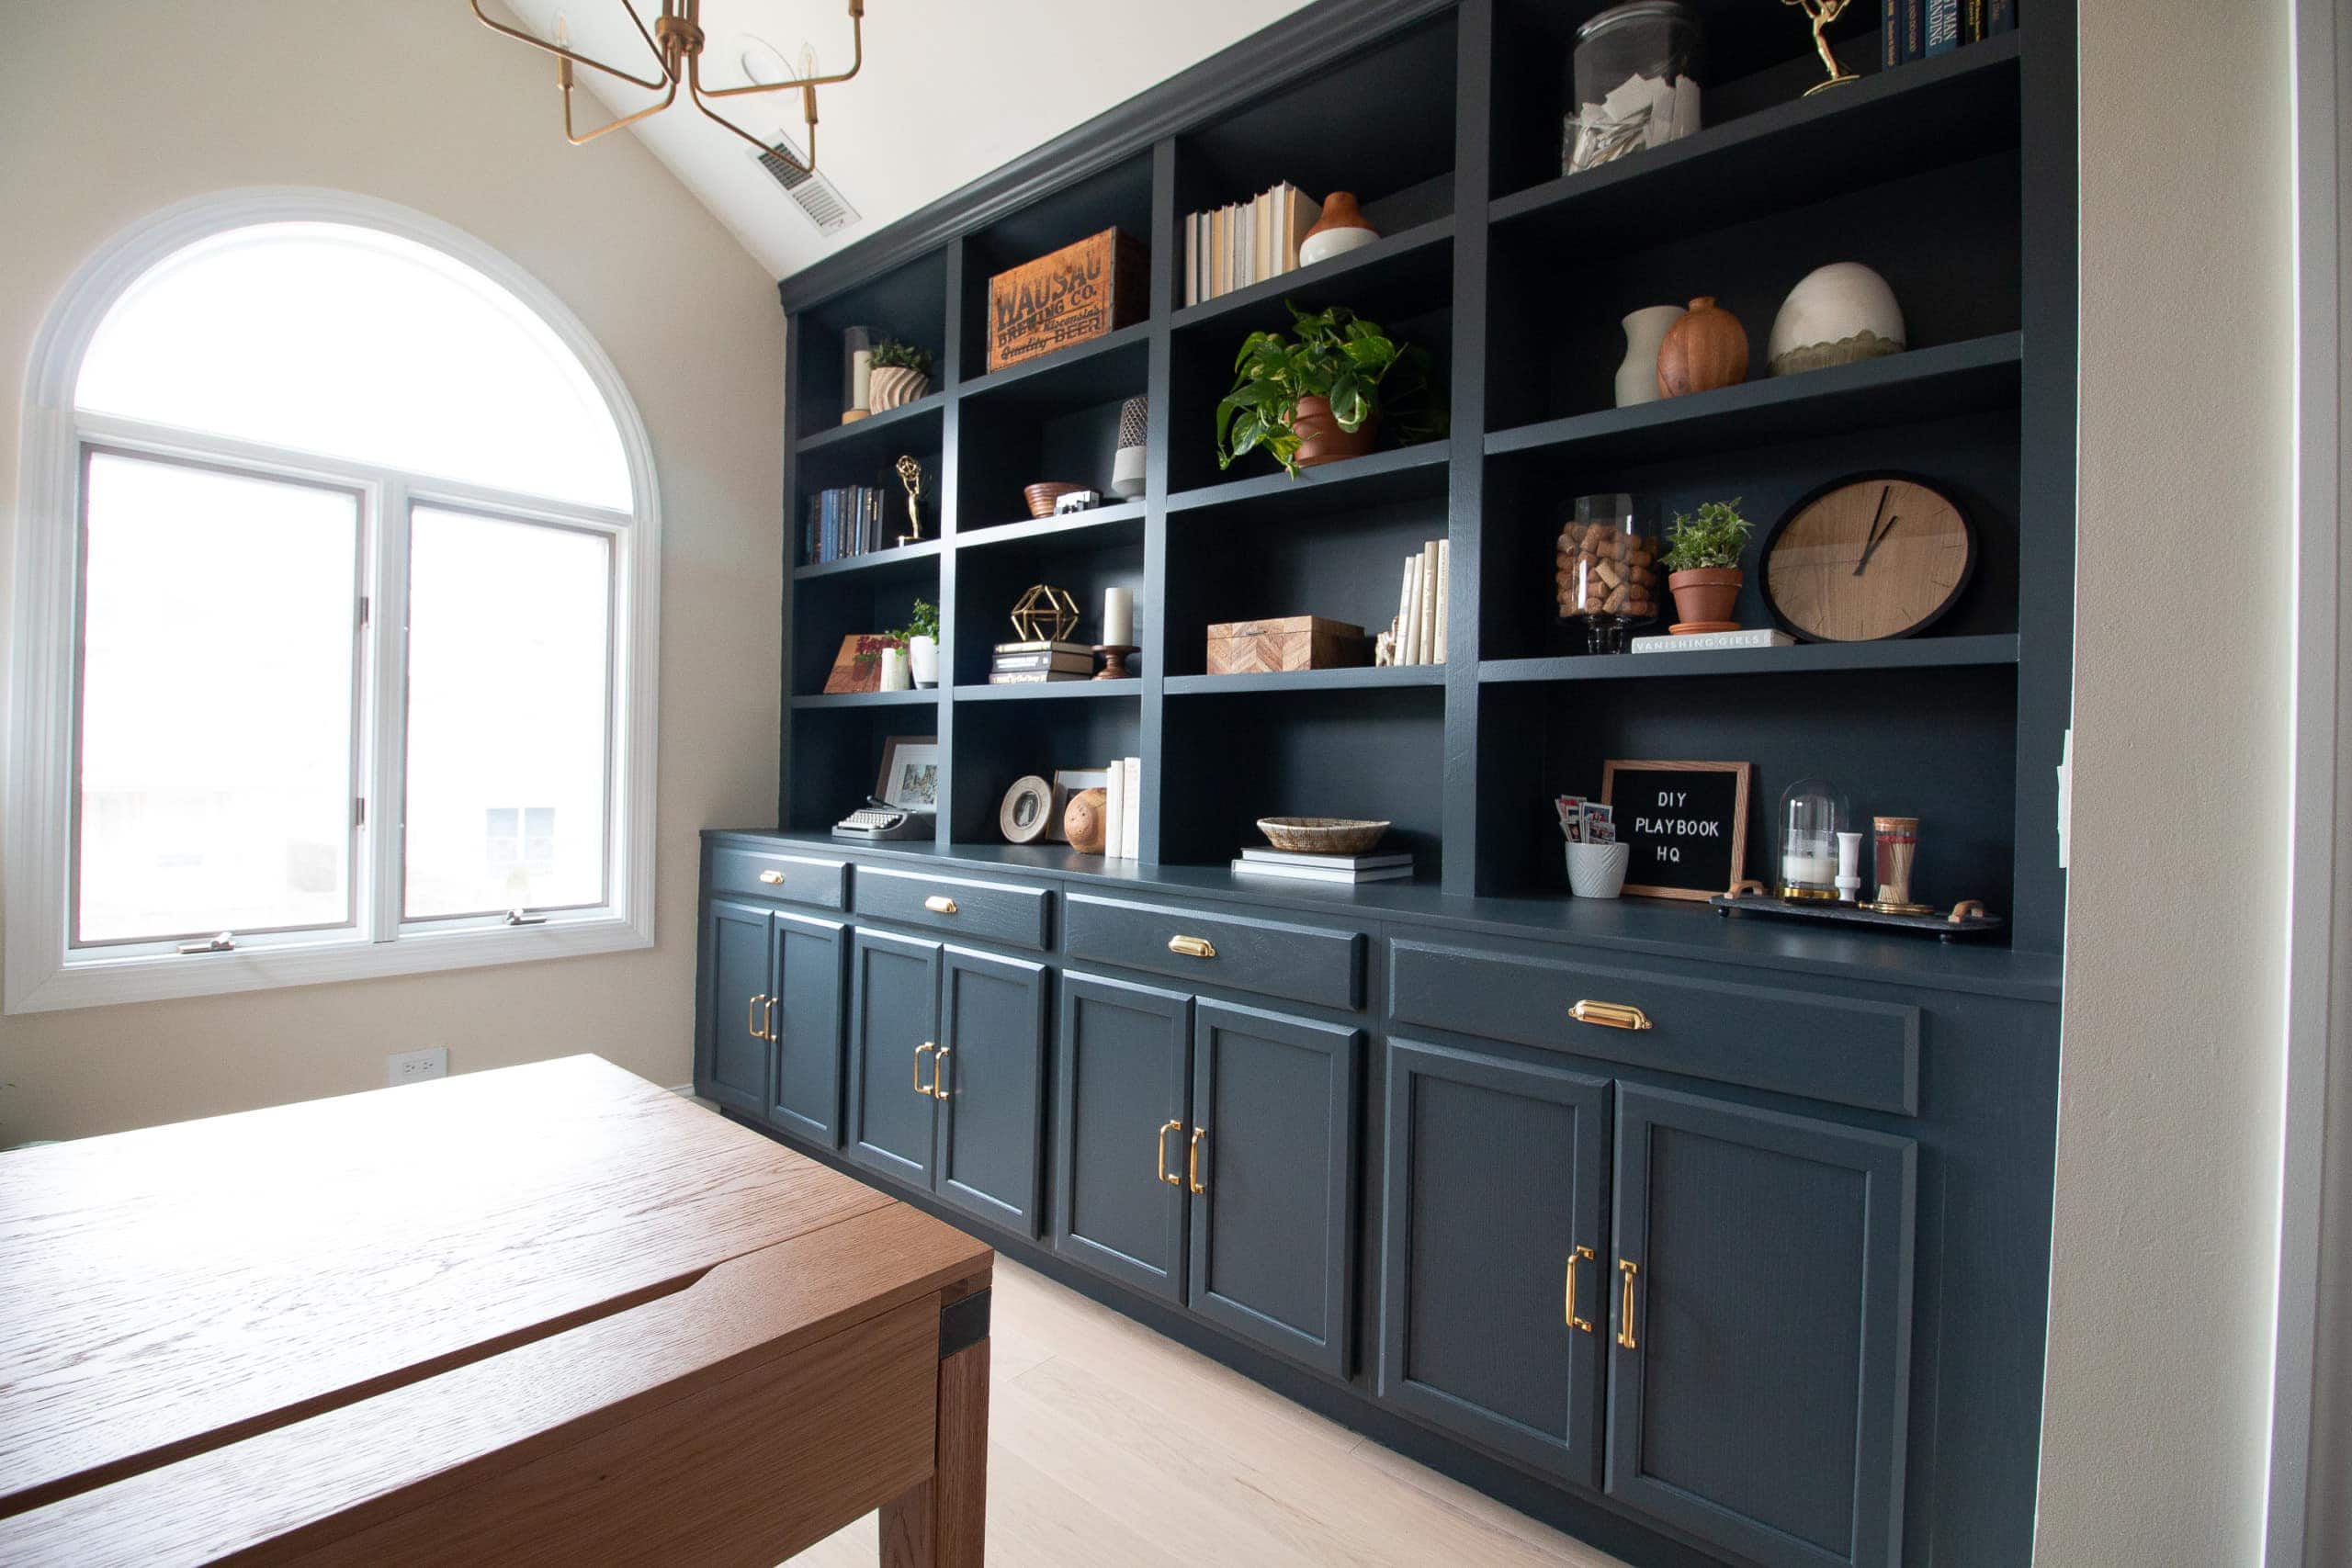
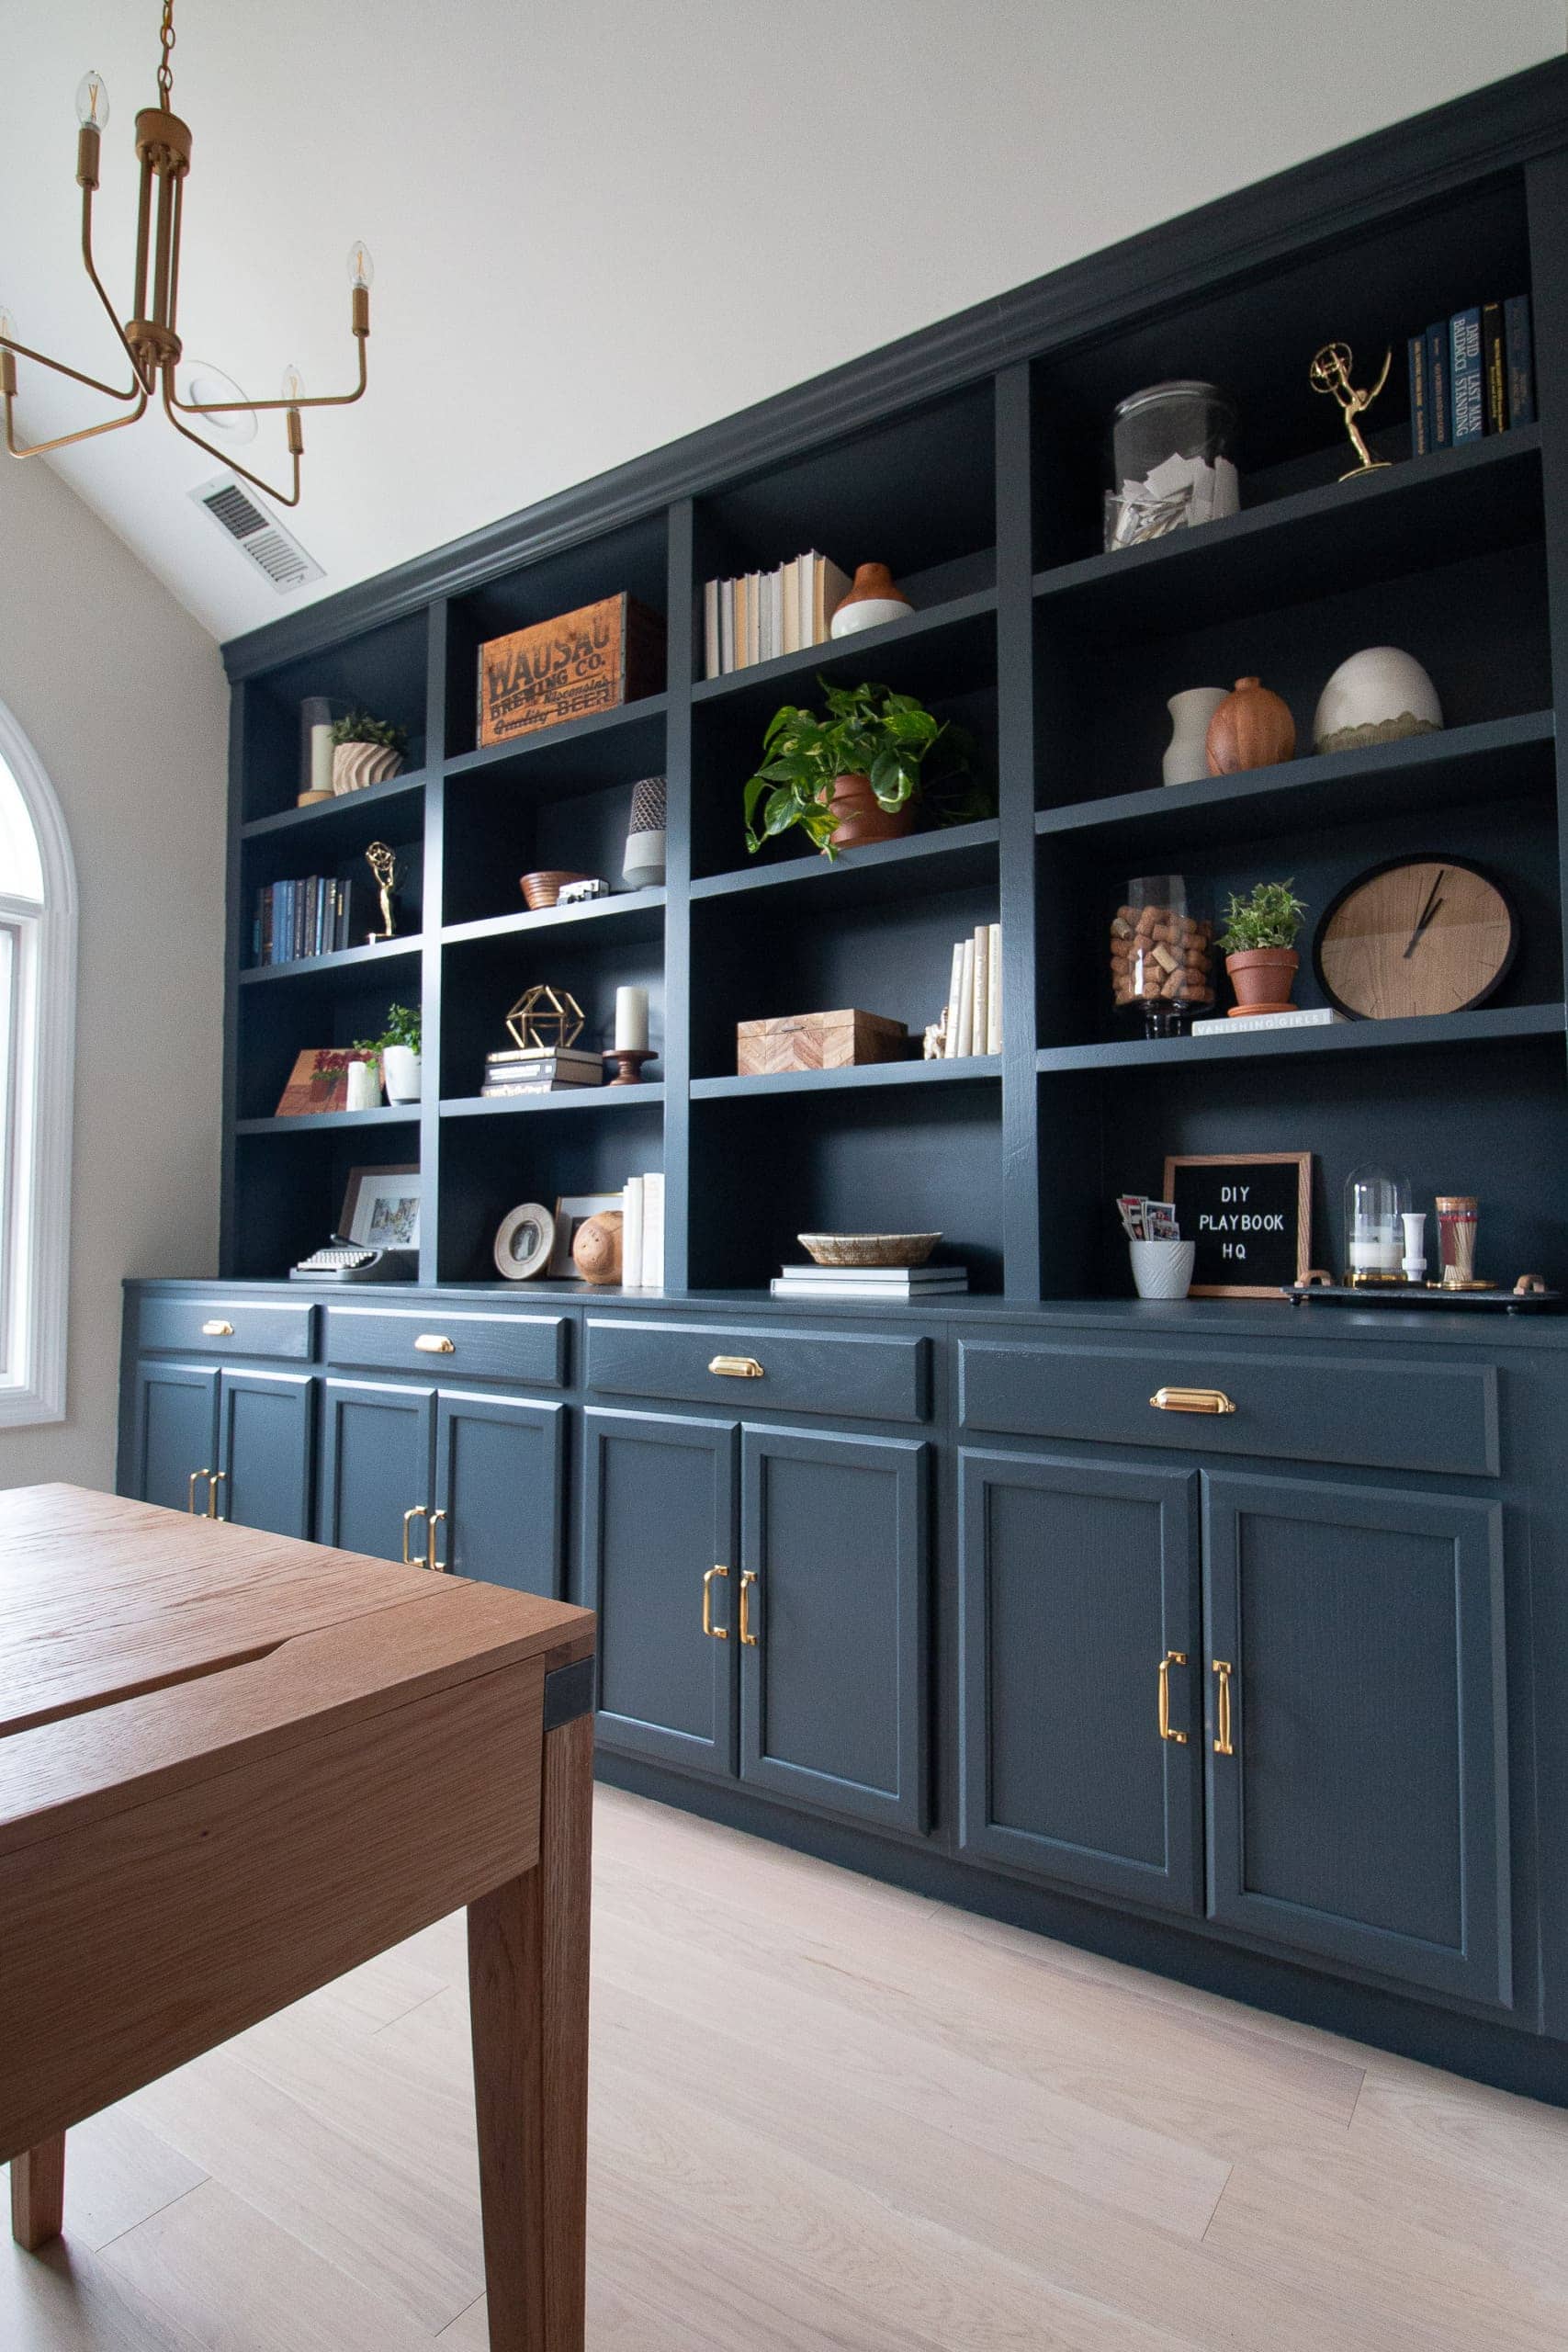
The color is “Chimney Smoke” by Valspar and it turned out gorgeous (you can read more about the painting process here). It is the perfect deep blue with grayish undertones. Even though I wanted to add the hardware and style these immediately, I waited as long as possible for the paint to cure to prevent any dents or nicks to the finish. This ended up being about ten days of waiting (I tried to wait longer but wanted to get this post ready for you!).
Okay, so are you ready to see them with the hardware installed and styled to perfection??
Our New Built-In Bookshelves


Adding Brass Hardware
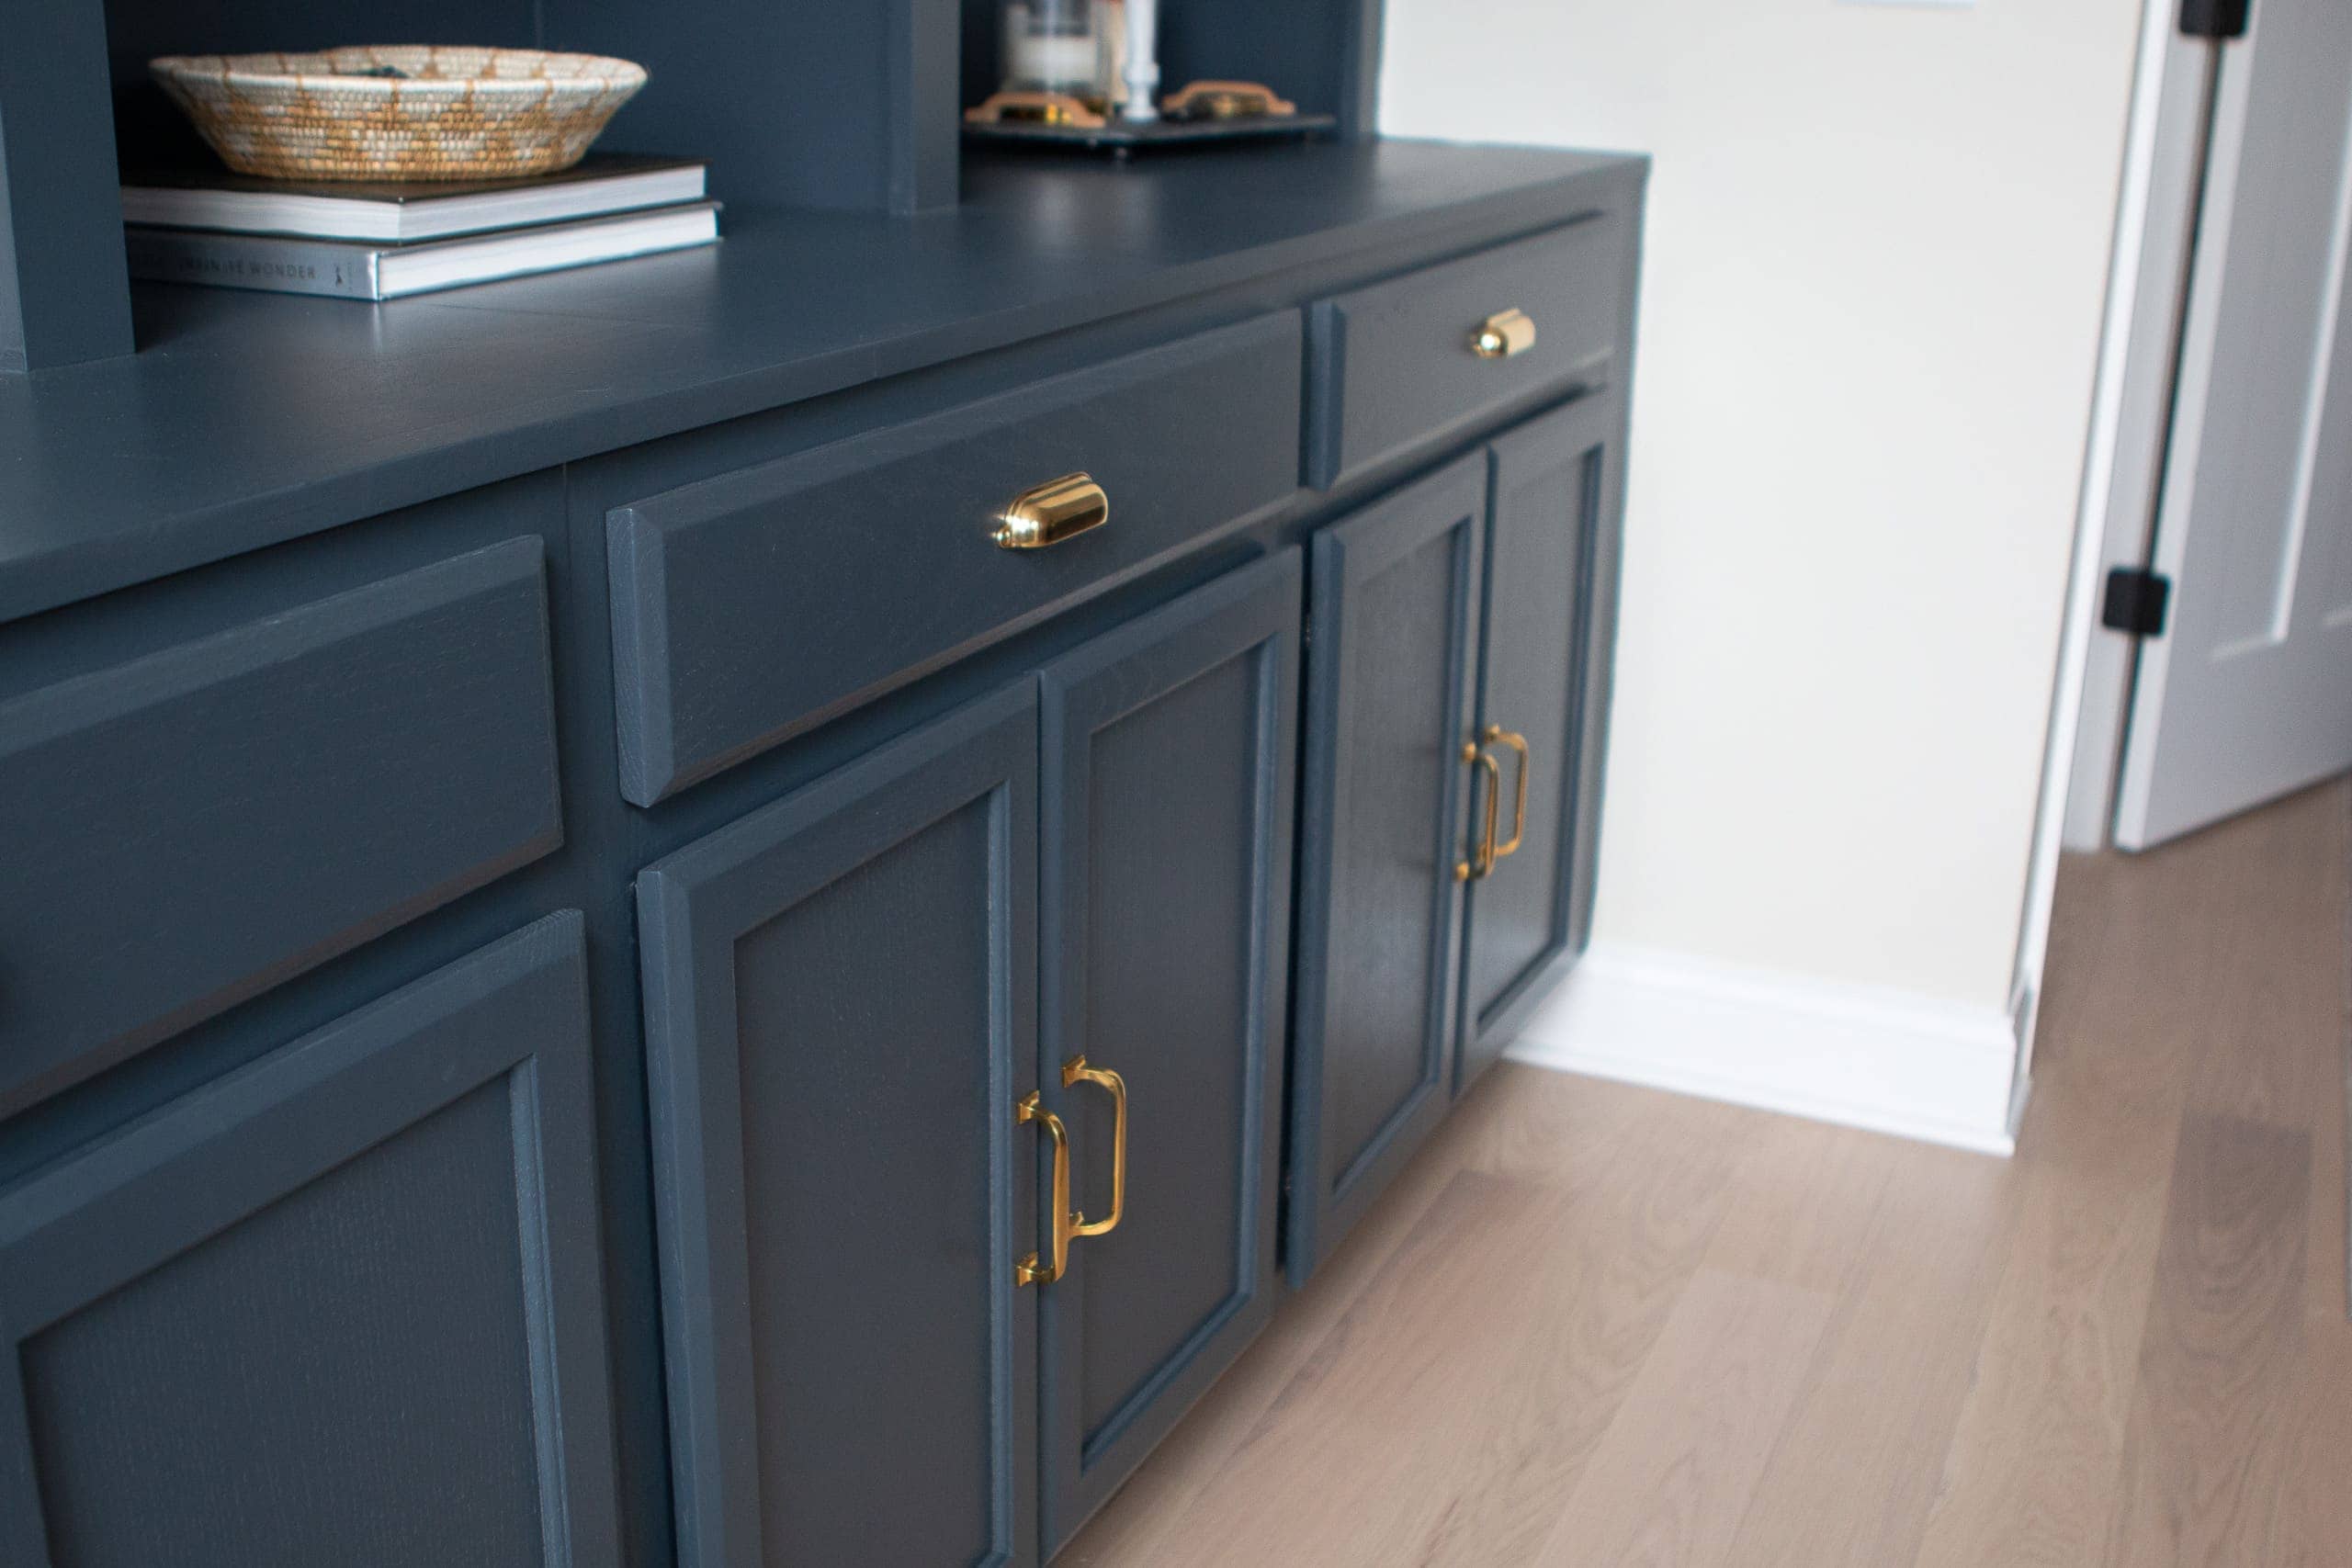
I ended up choosing the same hardware that we used in our laundry room makeover. I think it’s nice to have some elements of your home transition from room to room, to keep things looking cohesive.
These are the pulls on the drawer fronts (4-inch) and these are the cabinet pulls (4-inch) that I used on the cabinet doors.
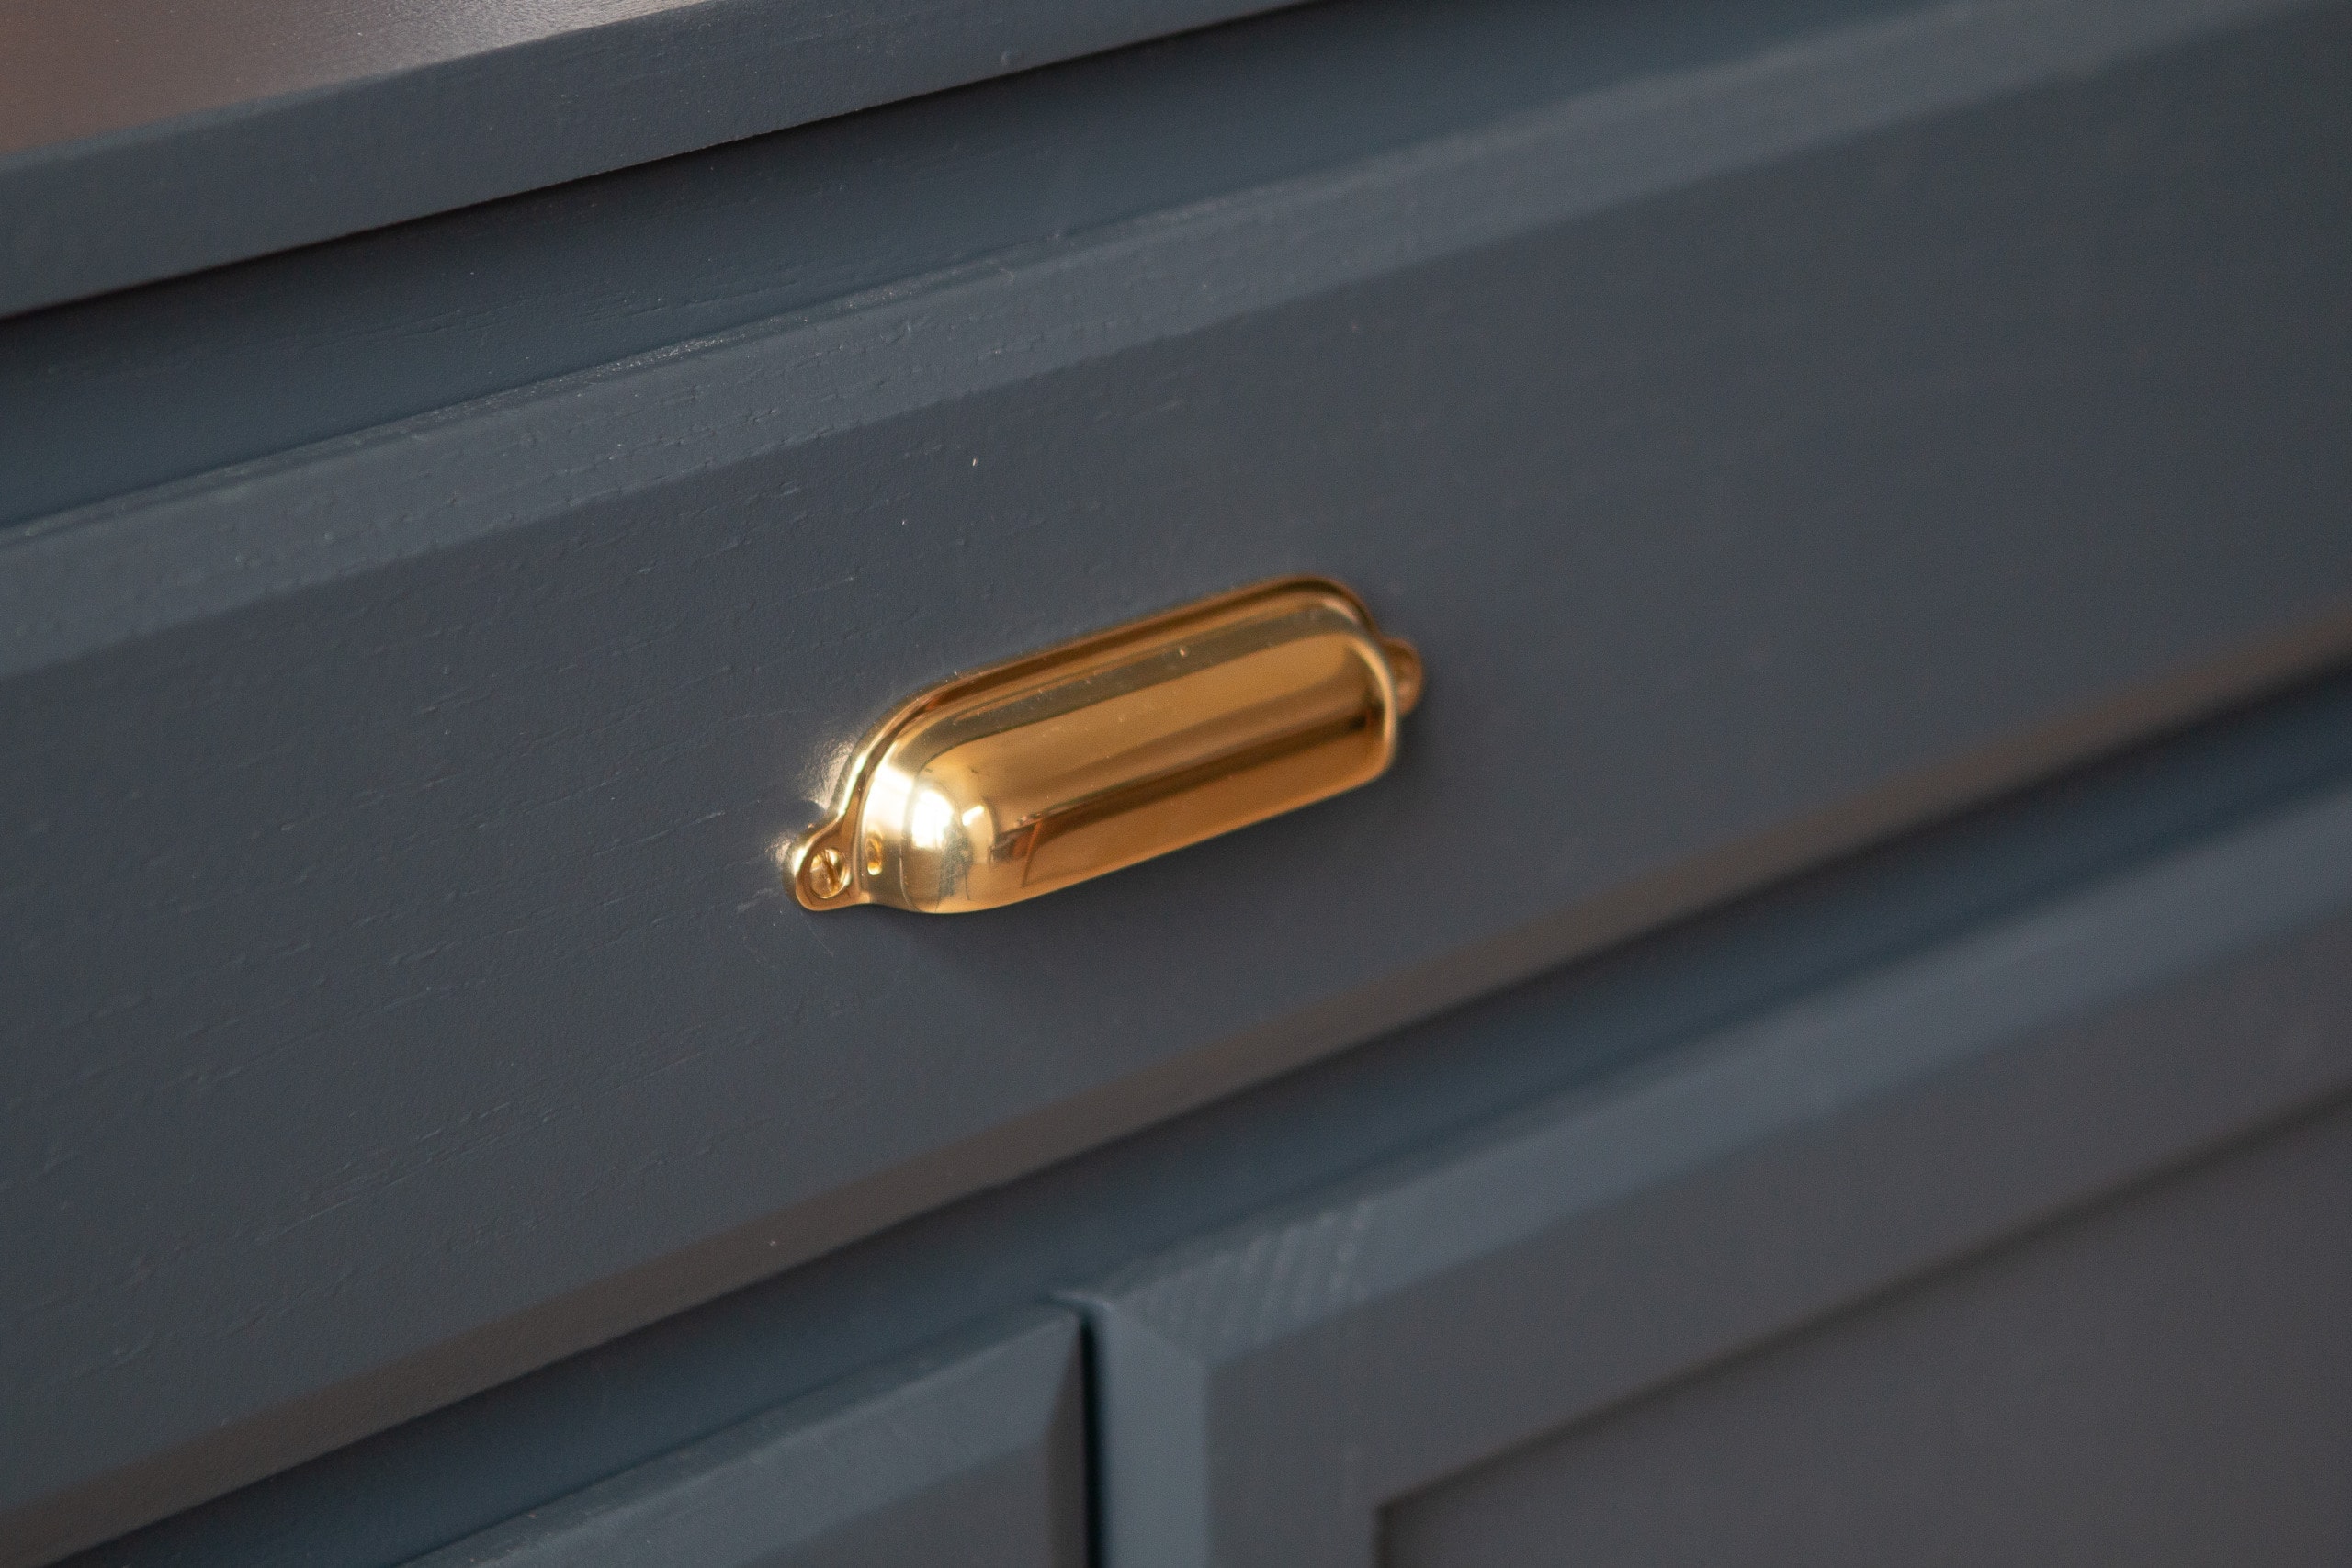
The brass color is stunning next to the dark blue. It really pops and I was amazed after I installed it.
Styling Every Cubby
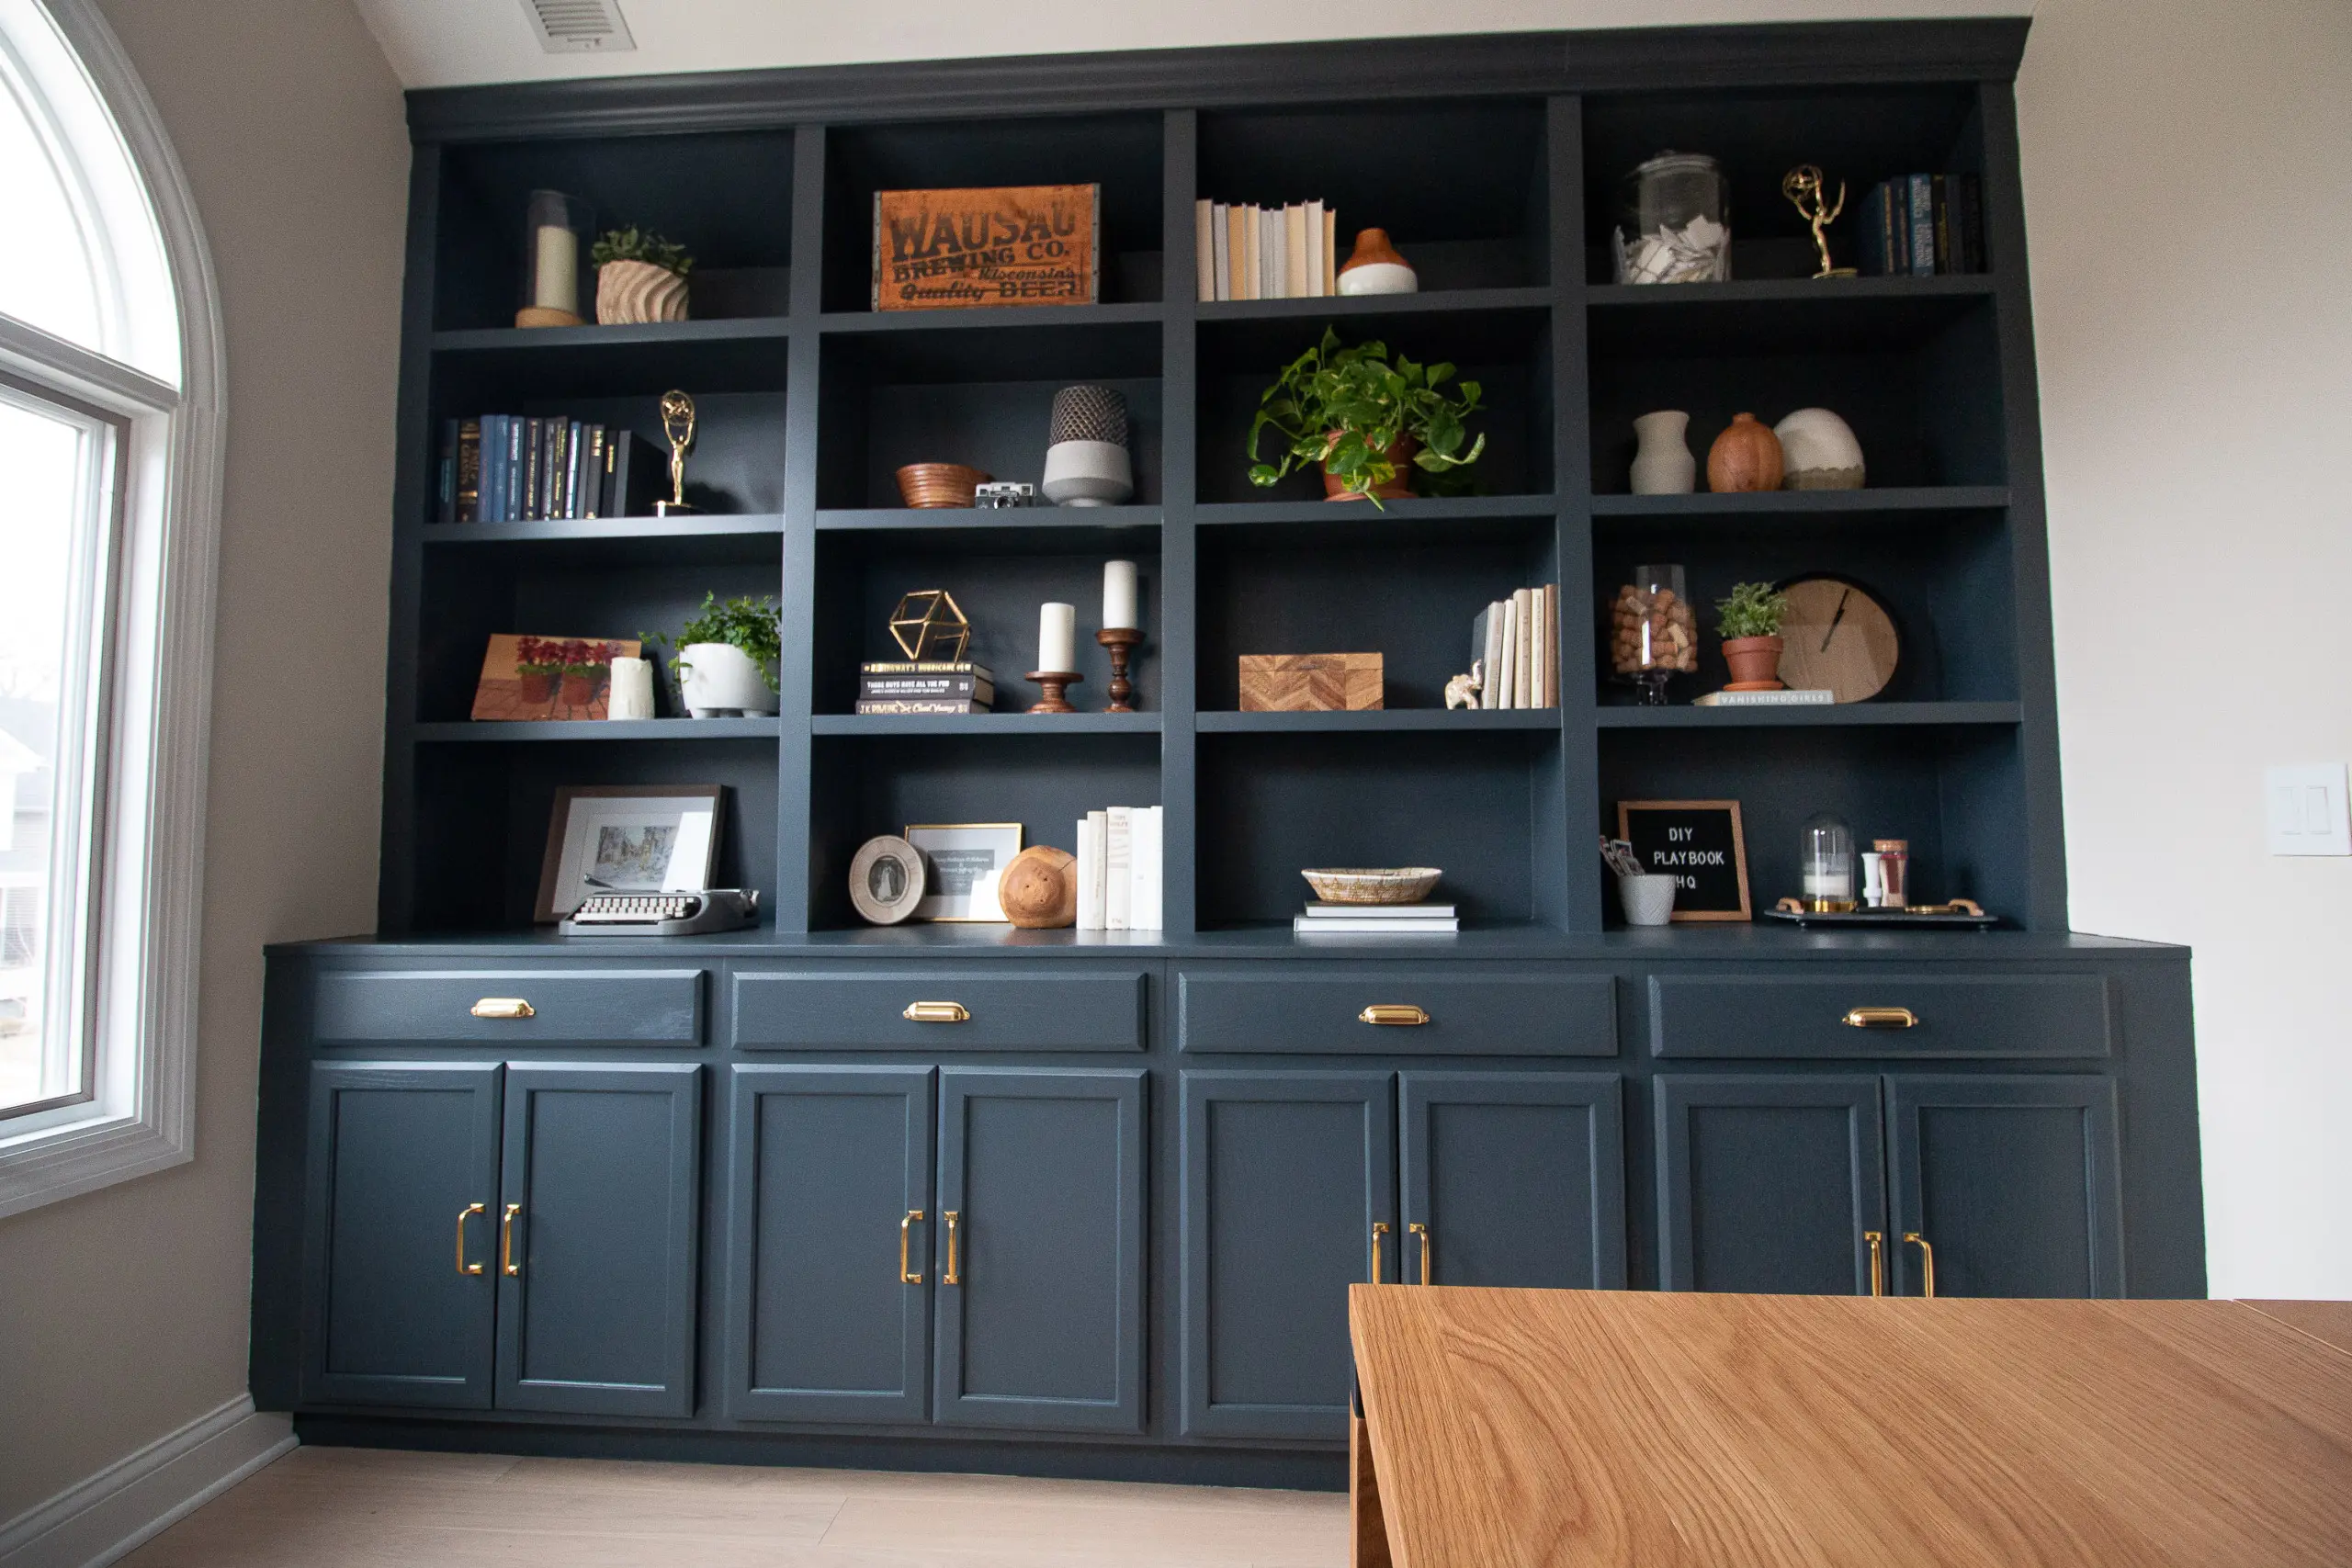
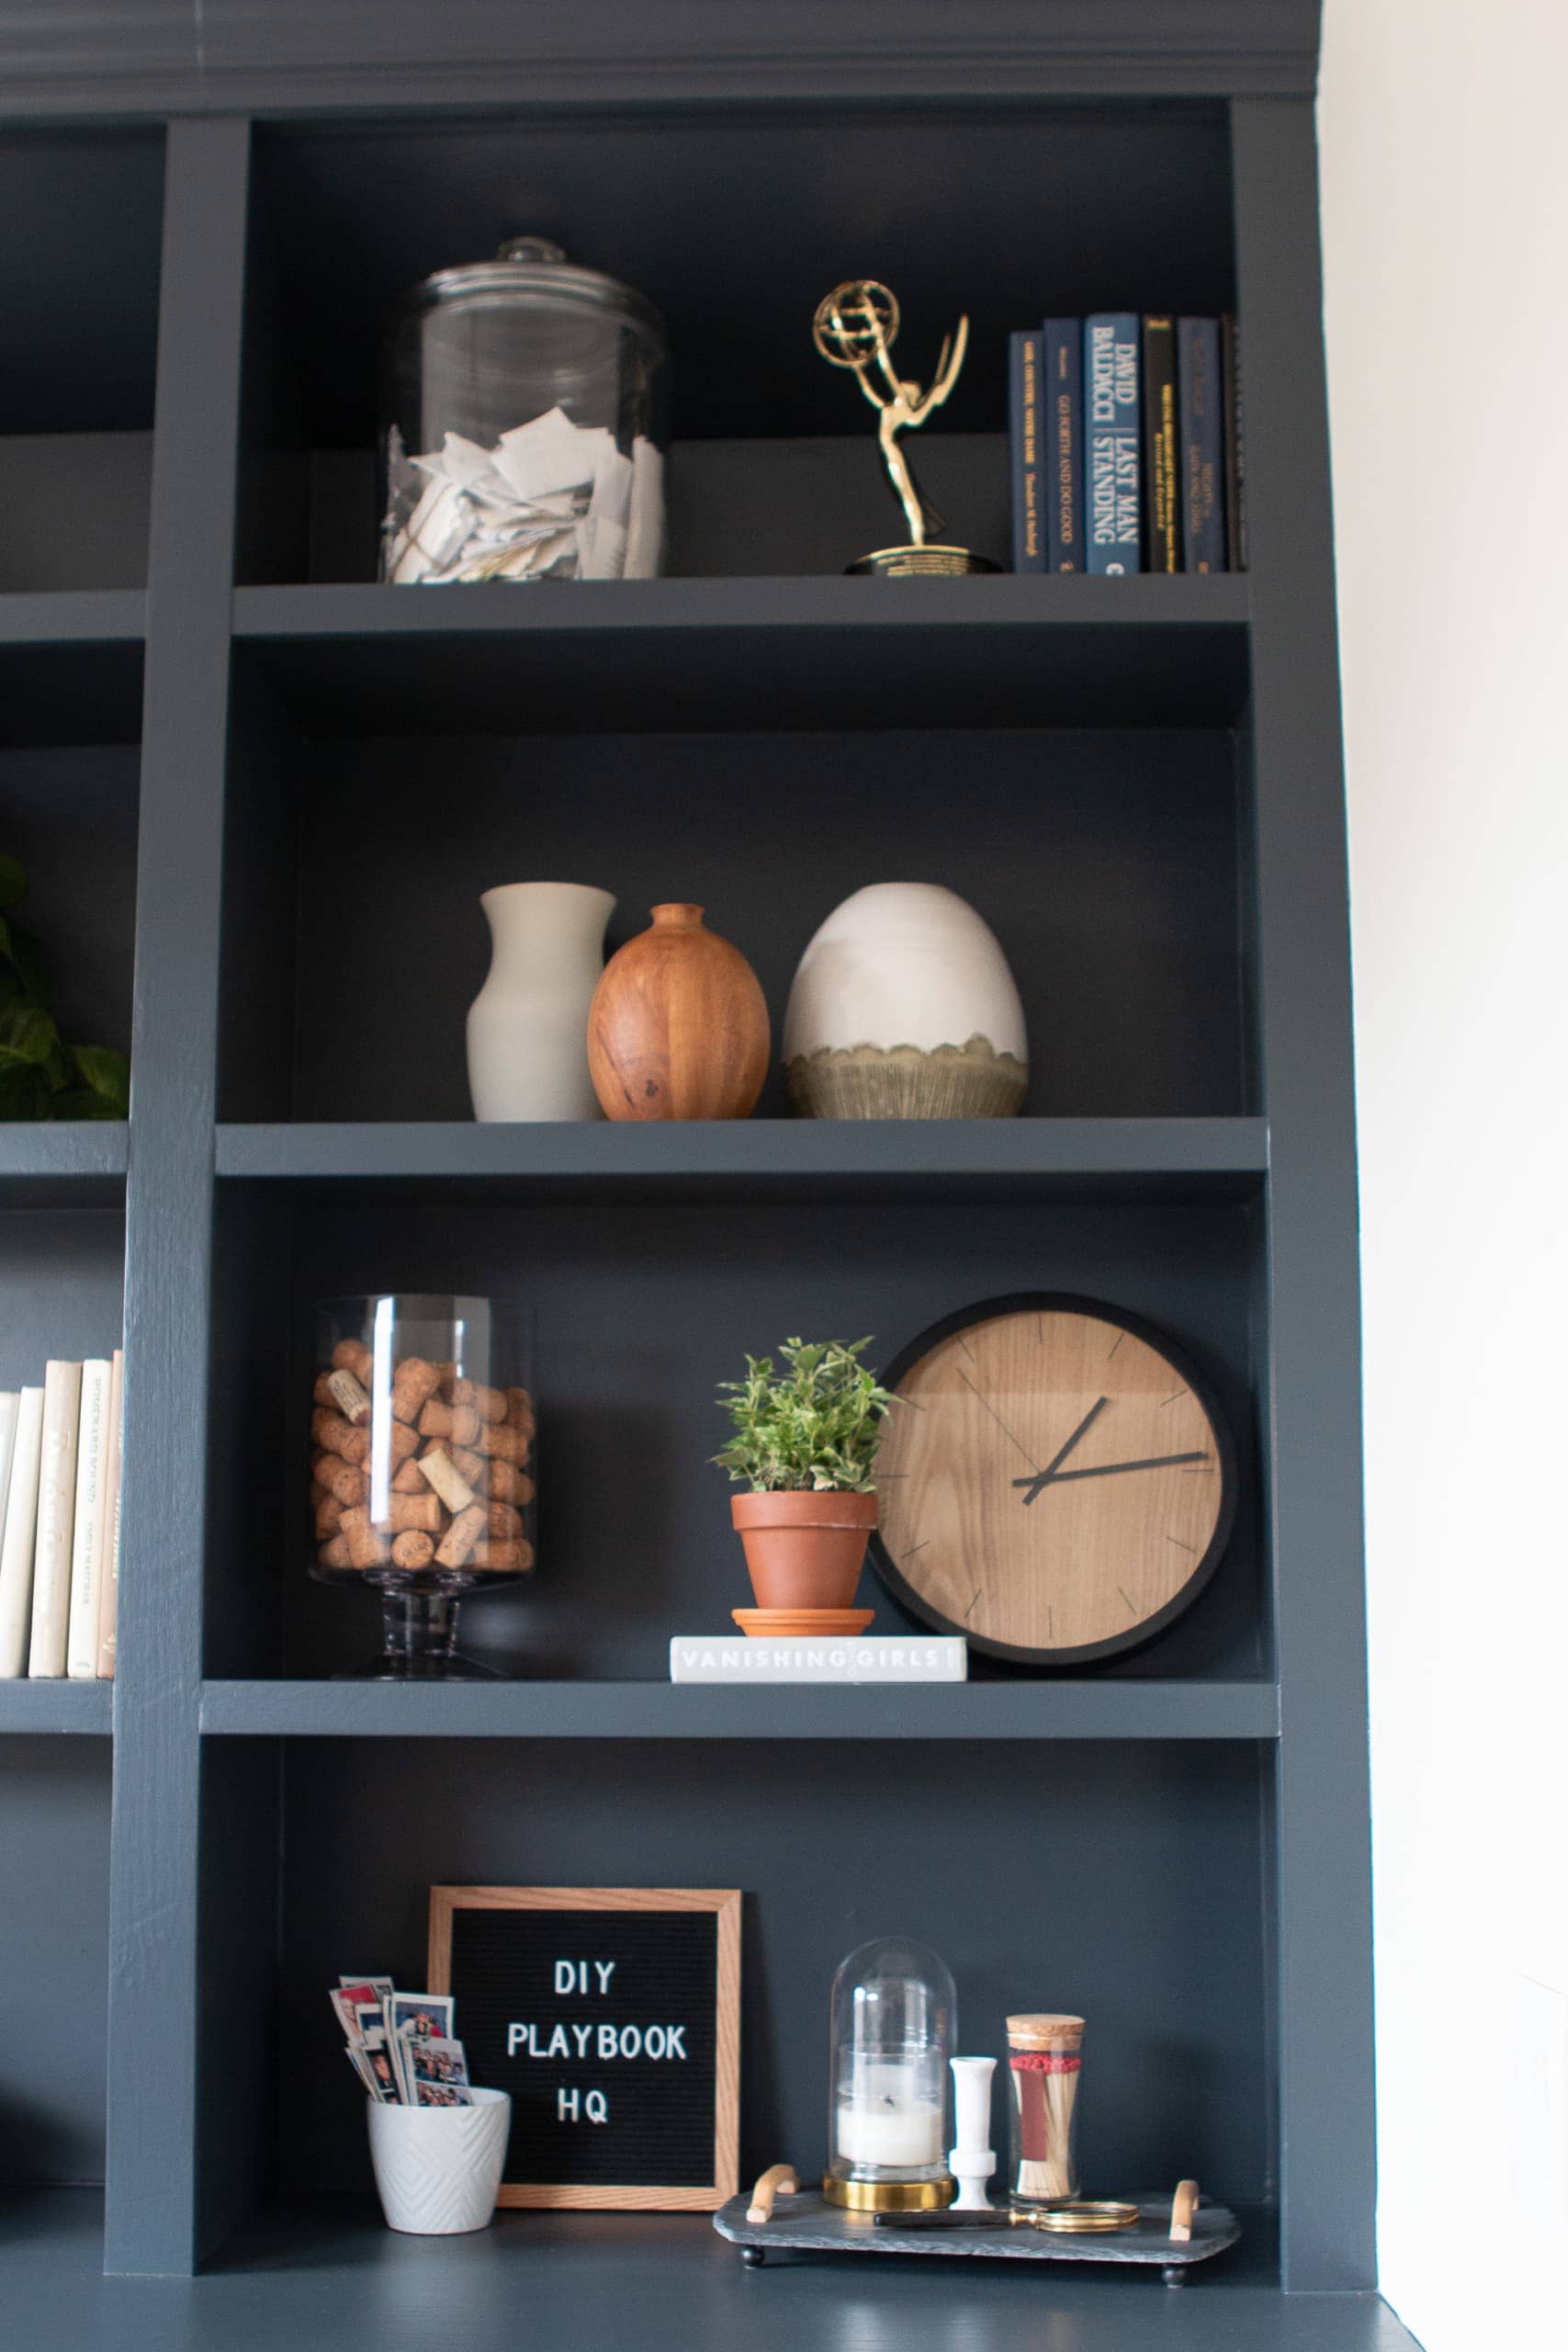
I’ve styled lots of built-ins over the years, but these just might be the biggest! The cubbies are huge, yet somehow I had enough stuff to fill them! We had lots of books and decor in our storage room and I was so excited to finally get them out.

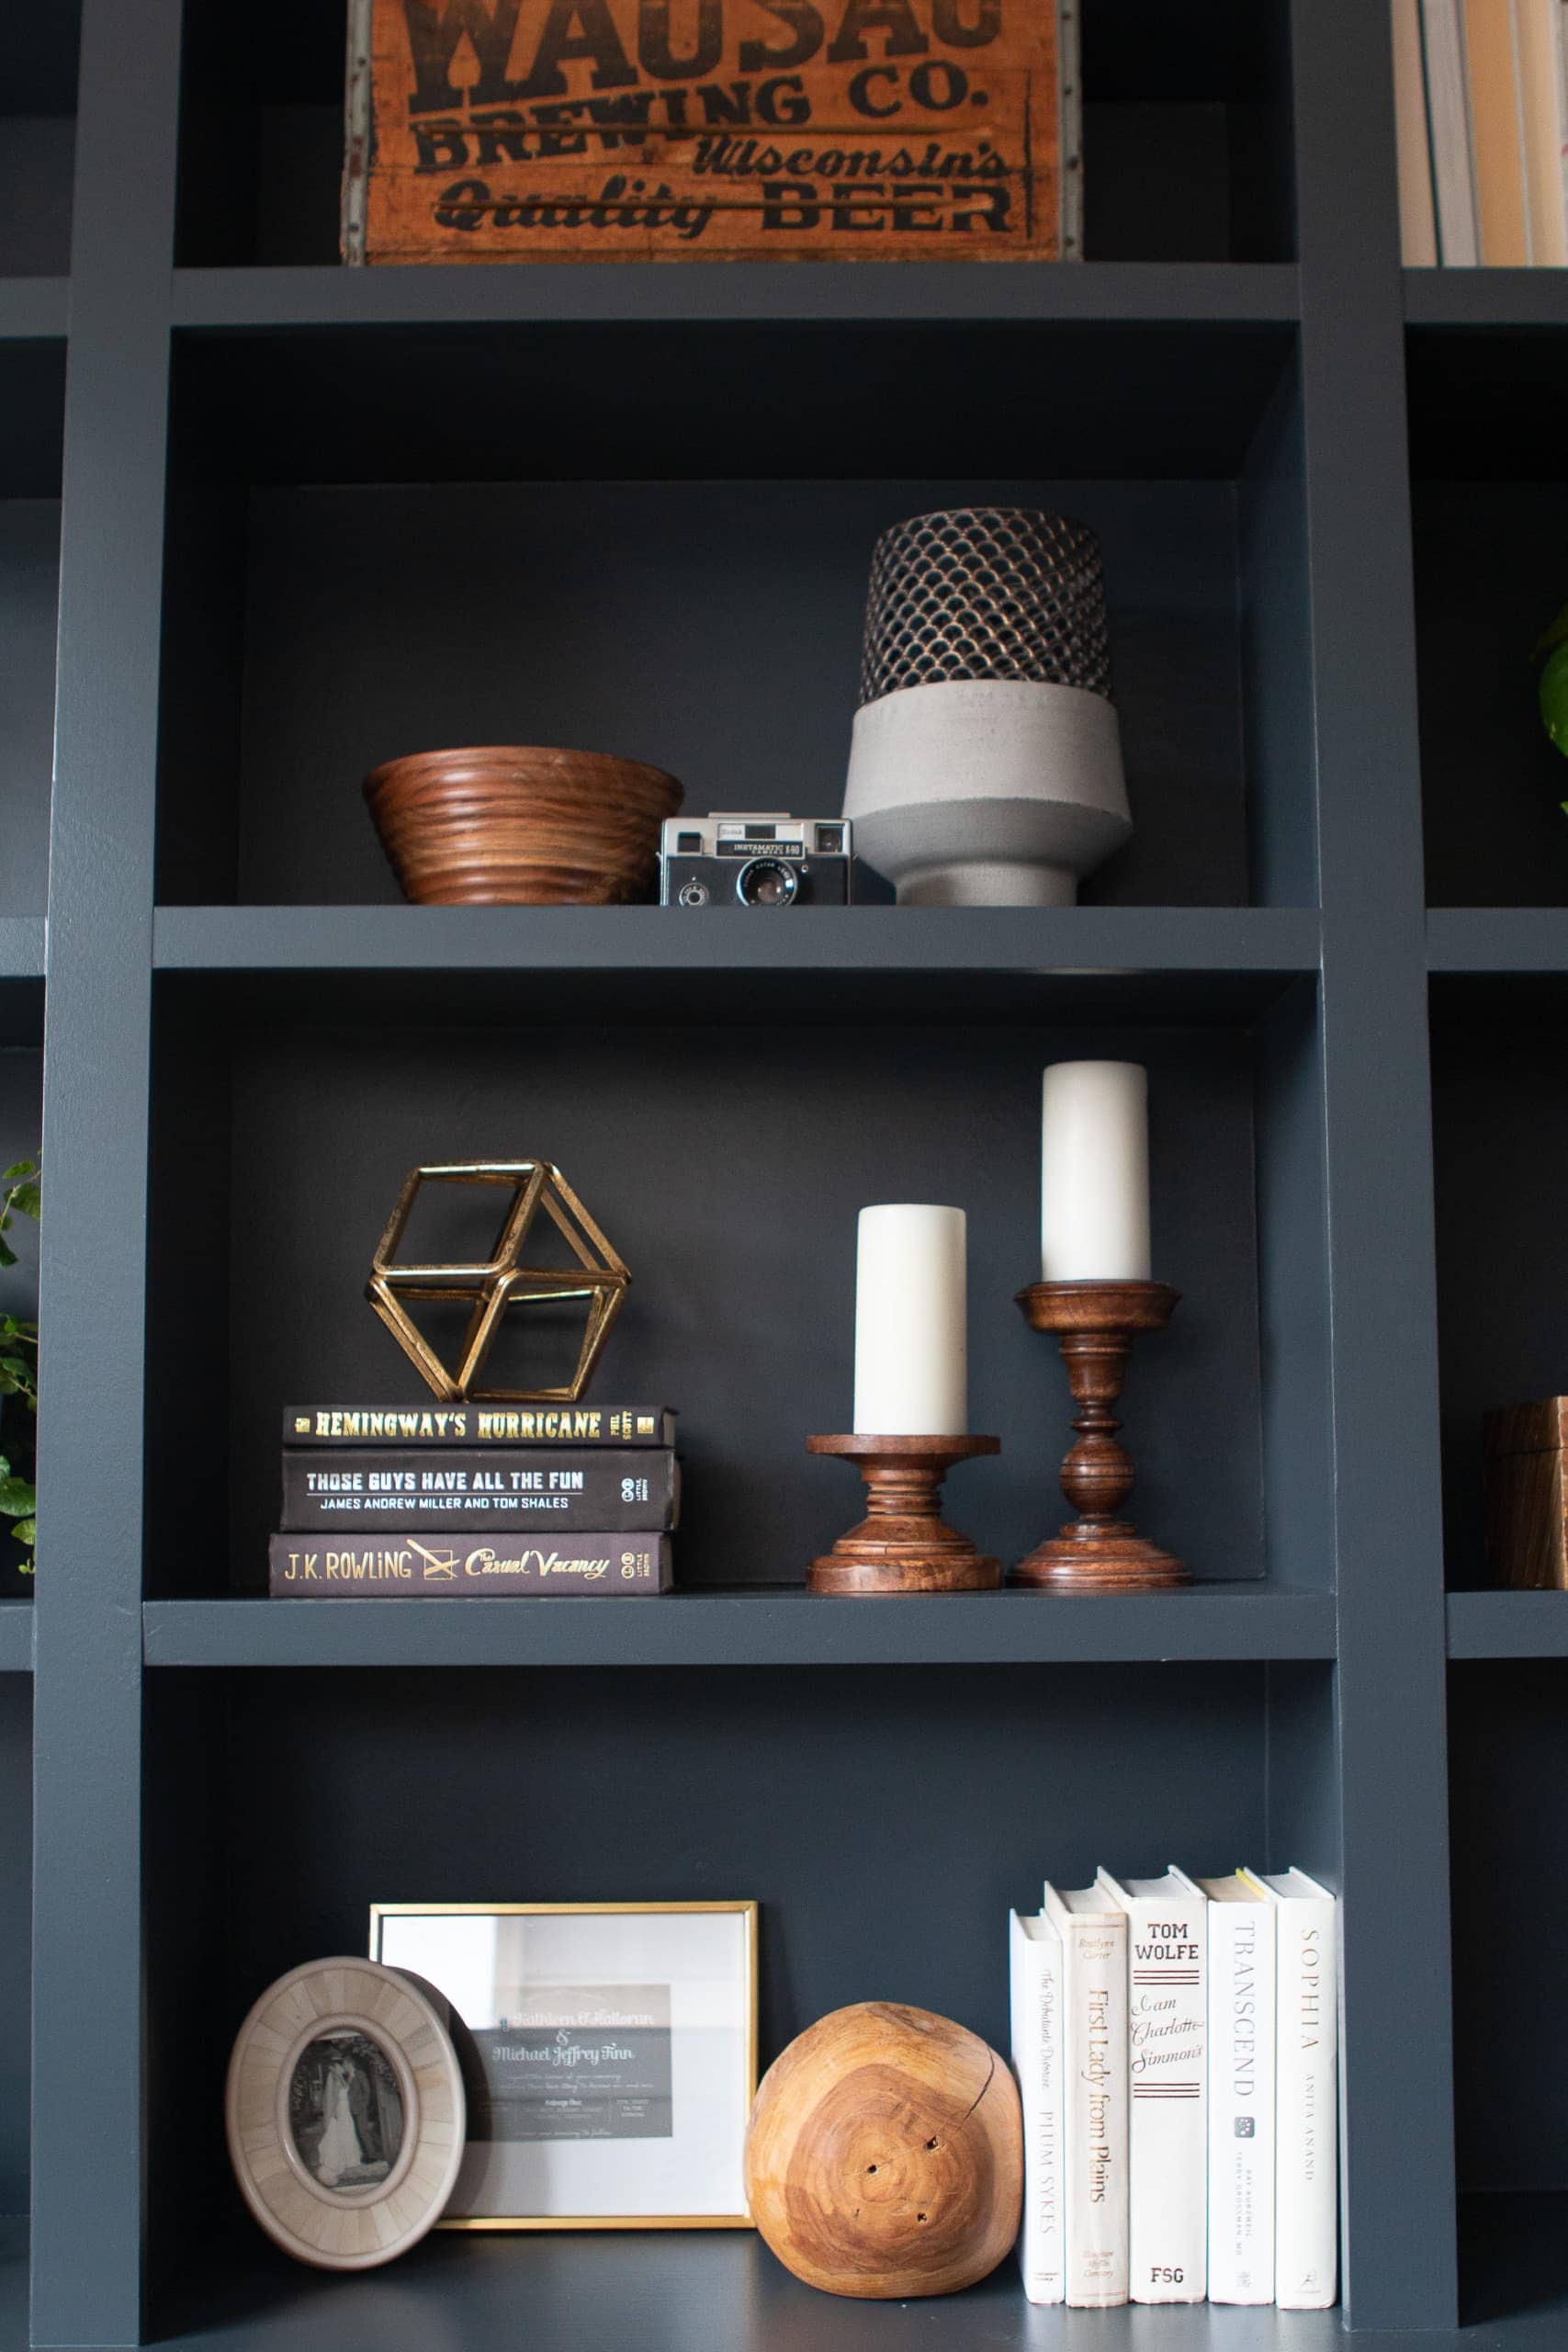
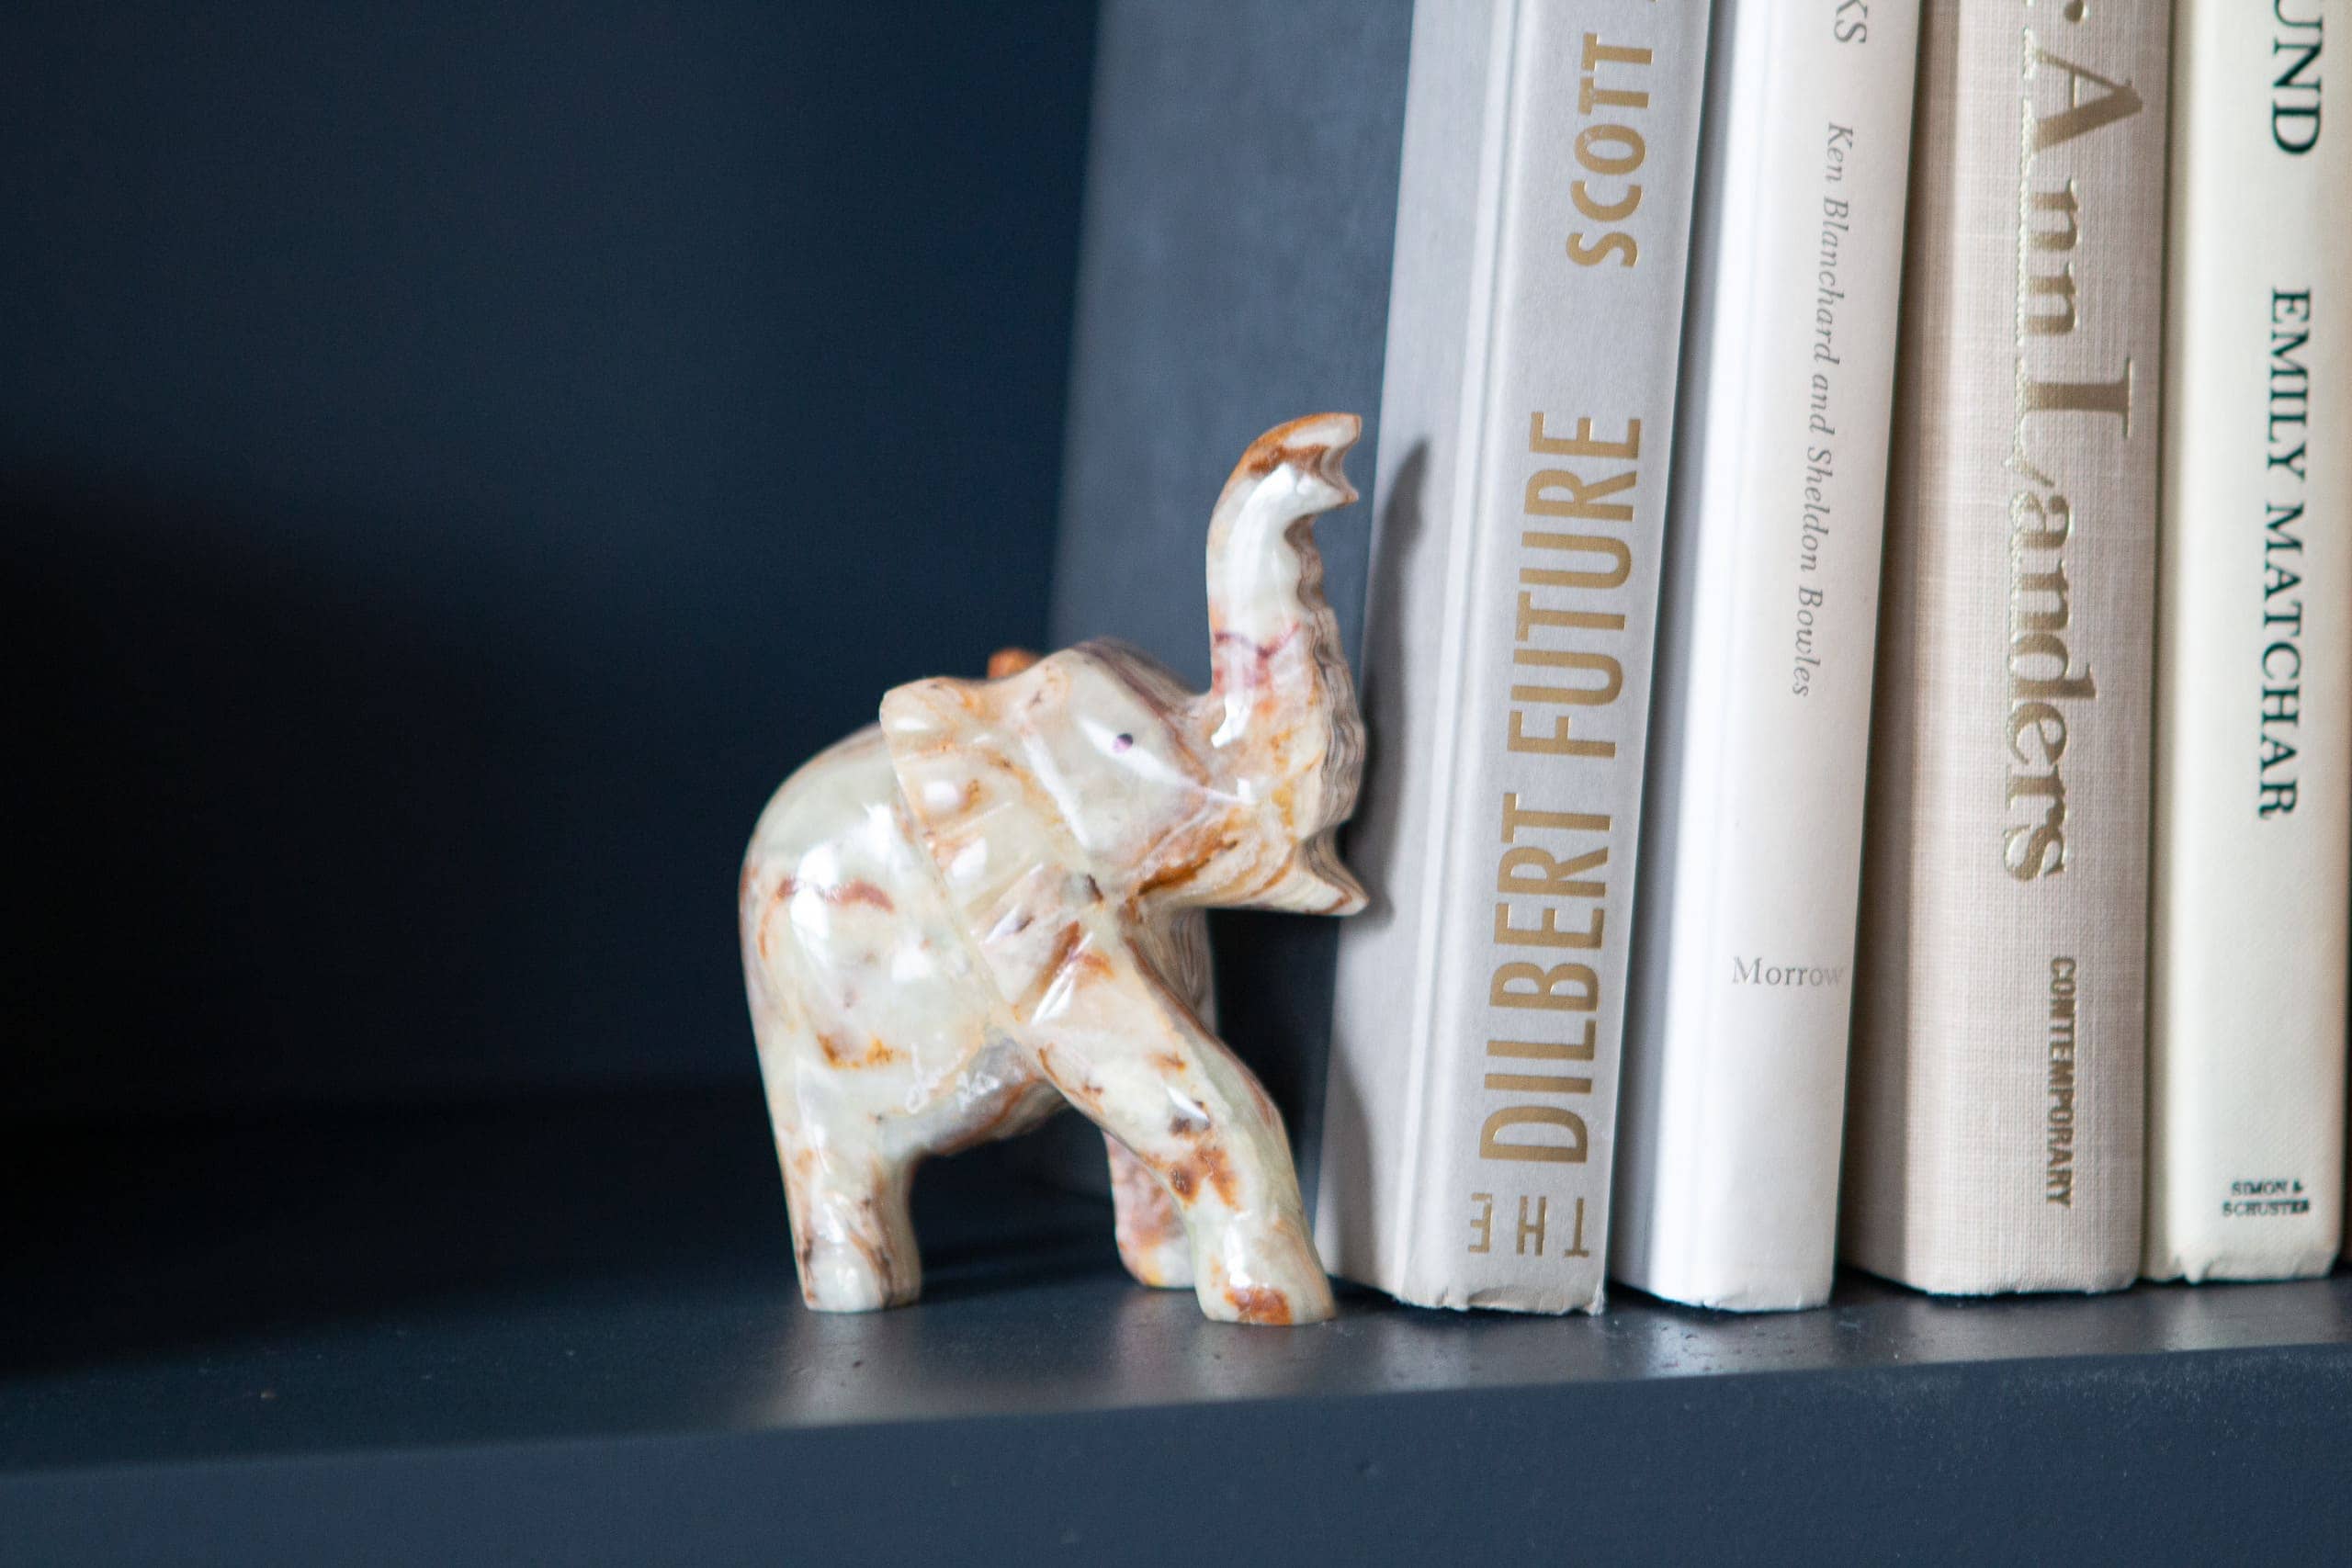
Each shelf has so many sentimental goodies that I’ve accumulated over the years. You can view my tutorial for styling shelves right here, along with stories about everything I have displayed on these. 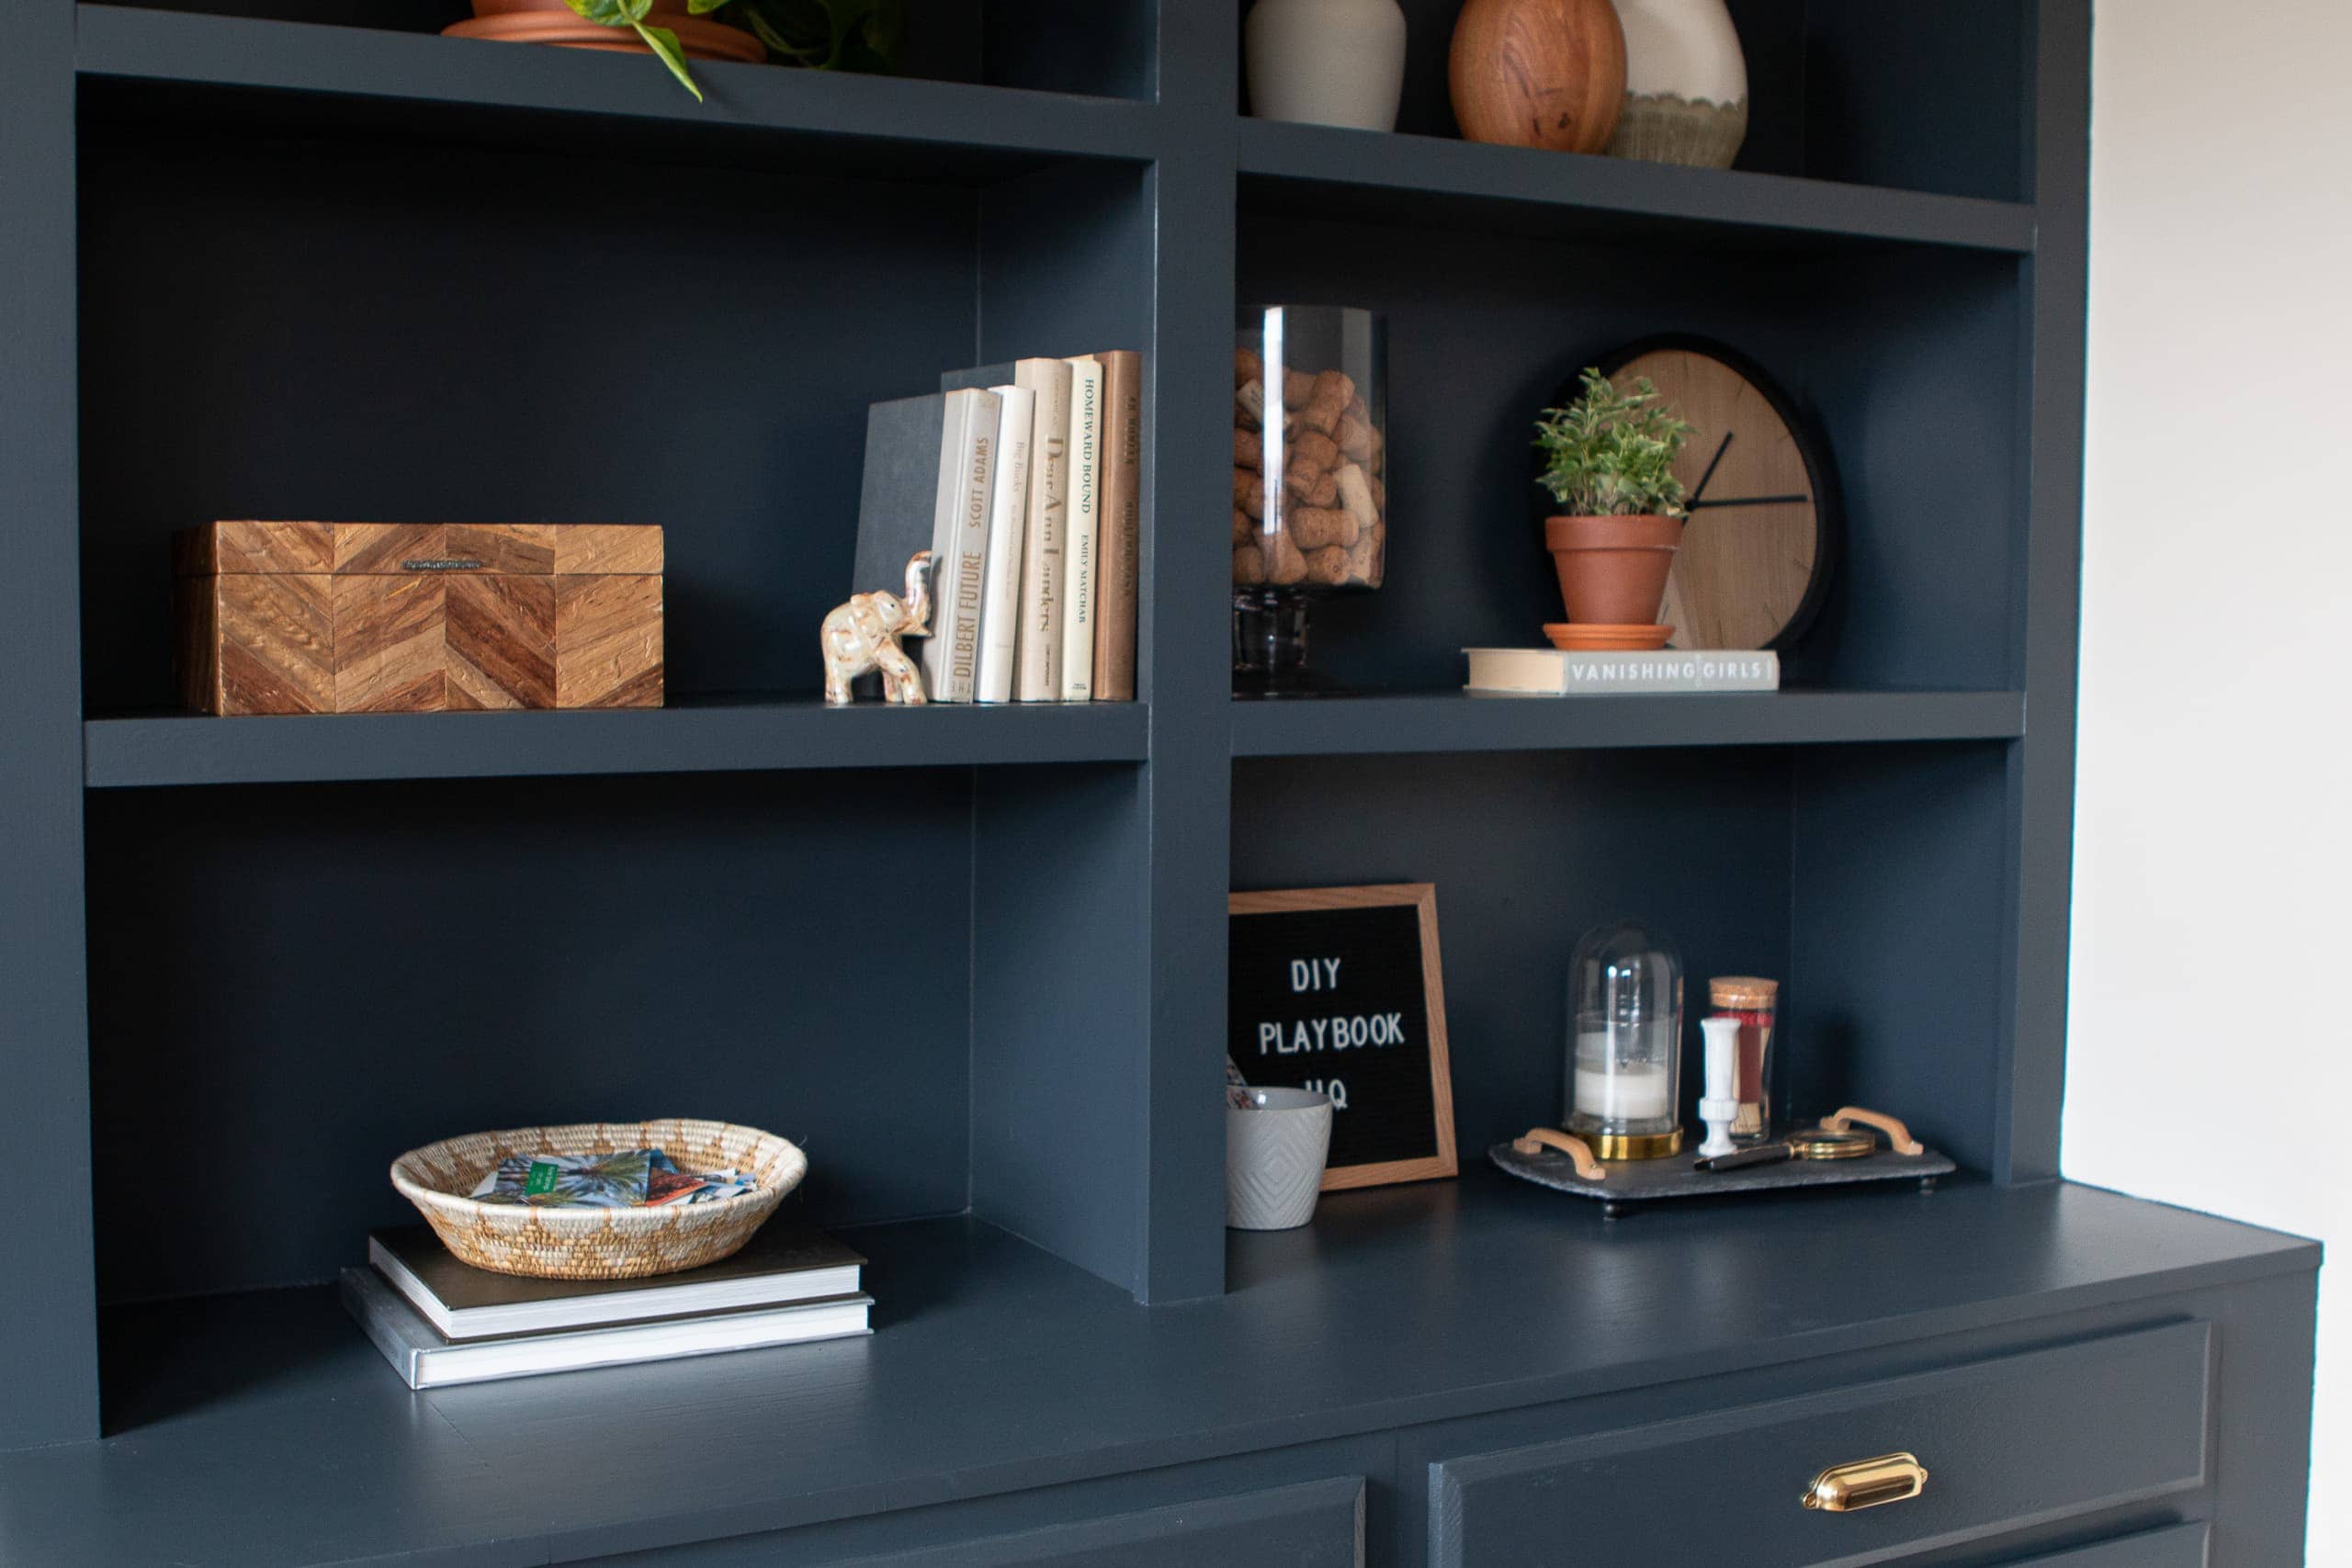
Built-In Source List
Honestly, most of the items on these shelves are thrifted, antiques, family pieces, or from HomeGoods, but I’ll list it all out below! I linked each piece if it was possible to link. Also, (because I know someone will ask!), yes, the two gold statues on the built-ins are Emmy awards. I used to work in television and won one in 2014 and the other in 2017. 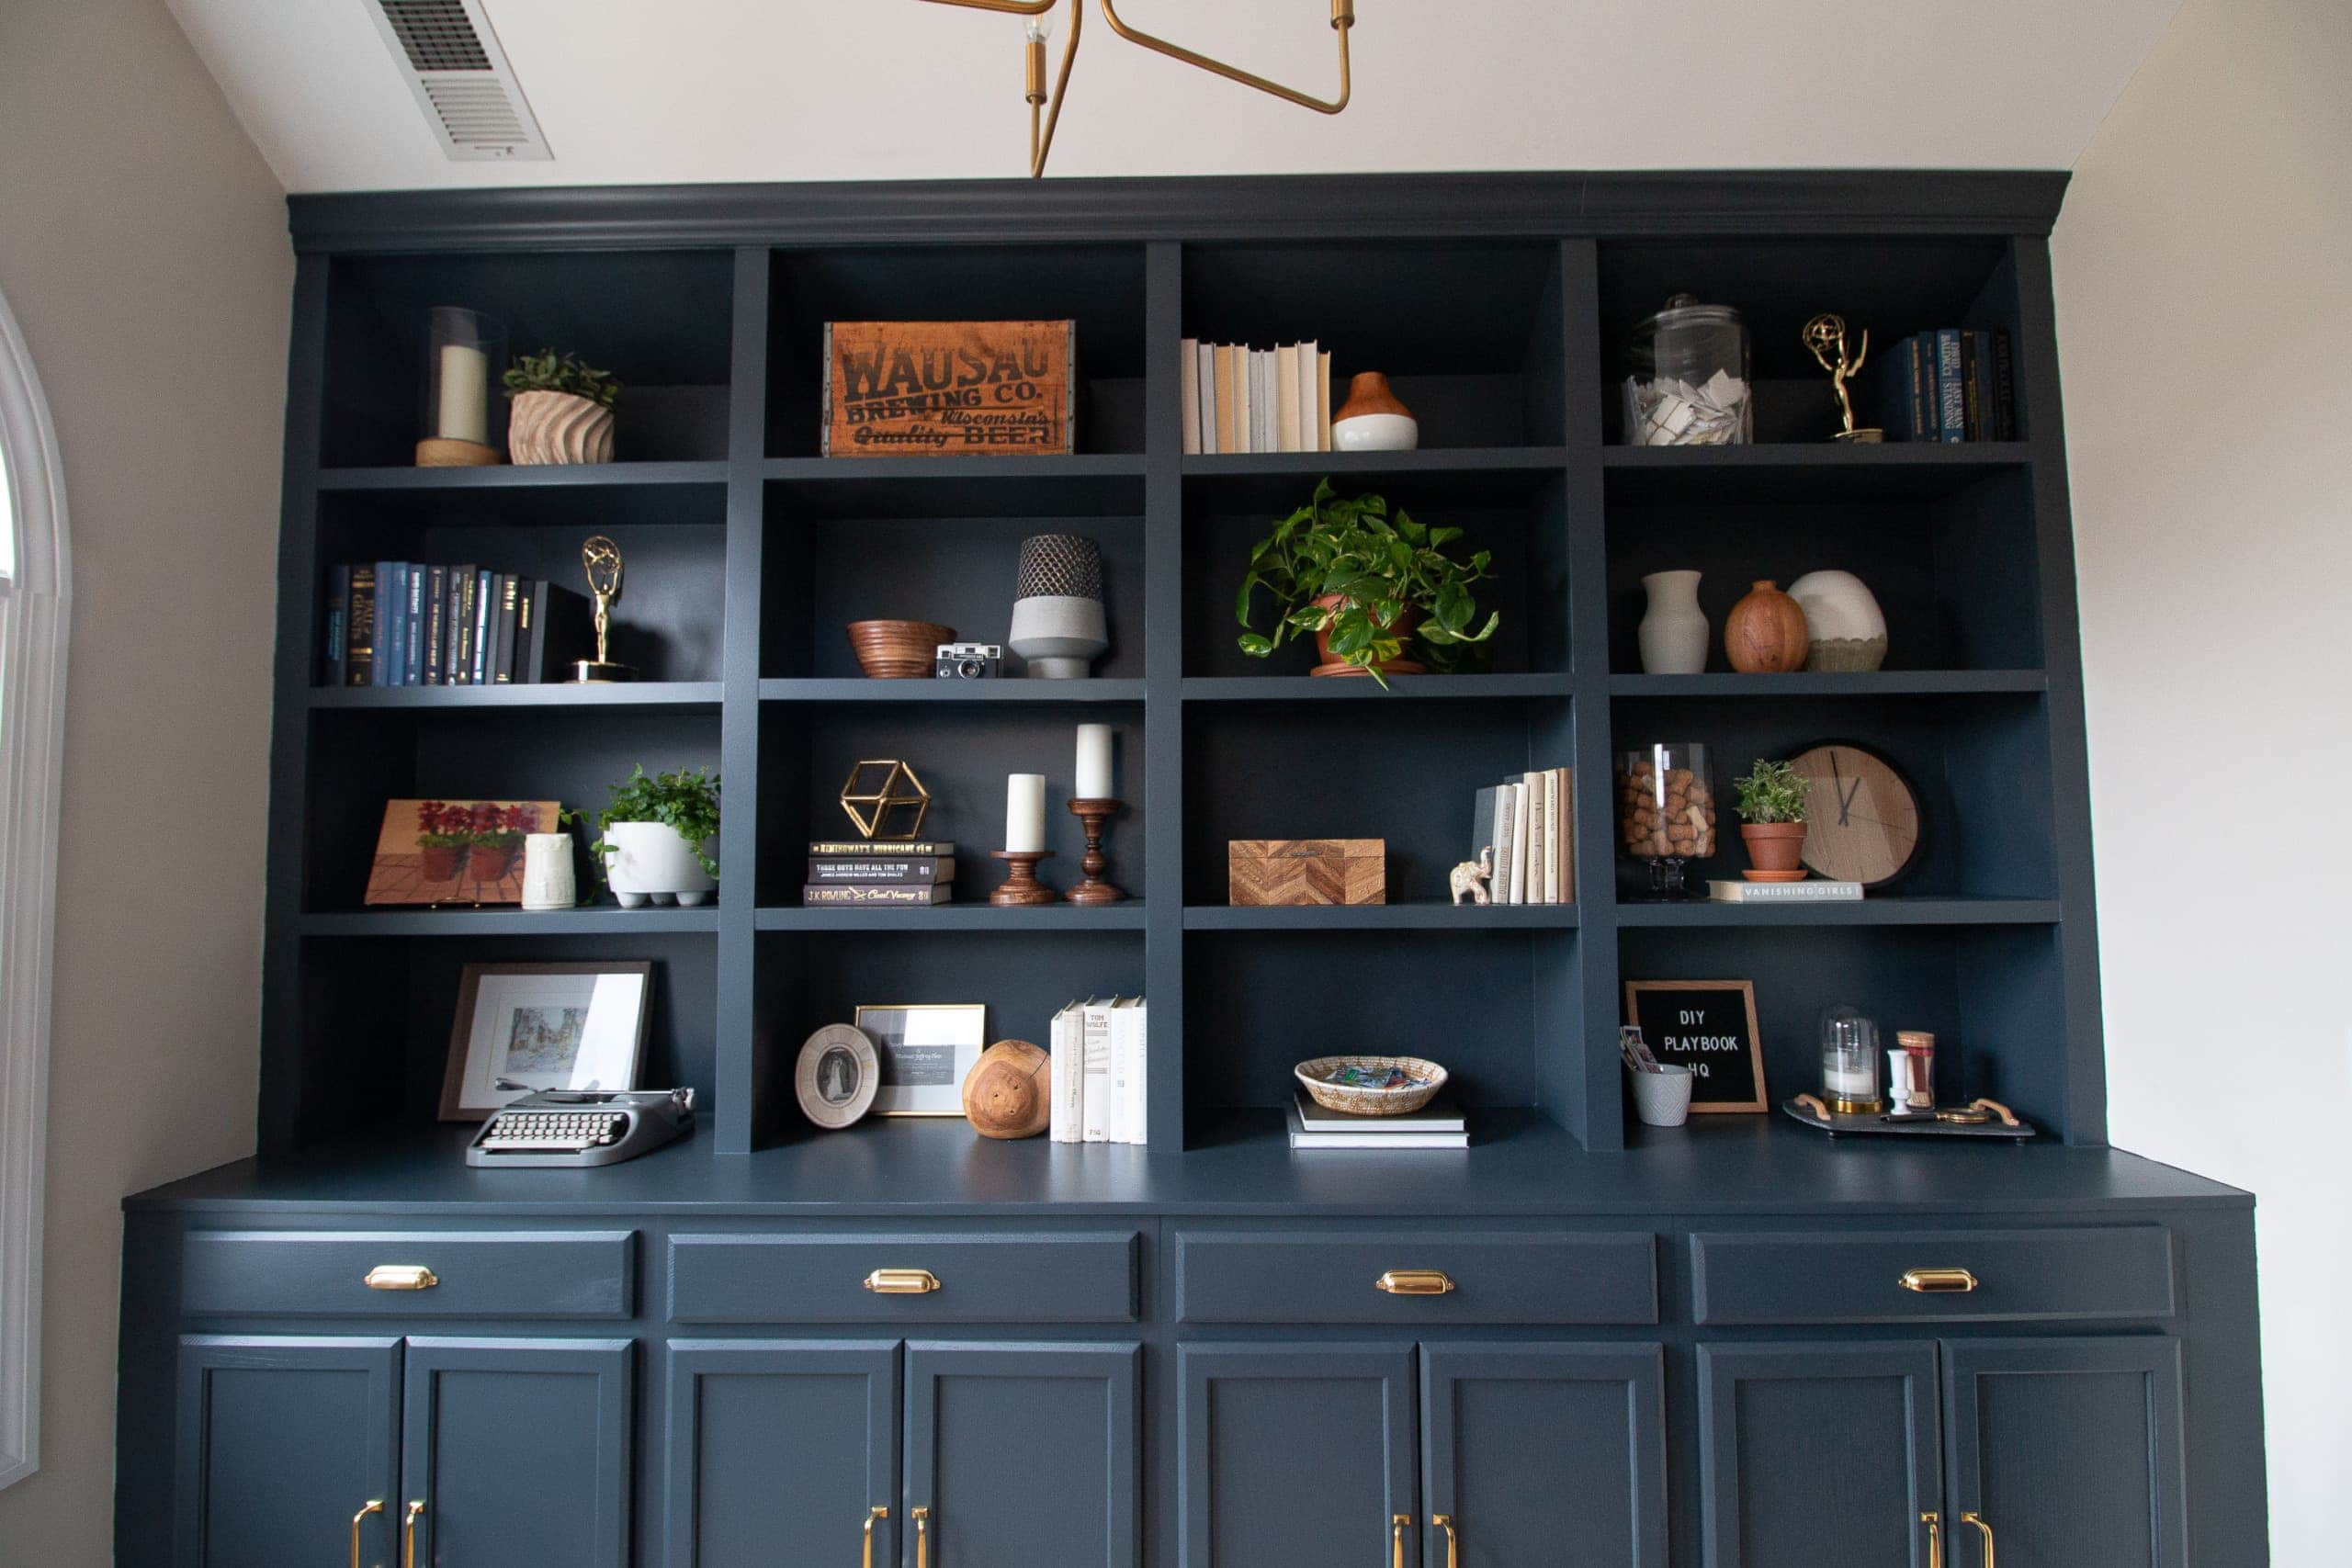
Wall Color: Benjamin Moore “Ballet White” // Trim Color: Valspar “Simply White” // Built-In Color: Valspar “Chimney Smoke” // Drawer Hardware // Cabinet Hardware // Chandelier
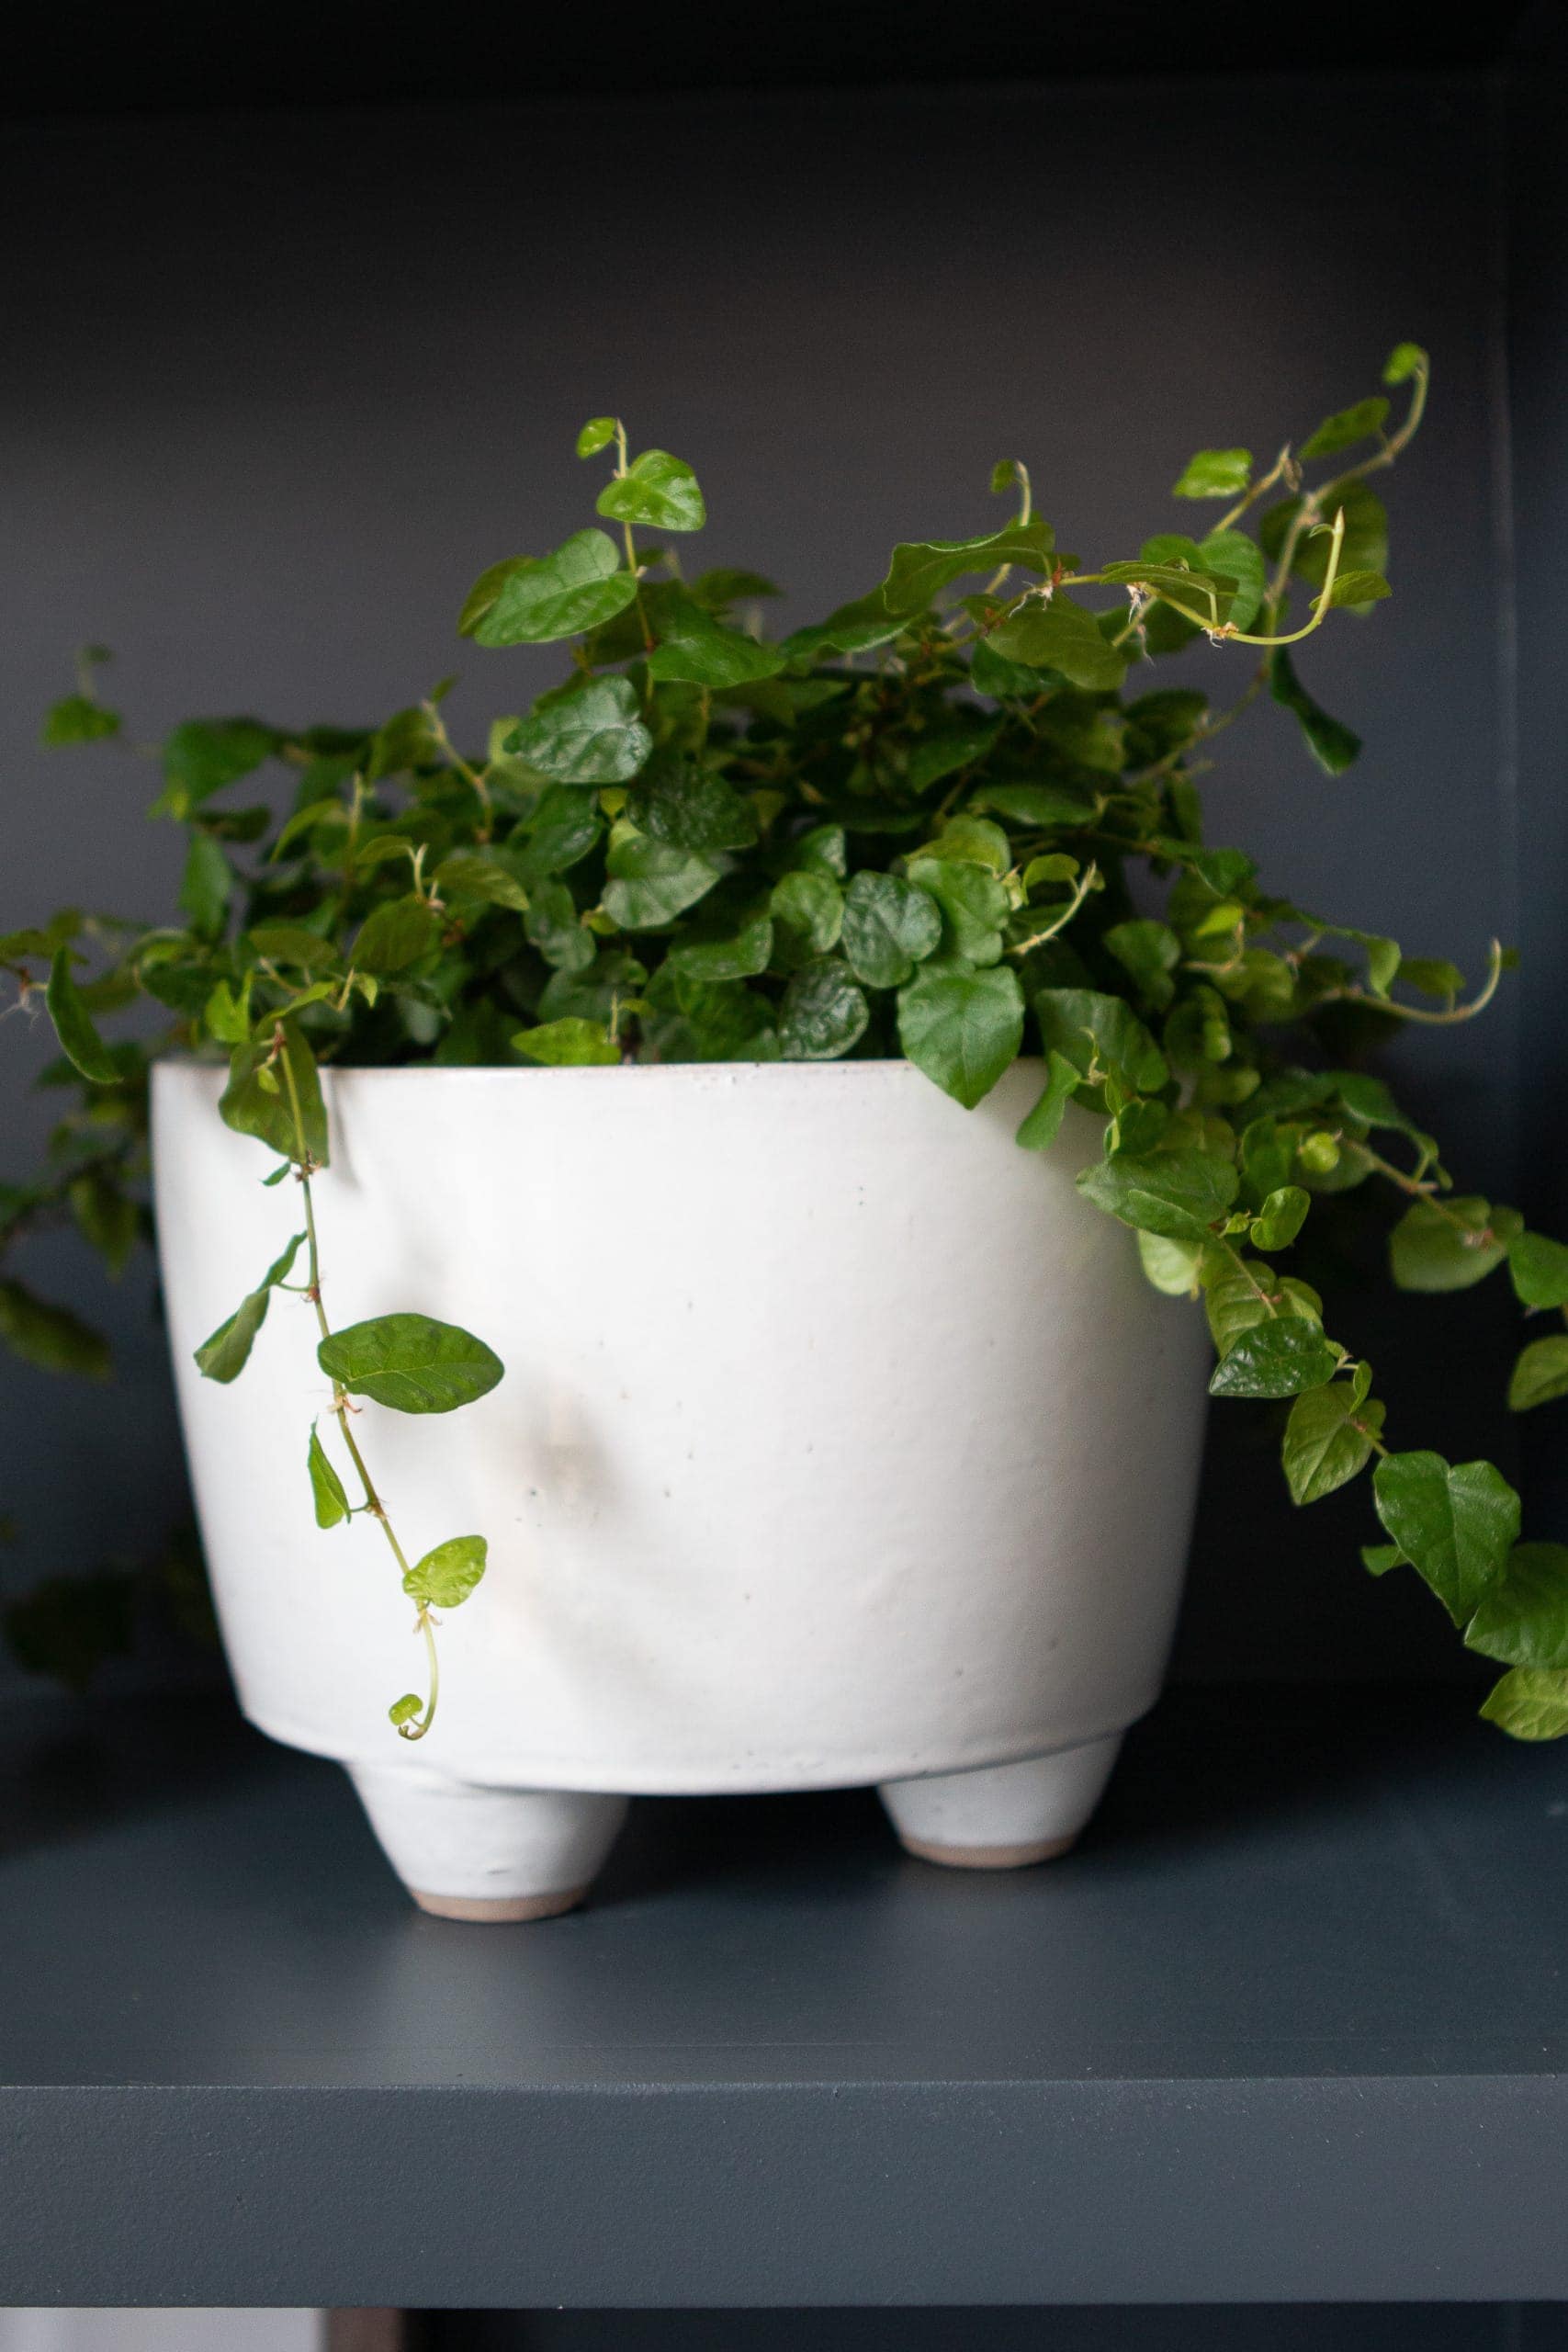
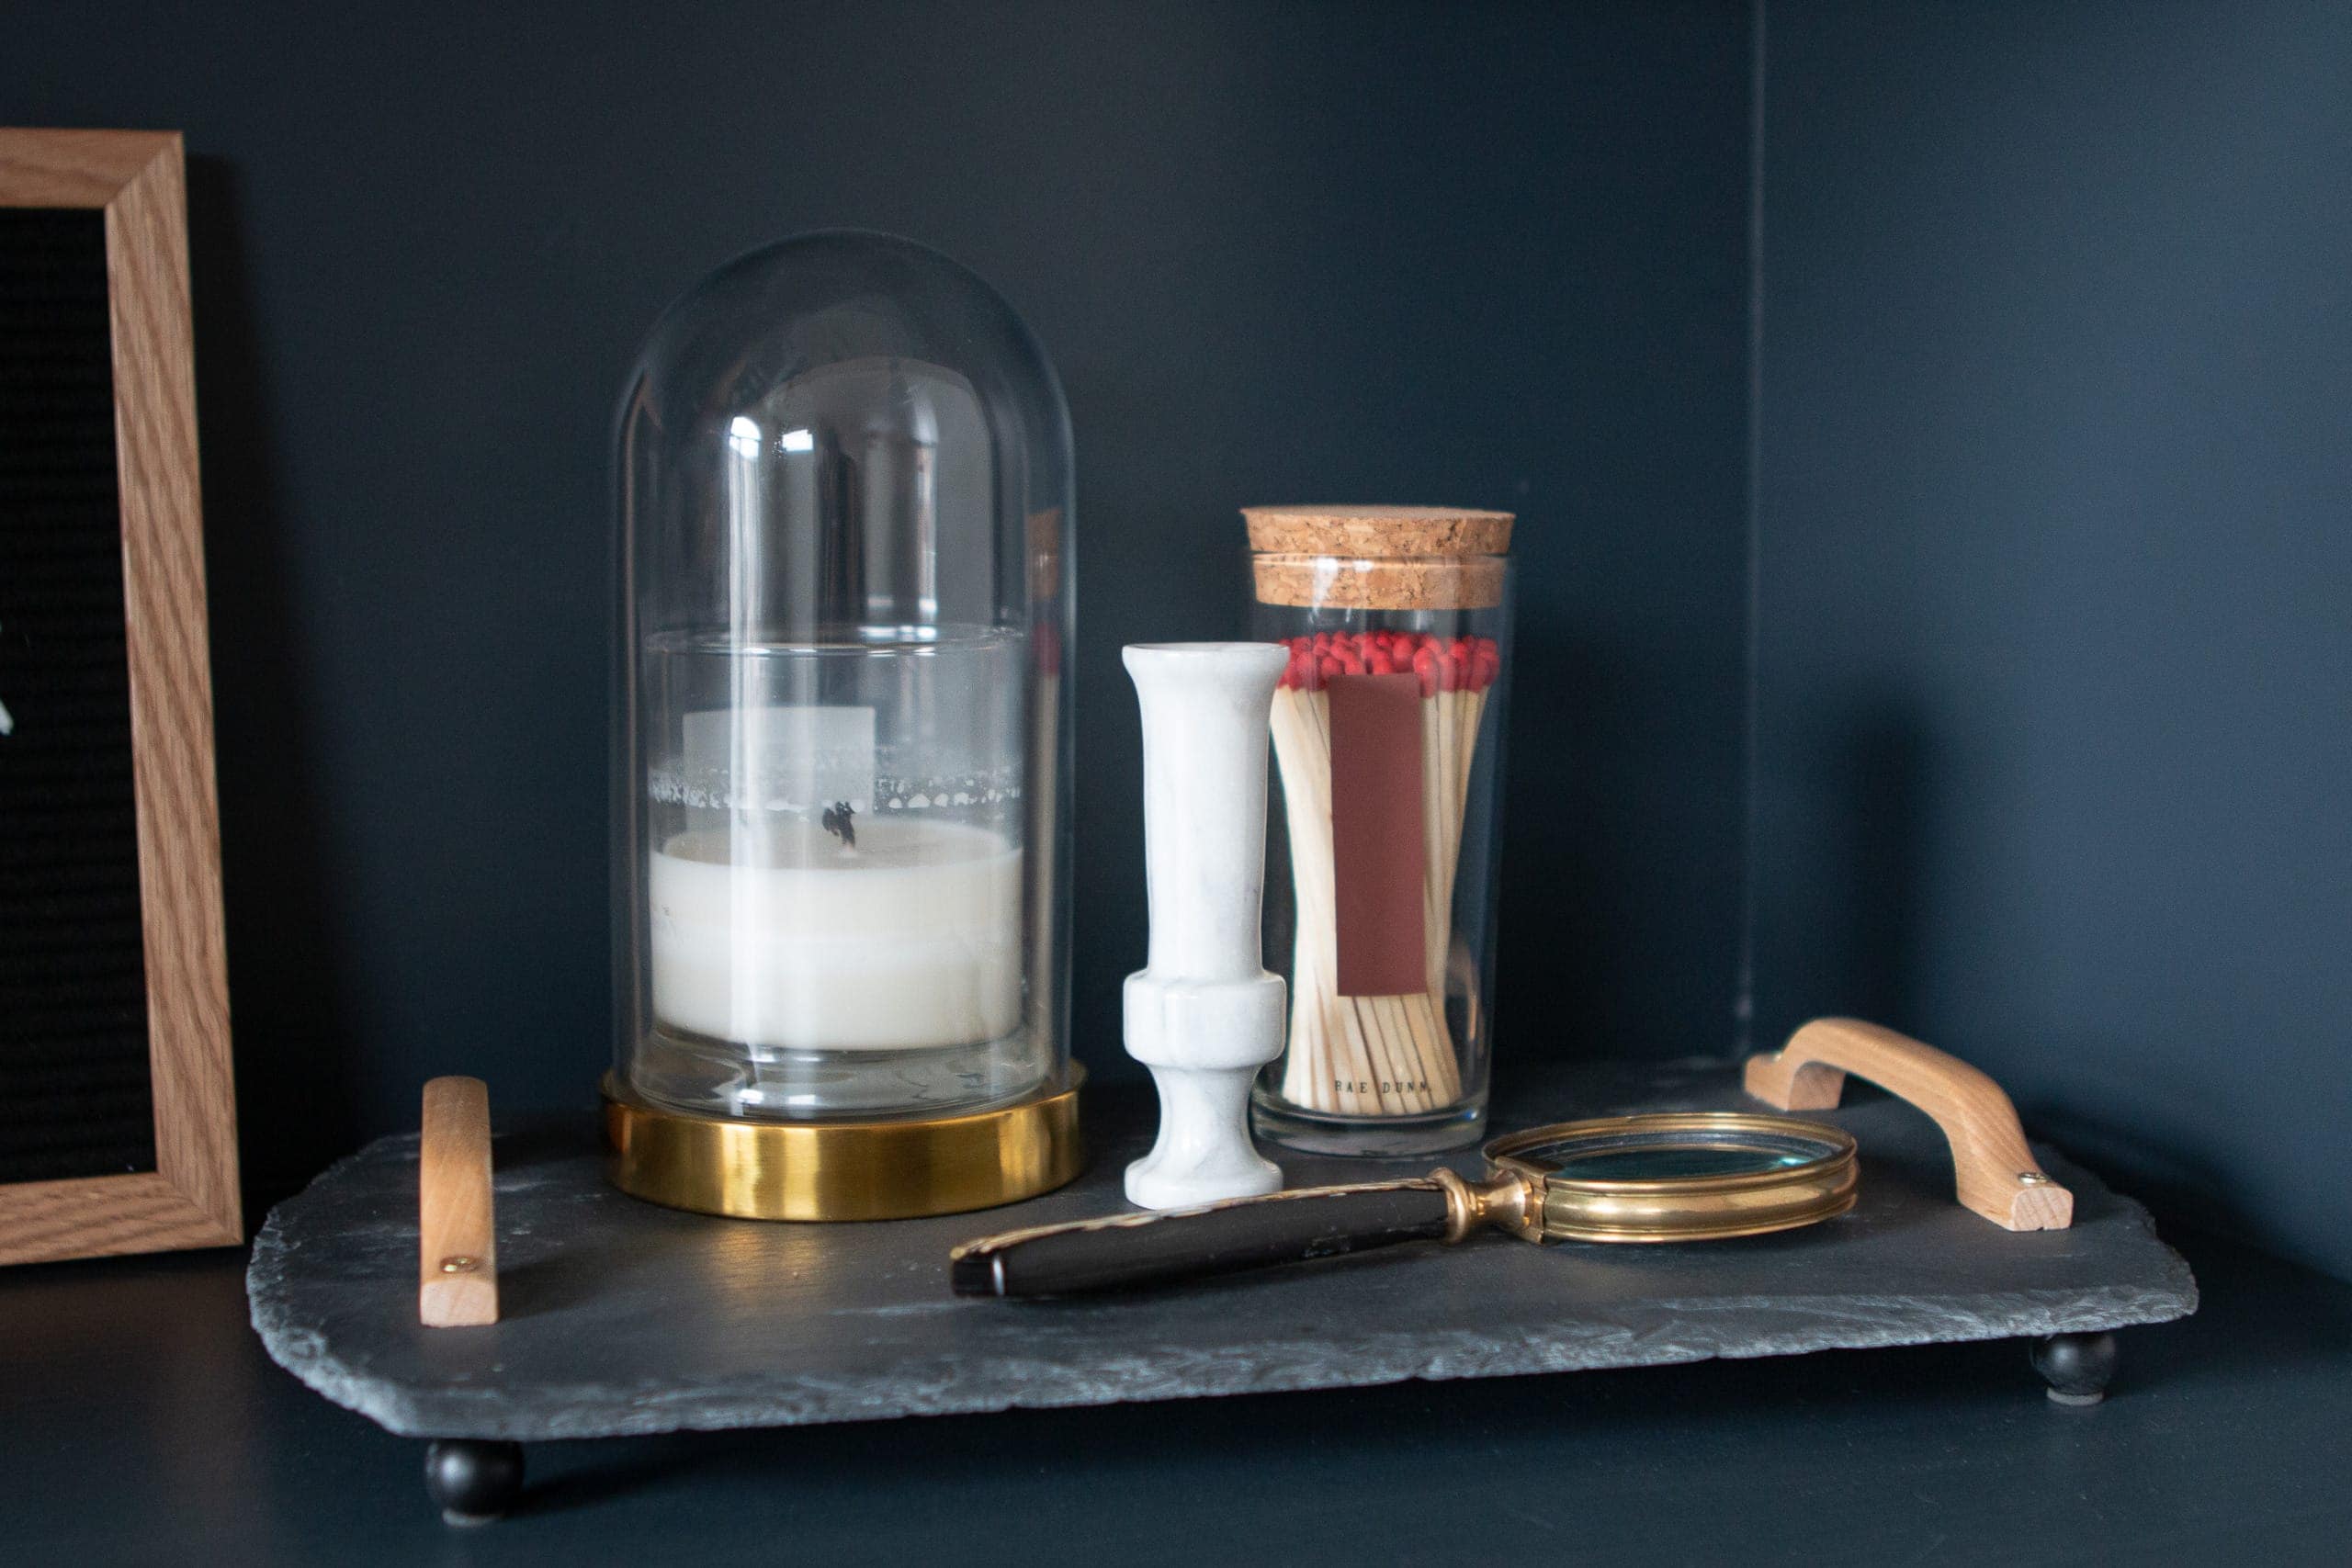
From left to right; top to bottom: Vase (HomeGoods), Faux Plant (HomeGoods) // Painting (by my grandfather), White Pitcher (my great grandmother’s), Footed Planter (no longer sold) // Frame (HomeGoods), Typewriter (Flea Market) // Wausau Box (Antique) // Wood Bowl & Vase (HomeGoods), Camera (Antique) // Candlesticks (Michaels), Gold Orb (HomeGoods) // Gold Frame, Capiz Frame (HomeGoods), Wood Ball (HomeGoods) // Vase (Lulu & Georgia) // Planter with Pothos Plant // Wood Box (HomeGoods), Elephant (Street Fair) // Basket (HomeGoods) // Jar // DIY Vase, Wood Vase (Target), White Vase (HomeGoods) // Glass Jar (Michaels), Planter, Clock // Letterboard, Vase (HomeGoods), Tray
The Budget Breakdown
Now, what you’ve all been waiting for…the budget breakdown for this new space.
In our condo, we had a large wall of built-ins that are similar to the size of these. I had a carpenter build them and a paint shop spray them. I think I paid about $6,500 total for that. Then, my mom had a different carpenter build and paint the ones in her family room. Those cost $7,000 which was a pretty expensive option.
My mom also went with a closet design company for a wall of built-ins in her main bedroom. You can read more about her bedroom built-ins right here. Those cost about $5,000 and it was the best way to make the most of a small area.

I asked my go-to contractor what he would charge for these and he told me $6,000. So I would say between $6,000-$7,000 would be a fair estimate if you’re hiring these out. And just so you know, our built-ins are huge….measuring over 12 feet across and 10 feet high.
Here’s my total cost breakdown for building these ourselves. I am only including supplies in this list (no tools), because everyone is different when it comes to the tools they already own, could borrow, rent, etc. So these are just the supplies you would need to buy to build these…
- 4 Cabinets – $452
- Filler & Toe Kick – $30
- Countertop – $60
- Screws, Liquid Nails, etc. – $20
- Plywood – $700
- Poplar Wood – $45
- Crown Molding – $24
- Caulk, Wood Filler, Putty, etc. – $30
- Painter’s Tape, Tarps, Gloves, etc. – $50
- Primer – $25
- Paint – $75
Total: $1,511
The Time Breakdown
While I spent many hours shopping and researching, I’m just going to account for the hours we spent physically laboring over these office built-ins. We ended up working on this project for just about every single weekend at the end of January into February. Here are the hours…
- Installing the Base Cabinets (8 hours)
- Adding Countertop, Toe Kick, & Filler (6 hours)
- Building Bookshelves (30 hours) *this was the hardest part for us.
- Prepping for Paint (6 hours)
- Painting Built-Ins (4 hours)
Total: 54 hours of labor
This was our first time doing a project of this nature, so we went slow with every step so we wouldn’t make too many mistakes. So, you might go a lot faster than we did. If we did it all over again, I bet we would shave off at least 10-15 hours of our time. No matter what, it will still take you a long time.
 Oh boy, compiling all of these hours really shows me just how much time we put into this project. It was a hell of a lot of work, but we honestly enjoyed so much of it (I mean, not every single minute…but we tried our best to have fun).
And we both learned a lot and improved our DIY skills along the way. Plus, I can’t even tell you how our DIY confidence has skyrocketed because of this project! Now everything else seems so easy compared to this gargantuan project!
Before & After

Full Tutorial Breakdown
Here are all of the in-depth blog posts that I’ve written about creating our home office built-ins. Each one dives into the supplies we used, the steps we followed, and the mistakes we made along the way.
- Planning The Design
- Installing The Base Cabinets & Top Piece
- Building The Upper Shelving
- Prepping, Priming, & Painting
Overall Thoughts
Do I want to go run out and create built-ins in another room, immediately? Probably not right now. I think we need a bit of a break from this project. But would I do it again? Absolutely!
We learned a lot, saved a ton of money, and we are so proud of ourselves. I think that’s what I love about the DIY process the most…the feeling of accomplishment.

Yes, there were plenty of moments when we wanted to quit and cry because our house was a disaster and we spent hours and hours working and barely got anything done. But once a project like this is complete, it’s the best feeling in the entire world.
If you want to add built-ins to your house somewhere, I highly recommend it! These built-in cabinets would look amazing in a dining room space in a dark paint color!
Wall Color: Benjamin Moore “Ballet White” // Trim Color: Valspar “Simply White” // Built-In Color: Valspar “Chimney Smoke” // Built-in decor sources in this blog post // Drawer Hardware // Cabinet Hardware // Wall Mural // Futon // Rug // Desk // Office Chair // Faux Fiddle Leaf (similar) // Basket for Fiddle
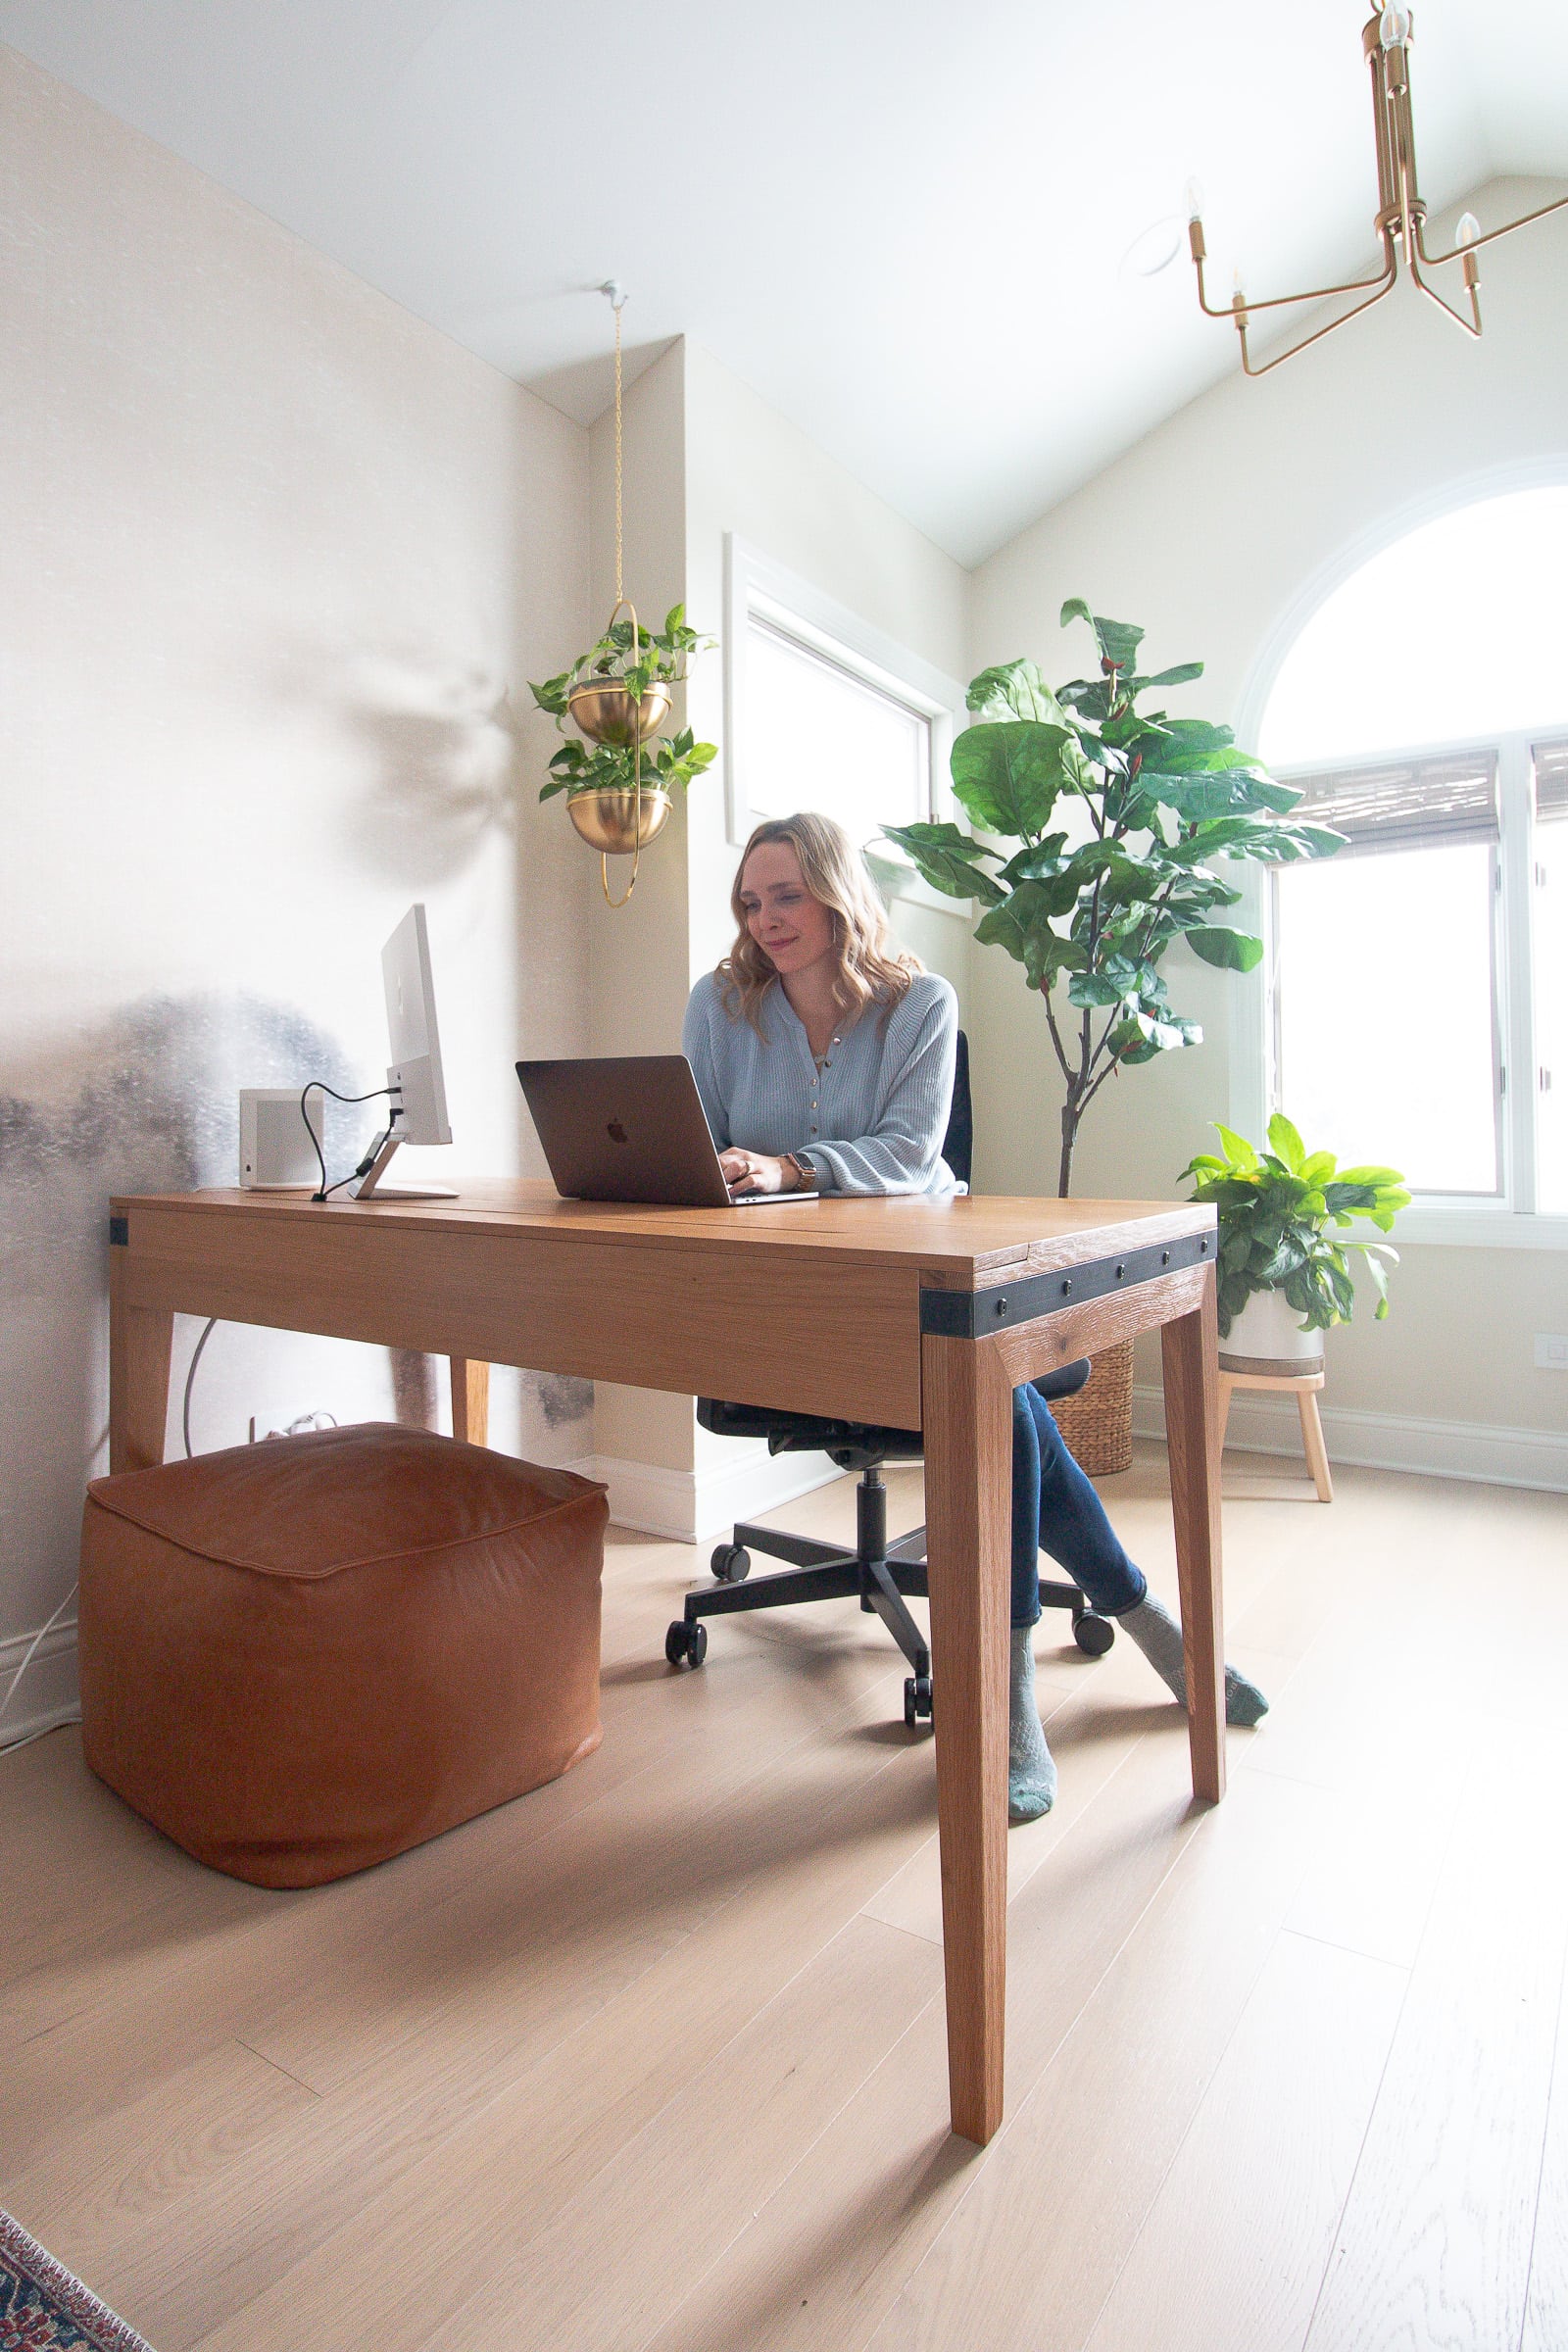
Want to see the rest of my office? You can view the entire space here.
Casey
Catch Up On the Home Office Makeover
- Office Design Plan
- Built-Ins Part 1: Installing the Base Cabinets
- Office Furniture
- Built-Ins Part 2: Building DIY Bookshelves
- Priming & Painting Built-Ins
- Built-In Reveal & Budget Breakdown
- Installing a Wall Mural
- Home Office Makeover Reveal
- DIY Acrylic Dry Erase Board
- My New Office Hanging Planter
- Our DIY Organized Closet
- Our Temporary Home Office Setup (with both of us working in here!)


